PretensT
Tensegrity is a special kind of structure made of push and pull.
Project maintained by elastic-interval Hosted on GitHub Pages — Theme by mattgraham
The Twist
It was such a nice experience last time using tie-wraps and the perforated aluminum connectors, I wanted to try some more structures using radial tension.
This time I’m really going back to the basics, and build the twist with just three bars. But in this case, one is not enough since there are two different ones.
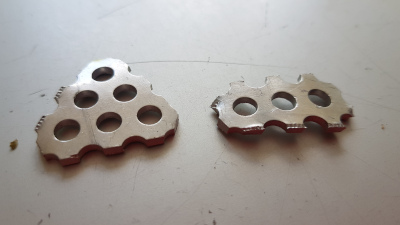
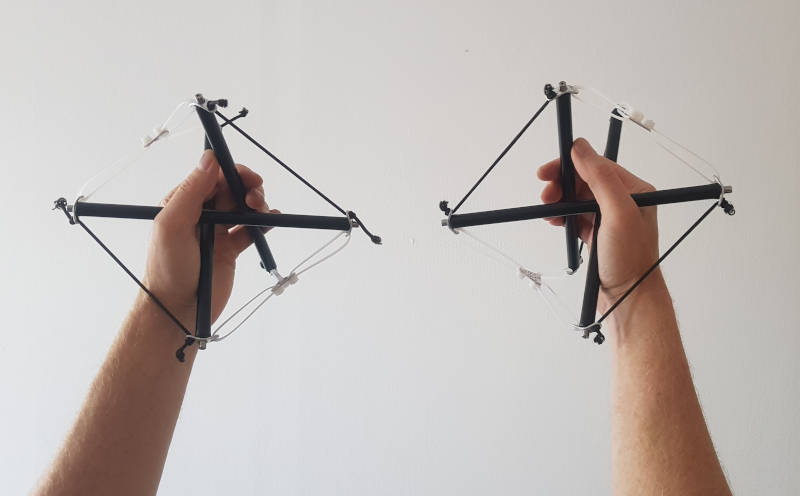
Here’s what they should look like:

If you look at your own hands with your fingers curled and where your thumb points, you should be able to see that the left one twirls to the left and the right one twirls to the right.
So actually you could grab these two nicely with your hands, if they were physical rather than just images on the screen. That’s where we want to go.
Preparing the Parts
Once again, we snip out a triangle shaped connector, four of them, and six row connectors of three holes, for the ends of the bars.
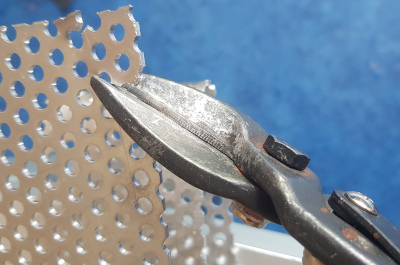
But wait, this time we will take a triangle which is one step bigger, six holes, because I want to be able to stack these twists one on top of the other, and maybe this will make it easier to do that.
Cutting the aluminum with metal scissors sometimes bends it a bit, because it’s pretty malleable stuff.

A couple of taps with a hammer flattens them out easily, and then they’re ready for shaping.
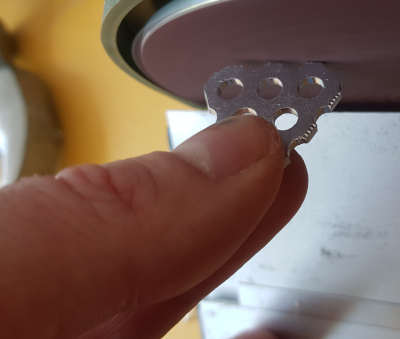
Shaping the Aluminum
It’s nice to trim down the edges and make things smoother. I used to do this with a hand file, and that worked just fine. But now I have a sander so it’s quicker.
When the shape is right, a little fine tuning using a Dremel tool makes them just that bit nicer.
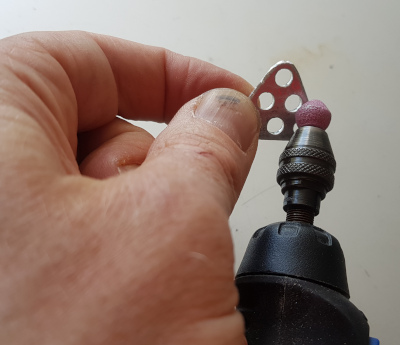
The finished product:
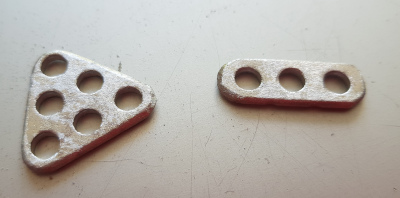
So these are our new connectors, ready to be linked with tie-wrap and hold the twists together!
Assembly: Clicks and Elastic
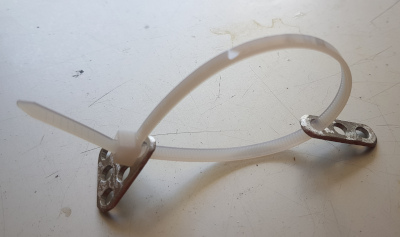
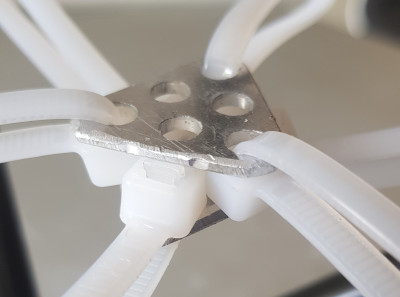
The tie-wraps are perfect to connect the two because you can measure by counting the clicks that you hear as you pull them slowly tighter. When you tighten one, say, three more clicks, you just have to go and tighten the others by the same number of clicks.

They meet at the edges of the triangle piece, but this time they leave holes in between the connections because we made the triangles one step bigger.
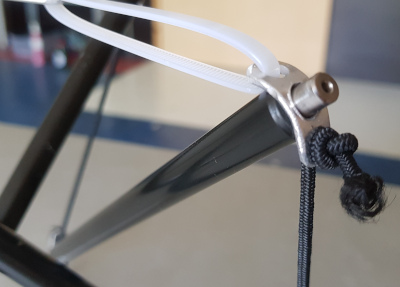
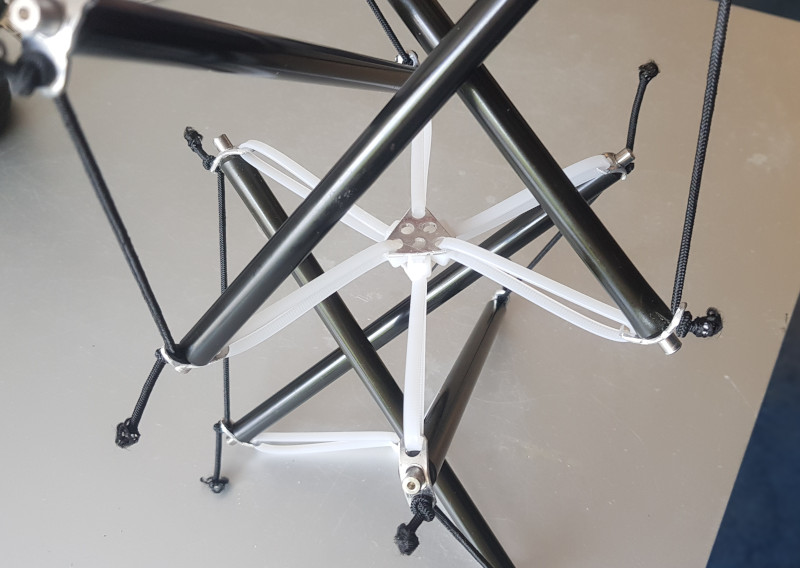
The rigid tie-wrap triangles now hold the top and bottom of the twist together, but we still need a connection between the top and the bottom. For this I used segments of 3mm elastic cord, so there was still some flexibility.
Choosing which on the bottom connects to which on the top determines whether you get a left twist or a right twist.
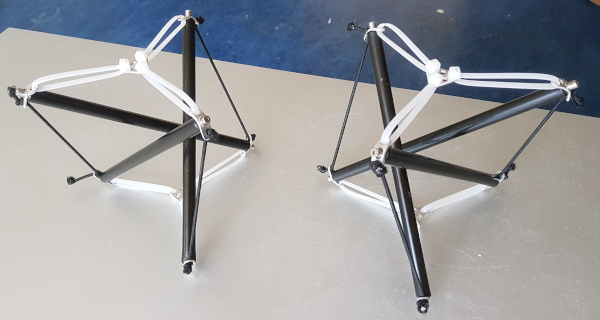
Now let’s look at how they stack up, one on top of the other. Stacking the right twist here on top of the left twist, the bars are nicely parallel so this is about right.
It turns out that it was very nice indeed to have these bigger triangles, because the blocky parts of the tie-wraps actually almost snap together snugly when you put one triangle on top of the other (60 degrees twisted of course).
Conclusion
Finally I have a left and right twist which I can hold in my hands nicely and even stack up with fitting triangles.
The twist is kind of like the tetrahedron of tensegrity: the simplest thing that spreads out in all directions to capture some volume.
This project has made me really appreciate the twist, and very conscious of how there are two opposite ones. This is the kind of thing you might know in the back of your head but not fully realize until you have them in your hands.
It also prompted me to go back to the drawing board and rewrite the growth algorithm in the pretenst software. I suddenly very much wanted to build twist-by-twist, one at a time, left-right-left-right, but the software didn’t work that way. I’ll write about that soon.
Projects:
2024-07-23: "Bouncy Wooden Sphere": what you can do with a discarded bed2024-04-23: "Twisted Torque": tied into a permanent twist
2023-03-27: "Easy 30-Push Sphere": one simple element
2022-10-05: "Glass and LED": going big and colorful
2022-09-29: "Fascia": dancing with tensegrity
2022-08-30: "Mitosis": the four-three-two tensegrity
2022-08-04: "Push Bolts for the People": finalizing design and getting it out there
2022-06-22: "Head to Head Push Bolt": M5 and M6 bolts symbiosis
2022-05-30: "Hiding Knots": bump up the aesthetics
2022-05-25: "Innovation with 3D Printer": the push bolt
2021-12-02: "Headless Hug": breaking a rule for the sake of symmetry
2021-10-28: "Rebuilding the Halo": finally got it right
2021-10-20: "Convergence": growing and reconnecting
2021-07-27: "120-Strut Brass Bubble": taking the next step up in complexity
2021-05-26: "30-Strut Brass Bubble": bouncing spherical tensegrity
2021-04-08: "Bow Tie Tensegrity": better bend resistance
2021-03-29: "Six Twist Essential": what if more hands could see?!
2021-01-25: "Minimal Tensegrity": no more tension lines than absolutely necessary
2021-01-18: "Degrees of Freedom": first adjustable hybrid tensegrity
2021-01-11: "Fractal Experiment": a tensegrity of tensegrities
2020-12-09: "Axial Tension": pretensing what is already pretenst
2020-11-02: "Halo by Crane - Part 2": the strengthening
2020-10-26: "Halo by Crane - Part 1": assembly complete but strength lacking
2020-10-12: "Brass and Tulips": a tight and strong tensegrity tower
2020-08-10: "Prefab Tension Tower": the tower of eight twists
2020-07-27: "Elastic Bubble": building with elastic ease
2020-07-13: "The Twist Sisters": left-handed and right-handed
2020-07-06: "Radial Tension": Pulling towards the middle
2020-06-22: "Diamond of Tension": Four pulls for every push
2020-06-15: "Prefab Tension": Separating compression from tension