PretensT
Tensegrity design software with real world construction experiments
Project maintained by elastic-interval Hosted on GitHub Pages — Theme by mattgraham
Oritensa
One of the hardest parts of writing the tensegrity construction code in the app was figuring out how to join things together that had grown.
Bringing loose ends together would allow bending into new and beautiful curved shapes!
I had it set up to grow tensegrity columns, and to divide into multiple directions from a symmetrical “omni-twist”, but the branches that grew all had the same chirality or handedness.
That is to say that they all ended with right-handed twists, or all with left-handed twists. The problem is that these do not fit together properly.
The solution I came up with was to introduce a new “omni-twist” element in the middle of the loose ends, and connect properly to its faces.
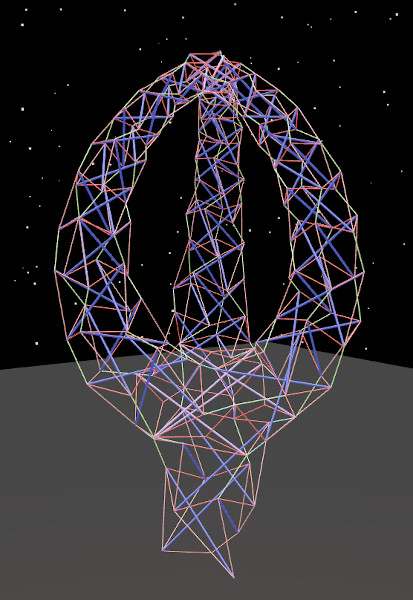
It worked! It was such a beautiful convergence process and the result was such a pretty shape, I worked with an artist friend of mine Burra to build a blender animation and compose music for it to celebrate.
But can I build it?
I had the computer model but I needed to prove that this shape could be built!
I had a new construction strategy using the bow tie tension pattern, and I had already built complicated structures like the halo, so I got started.
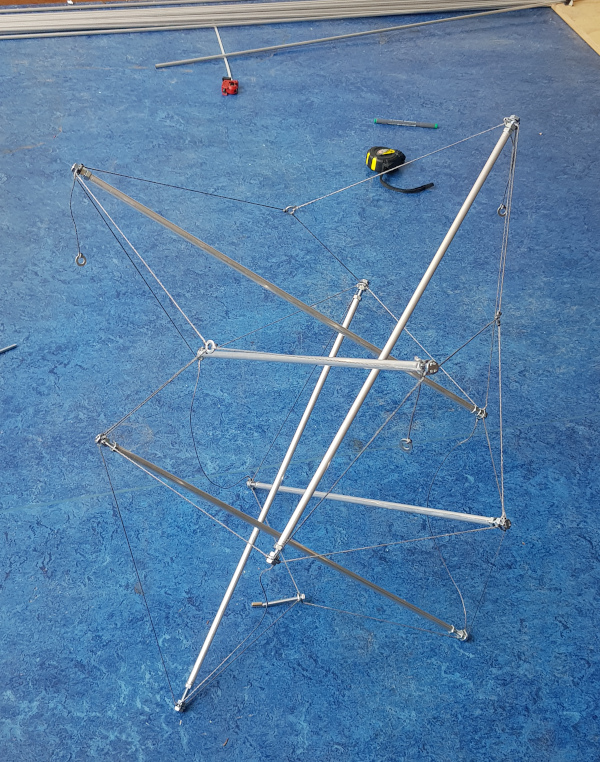
With the first two twists complete, I was already at the omni-twist from which the three arms were to grow.
Then came the careful wiring up of the tension that was to give the omni-twist shape.
The surprisingly tricky part of this is that you no longer have the simple symmetrical pattern of tension that an omni-twist normally has.
The triangles of tension get interrupted because you already have to have rings in place to hold the bars of the branches which have yet to be added, and that turned out to be confusing at first.
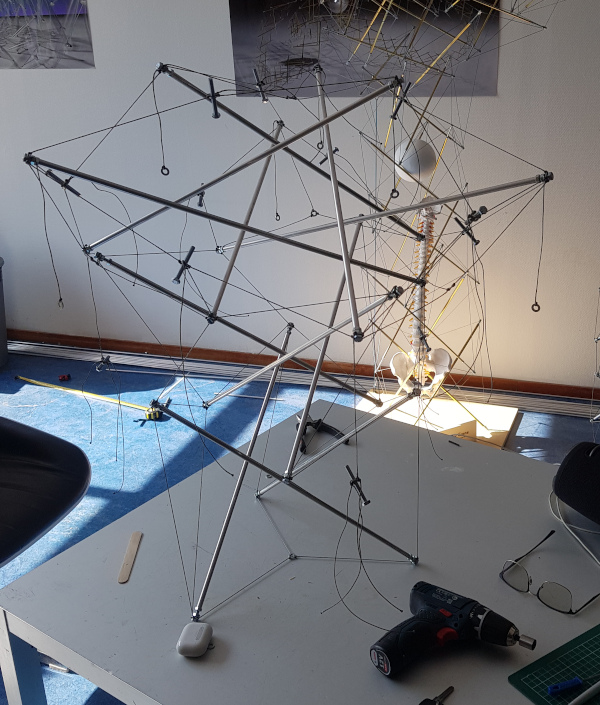
Keep in mind that you always have to have loose ends with free rings, as you can see hanging off in the above picture, because the rings which are “complete” (with bolts and nuts) already have to anticipate the arrival of the next twists. The tension cords have to be there already.
Once I completed the omni-twist and was able to start with the first twist of each of the branches, I knew the rest was going to be less complicated (although…).
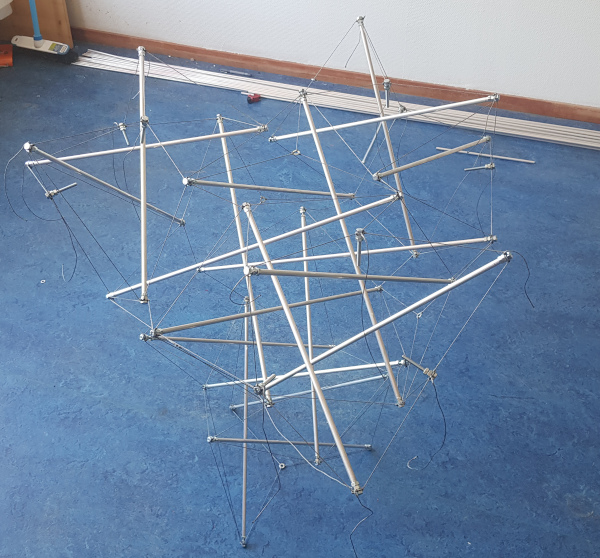
For a while all I had to do is keep my wits about me and make the right connections and lengths of bar and cable.
At one point I was encouraged to see that the curving inwards was starting to appear.
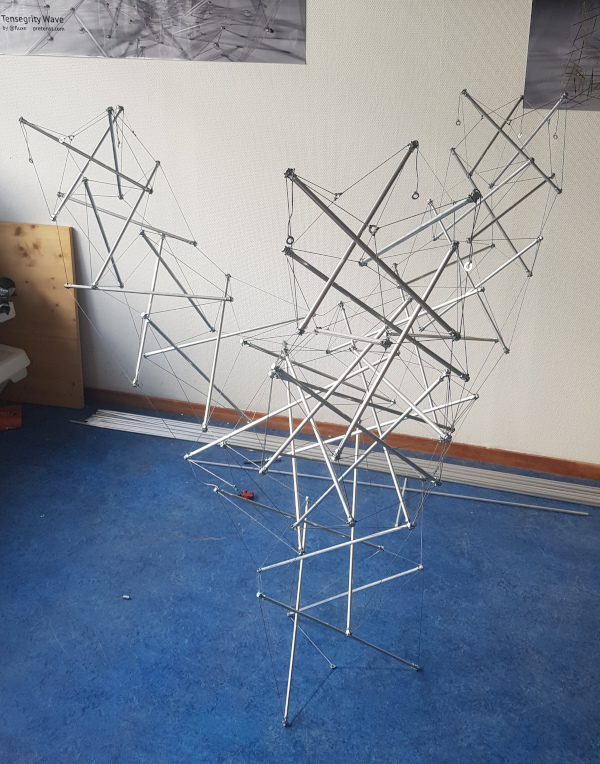
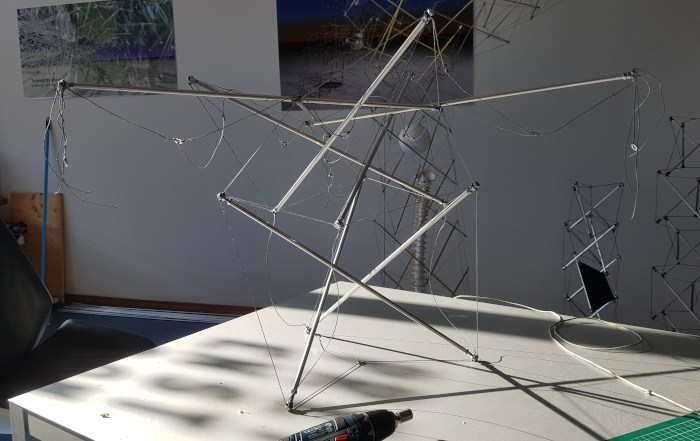
It became necessary to attach it to the floor and use some elastic cords to hold the three branches together as they grew.

Needless to say, things got really interesting and complicated (tearing hair out, taking calm-down breaks) at the tiny omni-twist at the top of the structure.
The cord lengths got small and the bars got short.
I made it through eventually, and the beautiful convergence shape actually stood before me!
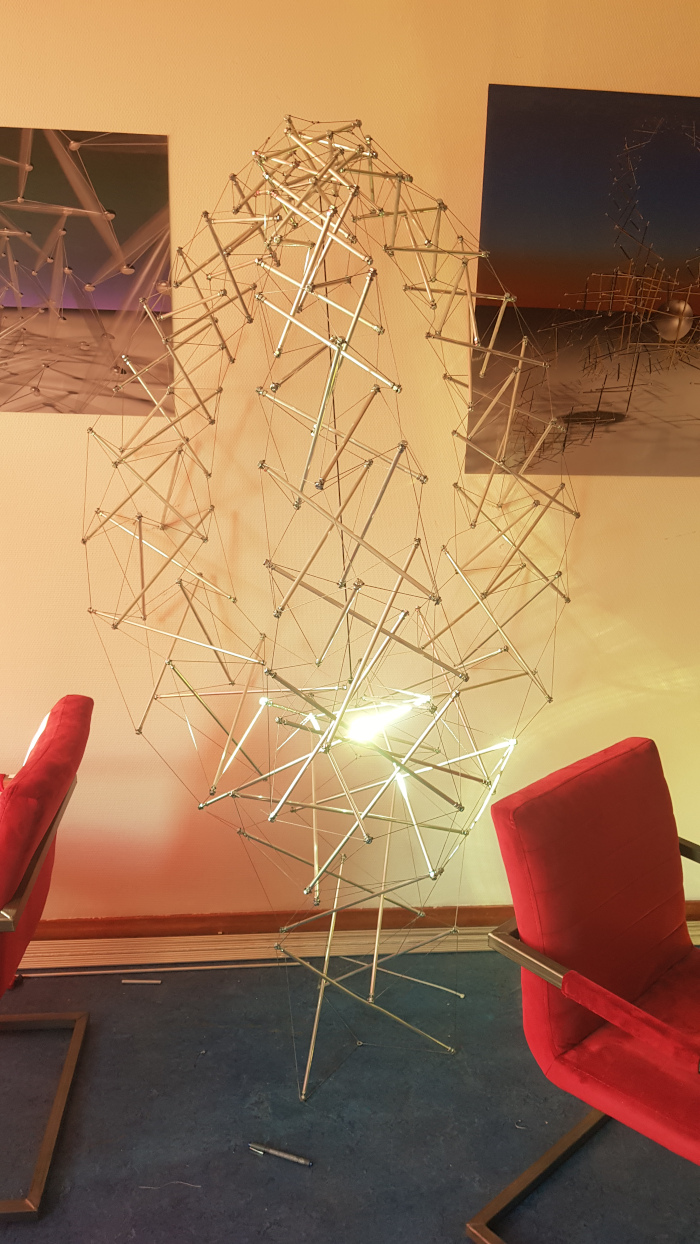
It was surprisingly heavy, and you can see the stress that the bottom bars are under if you look closely.
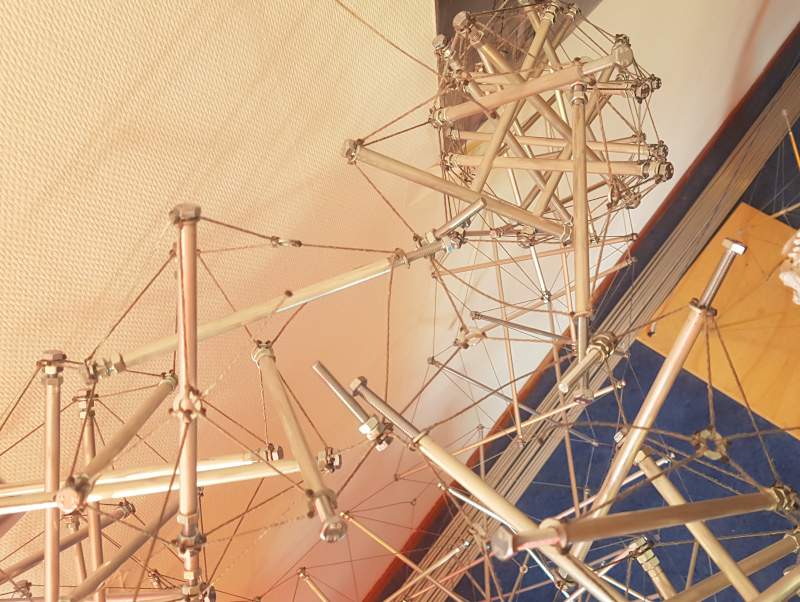
A twist in there?
I saw a kind of twisting in each of the branches, all in the same rotational direction, making a slight spiral of the shape.
This came as a surprise, so I went back to the computer model from which I got all the dimensions and lo and behold, the same spiral was actually visible in the model as well.
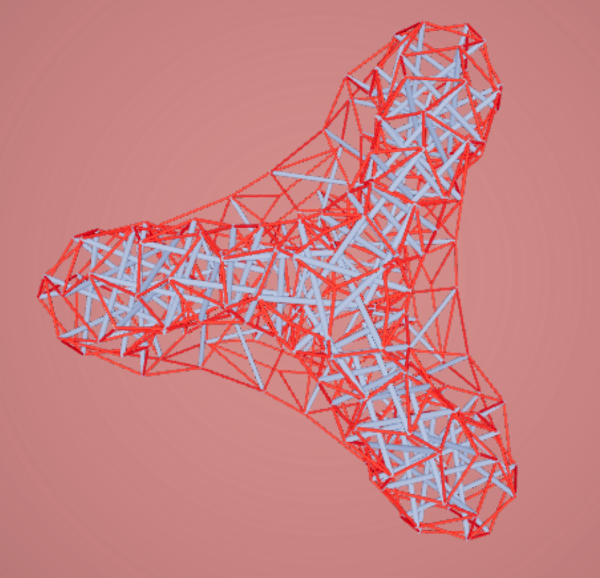
You can see it in the rendering here, from above.
Conclusion
I built my first complicated tensegrity structure with many different lengths using the bowtie pattern!
One thing that I could take advantage of was the threefold symmetry, so every bar and every cord in the branches could be made three at a time.
In the finished construction there are two rings suspended in the middle of the top and the bottom, so I could not help but string a cord from one to the other, as a kind of “axis”.
Unfortunately my materials here were not quite strong enough, so I eventually had to reinforce the bottom long bars.
Projects:
2024-07-23: "Bouncy Wooden Sphere": what you can do with a discarded bed2024-04-23: "Twisted Torque": tied into a permanent twist
2023-03-27: "Easy 30-Push Sphere": one simple element
2022-10-05: "Glass and LED": going big and colorful
2022-09-29: "Fascia": dancing with tensegrity
2022-08-30: "Mitosis": the four-three-two tensegrity
2022-08-04: "Push Bolts for the People": finalizing design and getting it out there
2022-06-22: "Head to Head Push Bolt": M5 and M6 bolts symbiosis
2022-05-30: "Hiding Knots": bump up the aesthetics
2022-05-25: "Innovation with 3D Printer": the push bolt
2021-12-02: "Headless Hug": breaking a rule for the sake of symmetry
2021-10-28: "Rebuilding the Halo": finally got it right
2021-10-20: "Convergence": growing and reconnecting
2021-07-27: "120-Strut Brass Bubble": taking the next step up in complexity
2021-05-26: "30-Strut Brass Bubble": bouncing spherical tensegrity
2021-04-08: "Bow Tie Tensegrity": better bend resistance
2021-03-29: "Six Twist Essential": what if more hands could see?!
2021-01-25: "Minimal Tensegrity": no more tension lines than absolutely necessary
2021-01-18: "Degrees of Freedom": first adjustable hybrid tensegrity
2021-01-11: "Fractal Experiment": a tensegrity of tensegrities
2020-12-09: "Axial Tension": pretensing what is already pretenst
2020-11-02: "Halo by Crane - Part 2": the strengthening
2020-10-26: "Halo by Crane - Part 1": assembly complete but strength lacking
2020-10-12: "Brass and Tulips": a tight and strong tensegrity tower
2020-08-10: "Prefab Tension Tower": the tower of eight twists
2020-07-27: "Elastic Bubble": building with elastic ease
2020-07-13: "The Twist Sisters": left-handed and right-handed
2020-07-06: "Radial Tension": Pulling towards the middle
2020-06-22: "Diamond of Tension": Four pulls for every push
2020-06-15: "Prefab Tension": Separating compression from tension