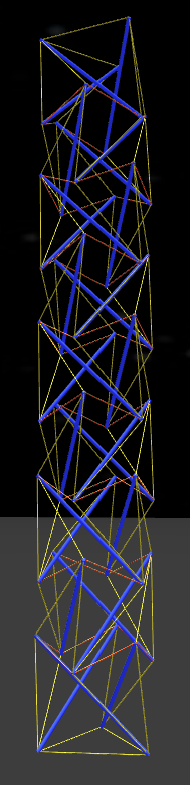
Prefab Tension Tower
the tower of eight twists
Screw Tightening
Ever since the first prefab tension project I’ve wondered what it would be like to tighten an entire tensegrity tower by a screwing action. How tight could I get a tower to be?
In the software it’s too easy because the model is abstract, the mechanics of all the many connections are just there, and they’re just perfect by definition.
Real life can be a bit more challenging.
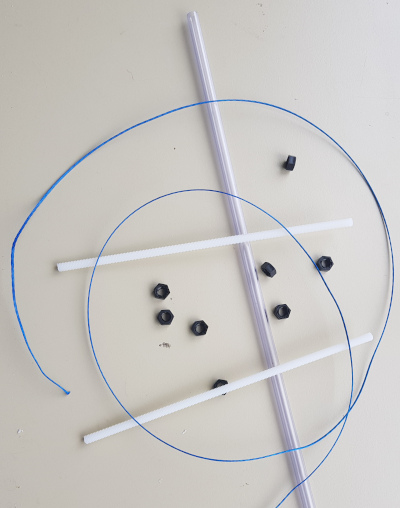
I ordered some 20cm M6 nylon threaded rods and nuts, and got some more 1mm Dyneema cord to go with my PVC pipes. The idea is to make bars that I can extend, and prefabricate the tension.
Adjustable Bar Ends
The plan involves having bar ends that can be extended to adjust the effective length of each bar.
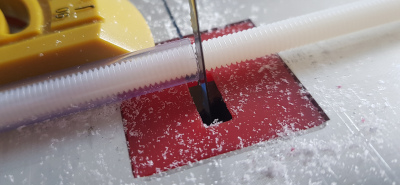
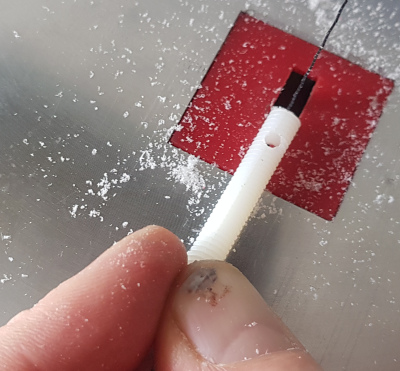
The threaded rod length I needed was about a quarter of the rods I bought, so I made two pipe segments to help me measure.

With the first I cut all the rods in half.
Then with the second I cut the halfs in half. Many times over, put some music on.

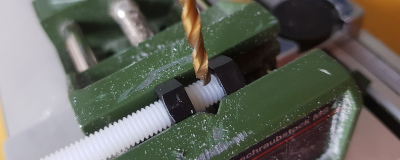
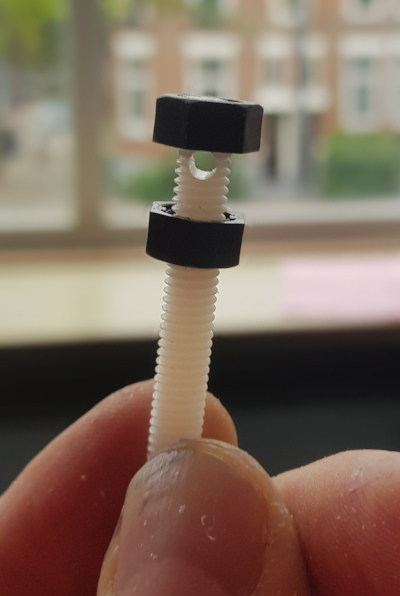
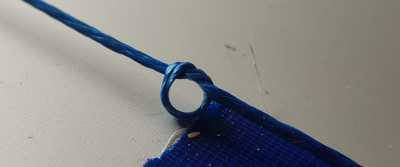
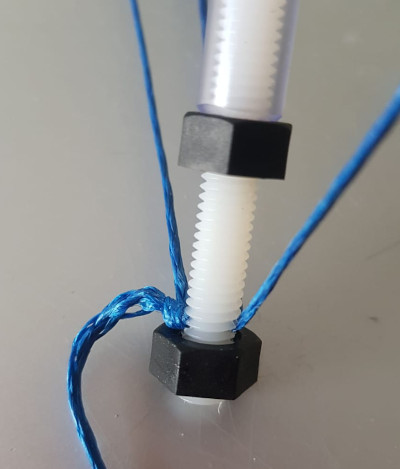
To hold the cord I needed to have a hole near the end of the threaded rod.
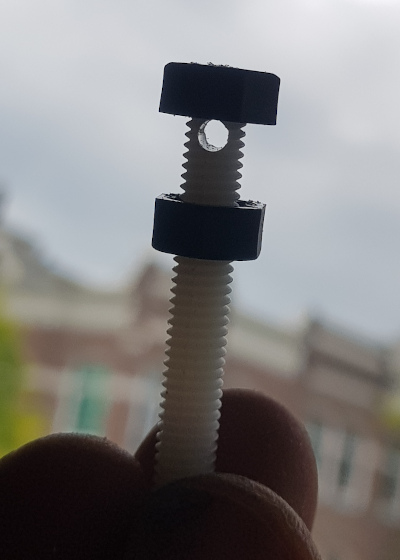
The idea is to have the outer nut pinch the cords in the hole, while I can use the inner nut to adjust bar length.
The distance from the end is basically one-nut-wide, because the end nut has to screw over the hole to pinch the cords.
Unfortunately prefabricated tension, you can’t easily thread all of the holes perfectly beforehand (for example, as you’ll see, I prefabricated tension rings), so I needed the hole to be accessible from the end.
I cut a slit from the end down to the hole. Needless to say this had to be done many many times.
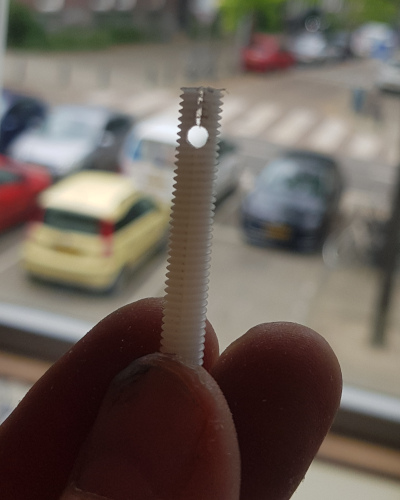
So now there is a hole with an access slit. It’s not perfect, but it’s pretty good. Actually I found the nylon material to be too weak to do this well at this scale, but it worked.
I’m risking thin walls with the hole in the rod, but when you put the nut back on, it all seems a lot stronger.

So we pinch cord with the outer nut.
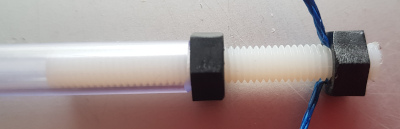
And the inner nut can push the rod outwards to effectively lengthen the bar.
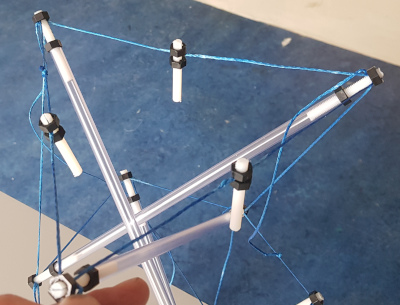
Assembly Scaffold
Now the tricky work of putting the tower together, twist by twist.
I needed things held in place while I attach the parts together, so I came up with a little helper tool I call a perp-clamp.
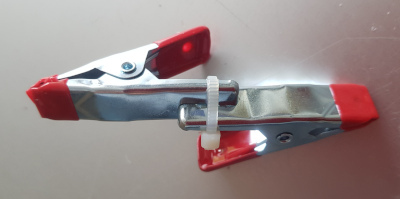
I bought super-cheap metal clamps from the dollar store and sawed a slit into their handles, and then tie-wrapped them together.
This way I could hold two bars perpendicular to each other, and by extension…
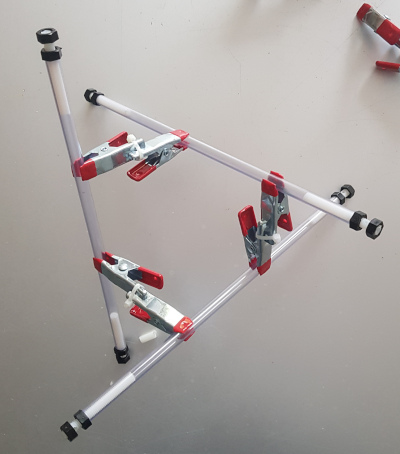
Three perp-clamps and you can hold an entire twist together without any tension, which is extremely handy while finding your way to making all the connections.
Rings
I’ve always thought that the tower’s ability to withstand compression depended on the bars and the rings between each pair of twists, so I made tension rings first.
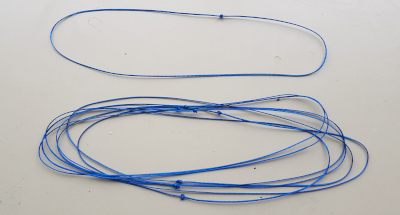
Melting the ends ever so slightly and making a square knot was extremely strong. I could hang my whole weight on one of these rings! This cord is unreal.
Then the scaffolded twist gets its two tension rings on bottom and top, but of course everything is still completely slack.
The cord went through the slits and then got pinched in the hole by the outer nut, but it isn’t yet time to tighten everything up by lengthening the bars. Nice and slack for now, thanks.
The Z Remains
First I needed the remaining tension, aside from the rings already made. I stared at the tower segment rotating on screen for a few minutes until I decided that the best way to build the remaining tension was to make Z-shapes.
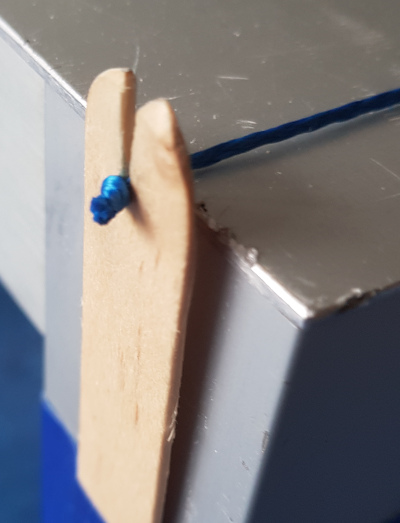
So I set out to prepare those tension segments. To cut them, I came up with a trick using a slitted popsicle stick to hold the end knot so I could measure and cut.
Since I ended up cutting this difficult cord many times, I opted to go the luxury route and buy an official cord cutter hot knife. Few things have been as useful as this tool, given all the segmenting of cord I have to do.
I marked the length with a bit of tape so I could get them all the same.

The Z needs to be divided into three segments so I marked another spot, and used a little glass tube to help me put a knot in the right place.
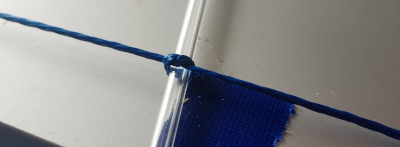
Slide out the tube.
Pull the knot tight.
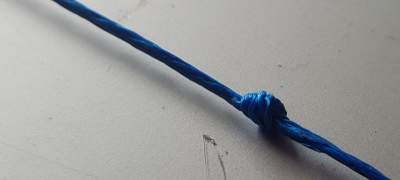
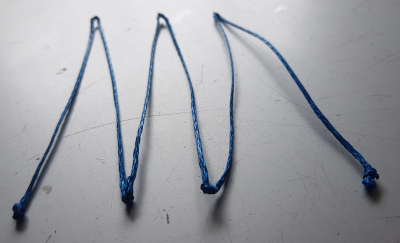
So the Z looks like this (a double-W?) when you fold it so all the four knots are close, and you can see that the three segments are the same length:
Radial tension
The thing about prefab tension tower is that there is a problem at the top and bottom triangle ends. The rings are supposed to join two twists together by connecting three bar ends to three other bar ends, making a hexagon.
That’s ok when there are indeed two twists to join, but you always have the two ends of the tower where there are no more twists. A ring is prefabricated, so it’s too long for the end case to hold the triangle together.
But thinking back to the radial tension project, we had a trick for holding triangles together:
So the challenge became to use a prefabricated ring as radial tension, making it the right length to hold the end triangle together.
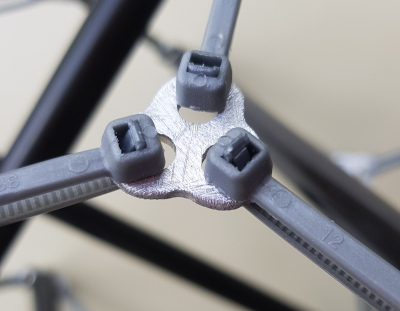
I once again started cutting the perforated aluminum, but this time in a different shape, with three petals.
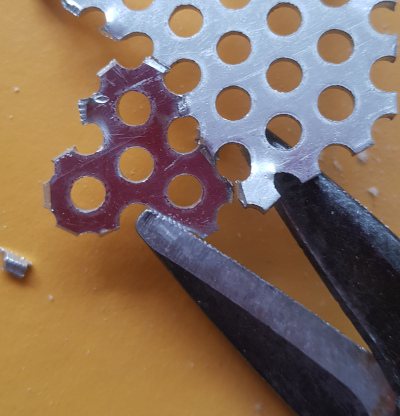
The radial tension had to be temporary. Later the ring would become a real hexagonal ring.
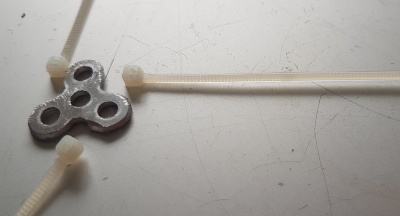
The idea was to slip an open tie wrap through the loop formed from cord sticking up through a hole, to hold it in place.
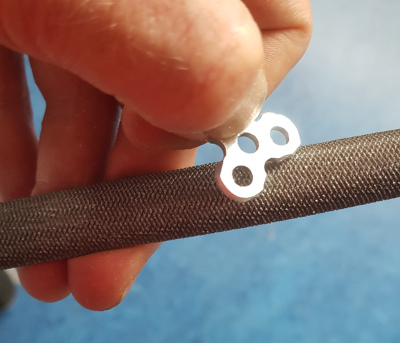
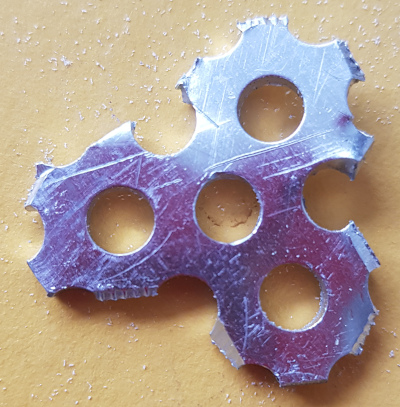
Just after cutting they look pretty rough, but aluminum is nice and soft for filing down, even by hand.
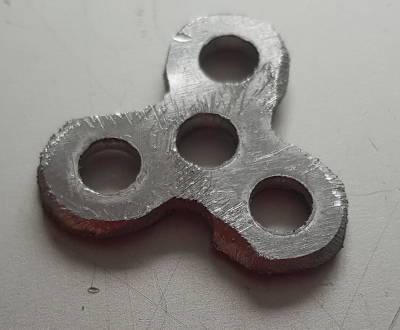
Eventually it looks pretty nice, so it can be put to work creating temporary radial tension to hold the triangle together.
This way a ring (which was too long) is able to play the role of radial tension until it gets joined with the next twist to make a hexagon.
Twists Meet
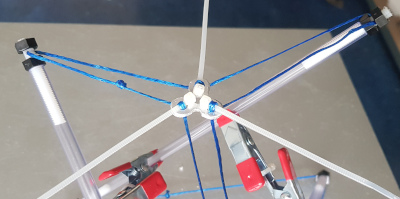
Now that we have bar ends that can pinch cord together, we can pinch both the ring and the Z together.
Notice that the way you first connect a Z to a twist is to have its middle segment pull almost vertically between bar-ends, leaving the two end segments (top and bottom) loose.
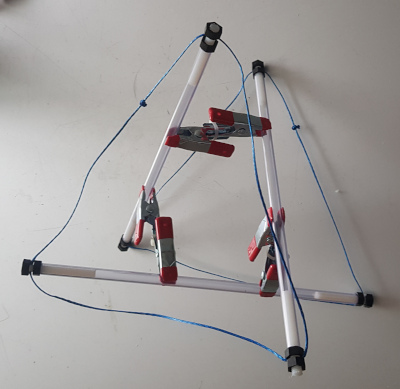
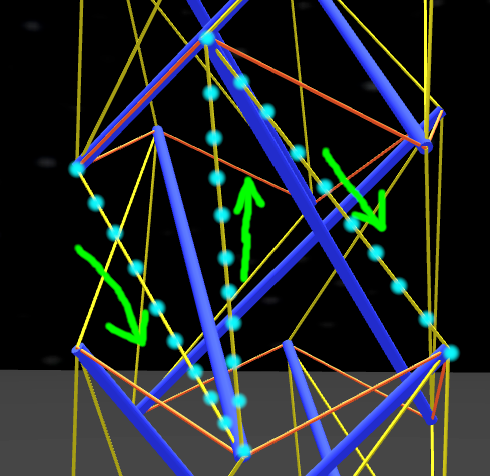
When it’s partially hooked up we basically have two twist sisters joined by a hexagon of tension.
The loose ends of the Z’s are waiting there to make connections which melt one twist into the next. Each loose end reaches either up or down, in search of the next twist’s bar ends to grasp.
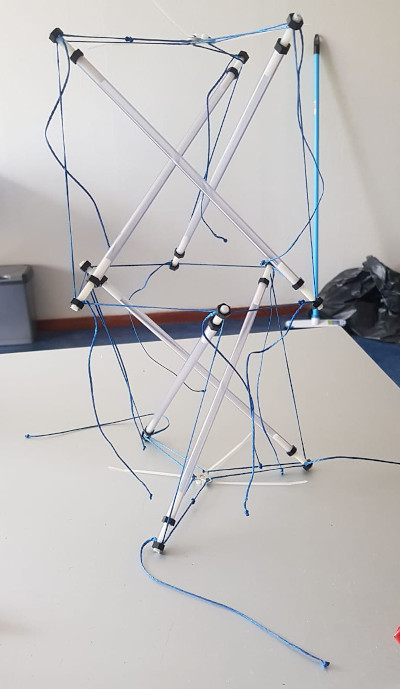
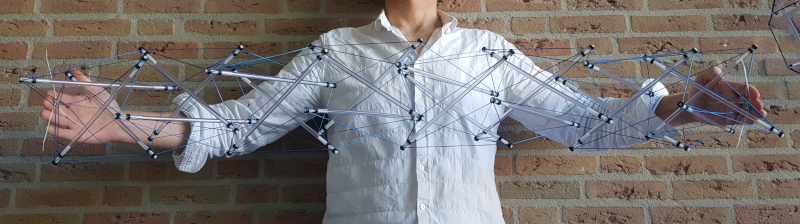
Slack and a Peculiar Milestone
Fortunately, we have quite a bit of freedom to attach and remove the ends from the bars themselves, and since you can make bars shorter at any time, it’s easy to slacken things up temporarily to make a correction if you’ve done something wrong (I did, many many times).
Just for fun, I decided that the first milestone would be for my tower to be tight and strong enough to hold up both volumes of Bucky Fuller’s Synergetics.
(Fuller fans unite and chant “More! With! Less! - More! With! Less!” until we have given all of humanity an adequate lifestyle on spaceship earth)

If you look closely you can see that one of the bars is curving under the stress. These are not yet serious materials.
Become a Robot
Then begins the step-by-step process of adding twists.
- new twist
- clamp three bars together into a twist with three perp-clamps
- attach a top tension ring to the upper bar ends
- connect the ends of zig-zags to complete the new twist (with still the bottom ring absent)
- gather the twist’s top ring together with the aluminum connector into radial tension
- link tower top
- remove the radial tension from the top tower triangle (pull out the tie wraps, releasing ring)
- place the new twist on the top of the tower, settling to make a tension hexagon that you then connect.
- connect the tower’s loose zig-zag ends to the new twist’s loose ends and vice versa
- tightening
- pinch all cords tightly enough with the outer nuts so that nothing slips around
- extend the bars using the inner nuts until the compression is tightly held back by the tension
- repeat!
At a certain point, with some ambient music playing, you get into the flow and learn to avoid mistakes better and better until it almost becomes automatic.
Conclusion
I was able to build a high strung tower which I could assemble when things were slack, and then tighten up by turning nuts. Mission accomplished.
The threaded rod inside the tube ends with pinch nut and length adjustment nut worked pretty well. The key thing is that I was able to loosen, unscrew, and correct all the stupid mistakes I made while connecting things up.
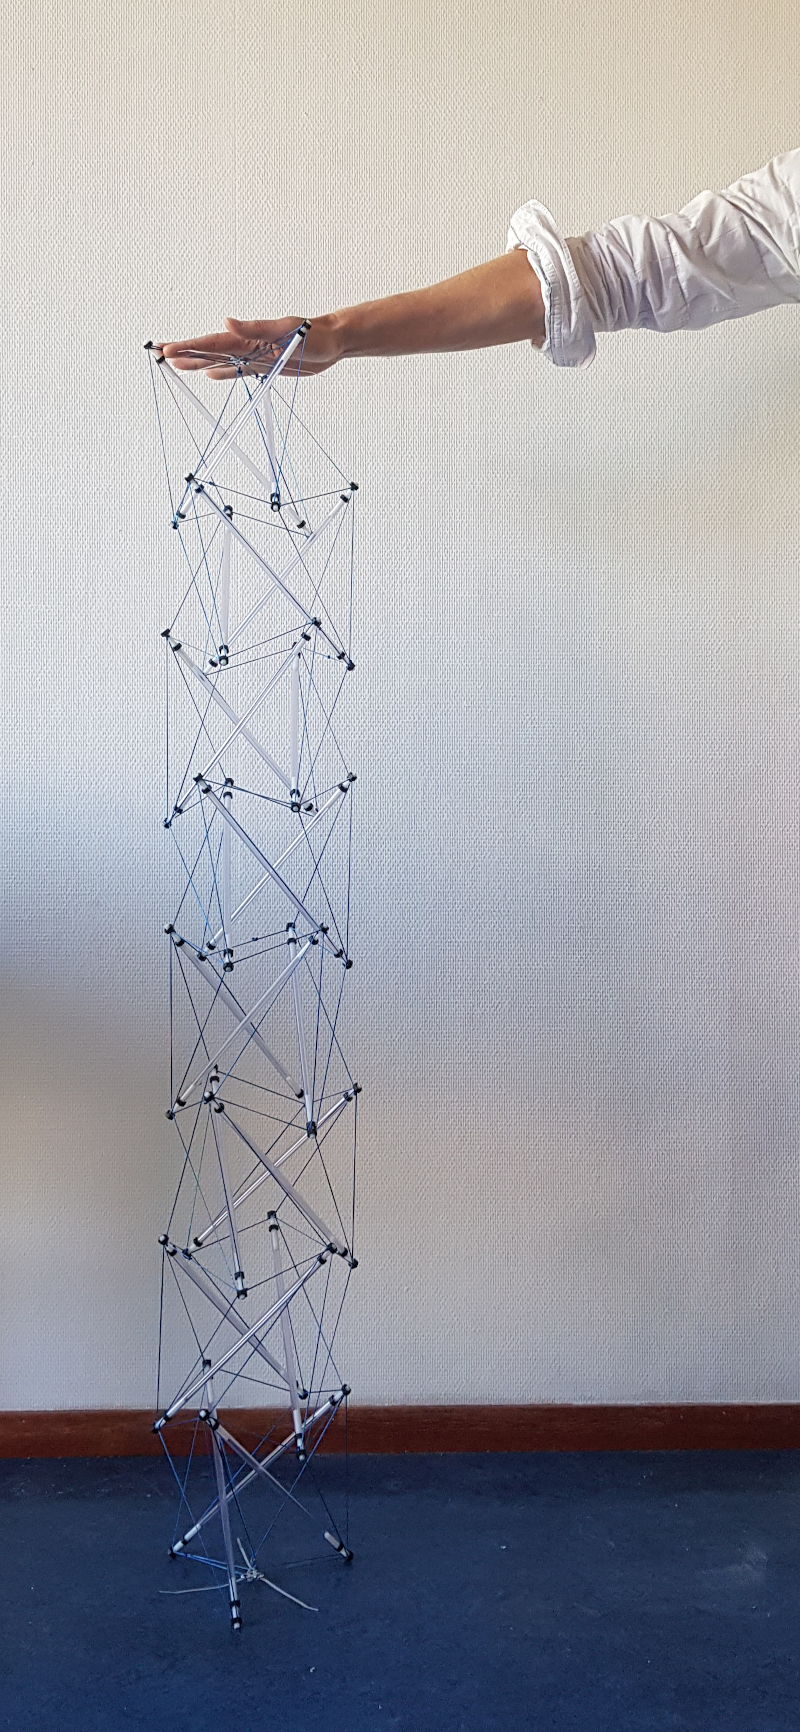
Several things were less than ideal, but good learning for next time.
- the nylon at M6 size is too weak. either stronger or larger threaded rod is needed.
- the 8mm PVC pipes were nice to work with in many ways but not really rigid enough against buckling to make this a really strong tower.
Heres a slow-mo video of how the tower behaves when I drop it on the floor:
I still want a much tighter and much stronger tower, ultimately. The battle continues.
Epilogue: The Superpower
Despite the weaknesses of this model, it does have one striking strength that should keep us thinking.
You can loosen some things up and disassemble the whole tower, separating the tension from the crompression.
Here’s a time lapse of my very first attempt. Let’s just say I learned from it.
This is is the holy grail of prefab tension, and makes for easy transport and (re)deployment.