PretensT
Tensegrity is a special kind of structure made of push and pull.
Project maintained by elastic-interval Hosted on GitHub Pages — Theme by mattgraham
An Empty Bubble
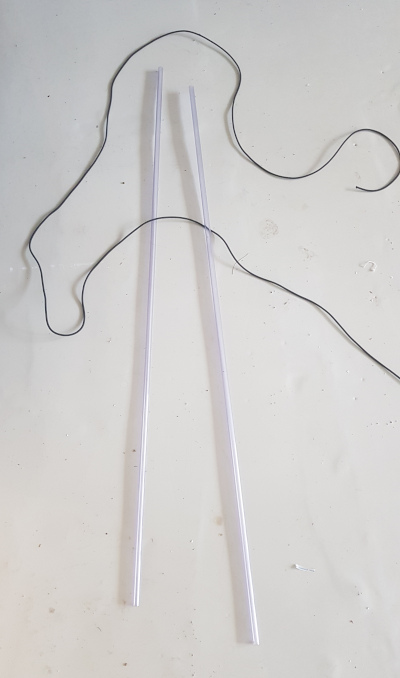
I had found some nice 3mm elastic cord a while ago, and I bought a bunch of 10mm diameter transparent PVC pipes.
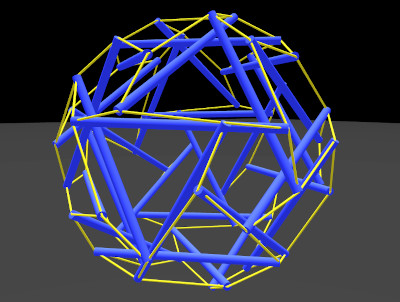
My goal was to build an empty bubble!
With some cutting, drilling, and knotting, I wanted to build a small tensegrity sphere, which should be a bit bouncy and behave like a bubble as it does in the pretenst app.
The app gives this picture:
The thing to keep in mind for this kind of project is that you end up doing the same thing many many times. Drill a hole?.. 60 of them, for example. That’s why you cannot help develop tricks to save time and make it easier.
Hole to Hole
I sawed the 1m PVC pipes into roughly 33cm each, and I needed 30 of them, so cut up 10 pipes. I decided to let the holes be highest priority for length, so I would drill the holes first and then cut them to length later.
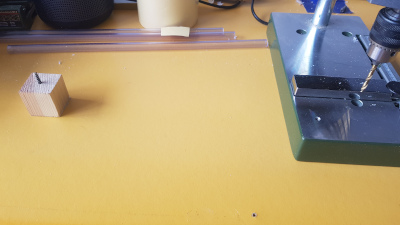
I wanted the holes to be 30cm apart so I stuck a little block to the workbench beside the drill press. This would make measurement a breeze, once it was in place.
Into the block, a screw was inserted, and then decapitated. This screw was precisely 300mm from the drill bit.
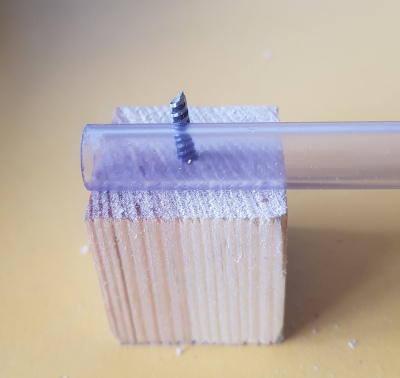
The first hole is easy, shifting the pipe so that it rests beside the screw.
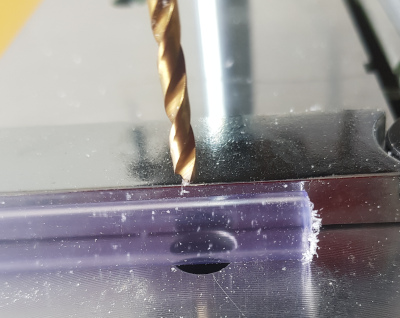
With the first hole drilled, in the center but with not a very specific location along the length, it is then possible to slip this new hole over the screw before the other hole is drilled.

This is a superb setup because you never have to do any measurements! Also, you’re assured that the hole orientations are the same, which could otherwise be tricky.
Believe me, you need these kinds of efficiencies because you end up having to do a lot of repeated holes, and they should all be pretty accurate to make the result good.
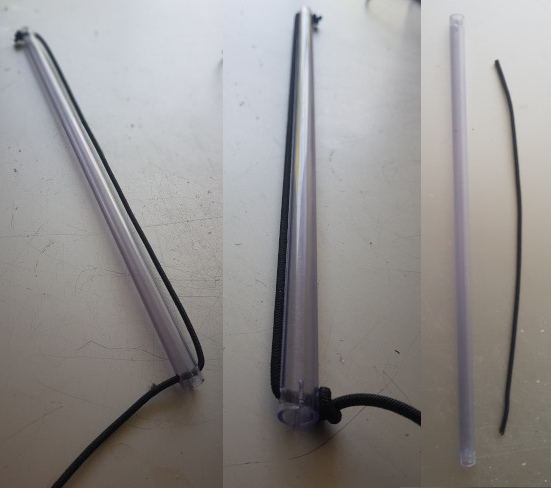
So now there are 3.5mm holes at the ends of the pipes, and I cut and sand the pipe ends a little to give them all the same amount of pipe beyond the hole.

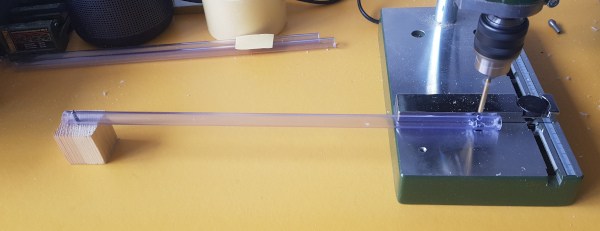
Perpendicular Slit
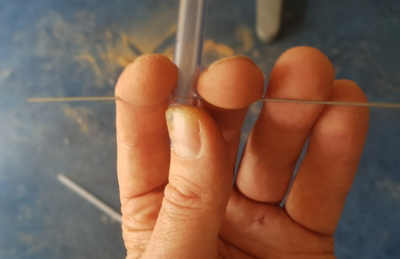
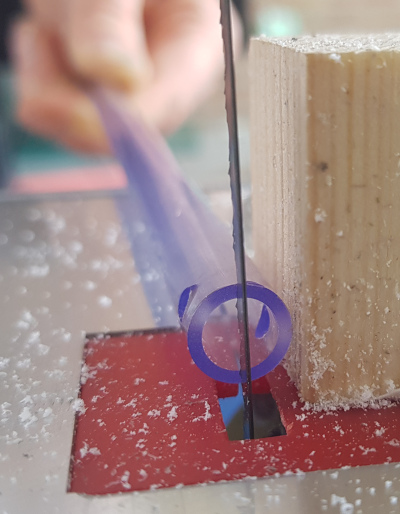
Now comes a tricky part. We need a slit which is to be perpendicular to the two holes.
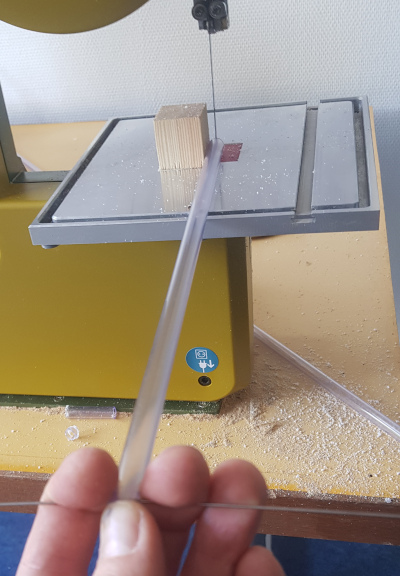
I came up with a trick that made the alignment a lot easier. I stuck a thin rod through the hole so I could grab it and be very conscious of the axis of the holes.
This way I could grasp one end of the pipe and orient it with holes horizontal to each other.
Then the tricky part was sticking a wooden block at the right distance from the blade, and holding the bar horizontal while cutting.
The goal is to make slits perpendicular to the hole axis, and what you see below means that it still needs to be tilted. It wasn’t hard to tilt the other end to steer this end, and be assured that the angle is right down at the saw end.
So that, 60 times over, we now have 30 pipes of the same length, each with a hole and a slit at both ends.
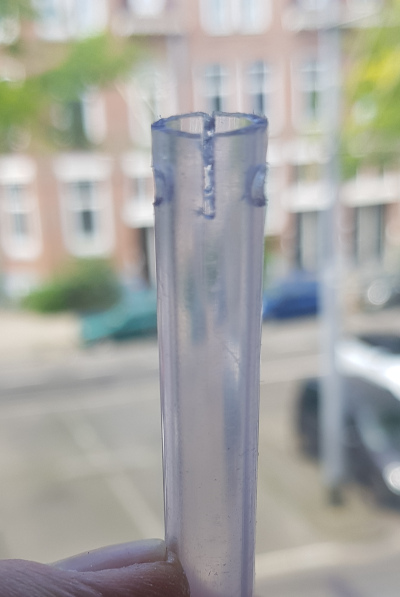
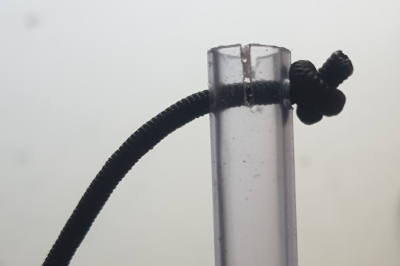
The hole is for attaching the elastic cord, because you can just tie a knot and it holds tight.
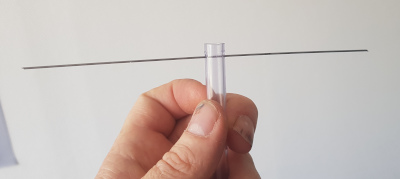
Stretch and Measure!
The cord goes from one hole to the other in the pipe, and you can pull it tighter until it feels nice and solid, and then make another knot in the other side.
Then through the other hole and pull it as tight as you think it should be, and make a knot to hold it stretched.
Cut the cord and then undo the knots. We need to know how long it is.
All the pipes have holes at the same length, so now we need 30 cords of exactly this length. They are easy to cut with a scissors but it’s good to hold a lighter flame to them for a half second and smooth the ends.
Assembly
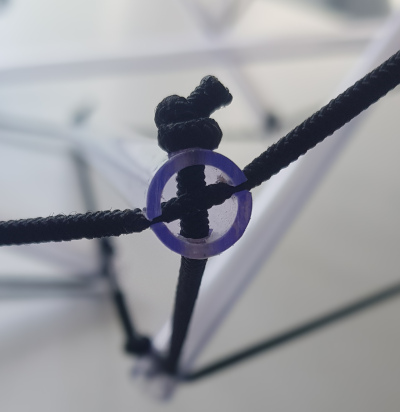
The slits come into play when the bubble is assembled. They fit quite tightly, and actually you first have to stretch them before the cords can get into the slits, since the slits are less than the cord’s 3mm width.
That’s a good thing, though, because then they pinch nice and tight.
So then with 30 pipes, each with its own elastic cord from hole to hole, I could assemble the bubble.
Here is a time-lapse movie:
Conclusion
With some lightweight pipes and some fine elastic cord it’s possible to make a bubble that basically bounces.
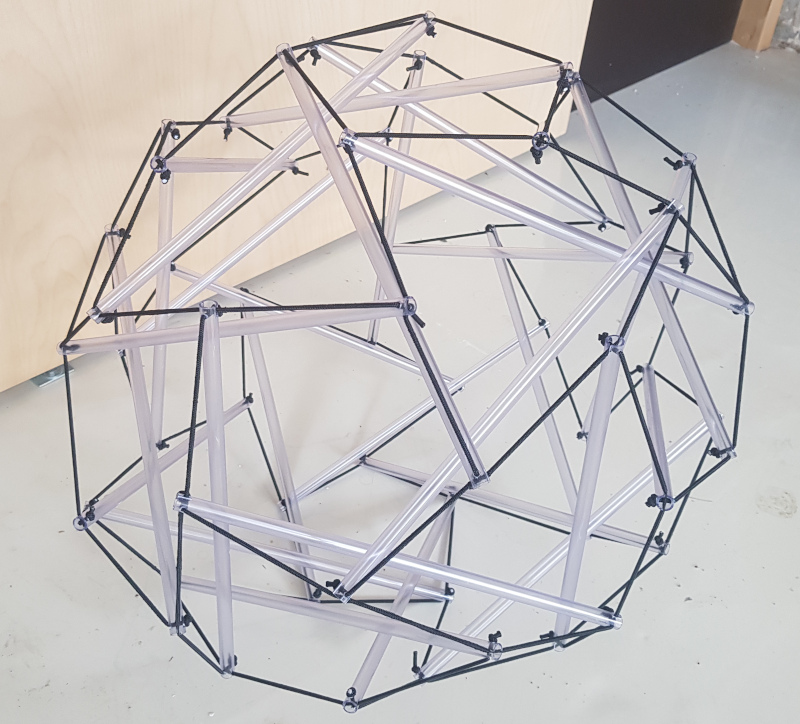
At least, I was able to dribble and roll it around.
Addendum: Sister Bubble
Just as with the twist sisters bubbles have chirality, and this one, all of its twists are right-handed (and pentagons twist left).
Now since I do so love the left-right symmetry, I had to build the other one of the Bubble Sisters.
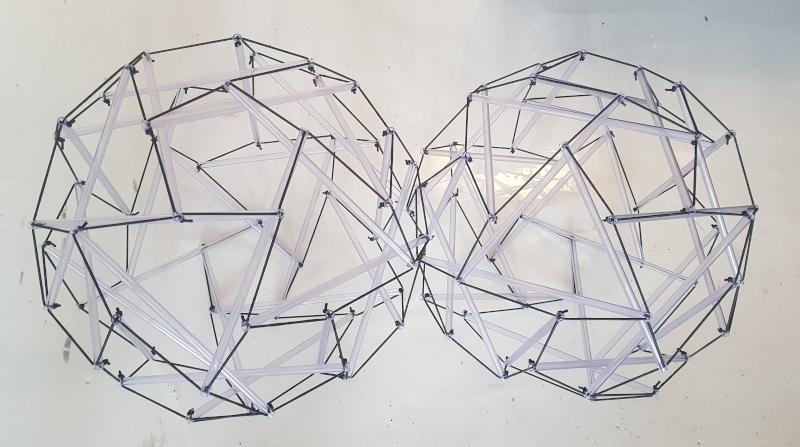
With everything in place, and the experience of the first one, I was able to build its sister in about 2.5 hours from start to finish.
Projects:
2024-07-23: "Bouncy Wooden Sphere": what you can do with a discarded bed2024-04-23: "Twisted Torque": tied into a permanent twist
2023-03-27: "Easy 30-Push Sphere": one simple element
2022-10-05: "Glass and LED": going big and colorful
2022-09-29: "Fascia": dancing with tensegrity
2022-08-30: "Mitosis": the four-three-two tensegrity
2022-08-04: "Push Bolts for the People": finalizing design and getting it out there
2022-06-22: "Head to Head Push Bolt": M5 and M6 bolts symbiosis
2022-05-30: "Hiding Knots": bump up the aesthetics
2022-05-25: "Innovation with 3D Printer": the push bolt
2021-12-02: "Headless Hug": breaking a rule for the sake of symmetry
2021-10-28: "Rebuilding the Halo": finally got it right
2021-10-20: "Convergence": growing and reconnecting
2021-07-27: "120-Strut Brass Bubble": taking the next step up in complexity
2021-05-26: "30-Strut Brass Bubble": bouncing spherical tensegrity
2021-04-08: "Bow Tie Tensegrity": better bend resistance
2021-03-29: "Six Twist Essential": what if more hands could see?!
2021-01-25: "Minimal Tensegrity": no more tension lines than absolutely necessary
2021-01-18: "Degrees of Freedom": first adjustable hybrid tensegrity
2021-01-11: "Fractal Experiment": a tensegrity of tensegrities
2020-12-09: "Axial Tension": pretensing what is already pretenst
2020-11-02: "Halo by Crane - Part 2": the strengthening
2020-10-26: "Halo by Crane - Part 1": assembly complete but strength lacking
2020-10-12: "Brass and Tulips": a tight and strong tensegrity tower
2020-08-10: "Prefab Tension Tower": the tower of eight twists
2020-07-27: "Elastic Bubble": building with elastic ease
2020-07-13: "The Twist Sisters": left-handed and right-handed
2020-07-06: "Radial Tension": Pulling towards the middle
2020-06-22: "Diamond of Tension": Four pulls for every push
2020-06-15: "Prefab Tension": Separating compression from tension