PretensT
Tensegrity is a special kind of structure made of push and pull.
Project maintained by elastic-interval Hosted on GitHub Pages — Theme by mattgraham
Turn up the Tension
My previous project, the prefab tension tower achieved something interesting. I was able to lengthen the compression bars as final step because there were nuts that could be adjusted. The result was satisfying for what it was, but it was just asking to be repeated using metal so some higher tension could be reached.
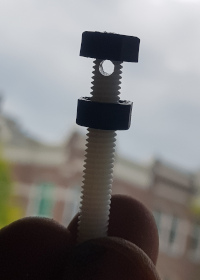
I figured out a way to create brass bars which could be effectively lengthened by connecting the ends to the cords using another screw mechanism, but this time with steel.
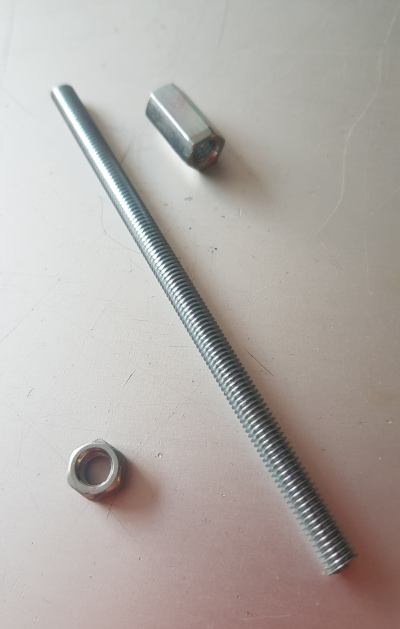
I got so called “connector nuts” which are elongated, as well as some threaded rods and normal nuts, all of them size M6.
Tulips
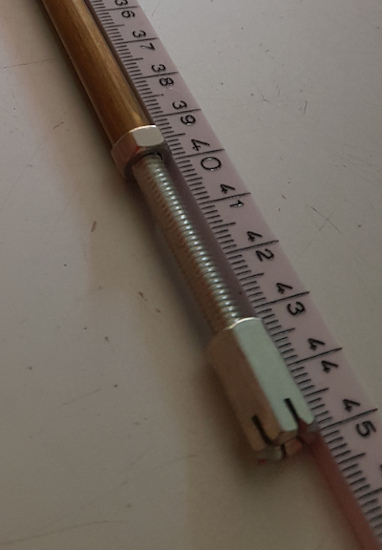
A good analogy for these bar-end devices is “tulips”, I thought, because the shape reminded me of the flower (as you’ll see) and also hey why not, because I’m Dutch.
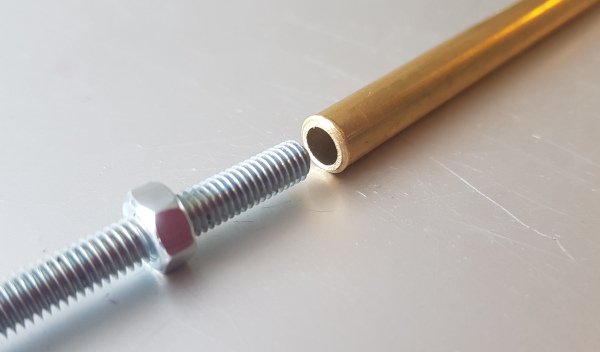
I ordered some hollow brass bars with an inner diameter that just fits the M6 threaded rods, so they can be inserted, and yet held back using the normal nut.
The connector nuts need to be the parts which connect to the cords and to do so they needed to be cut with the band saw three times each, creating six slits.
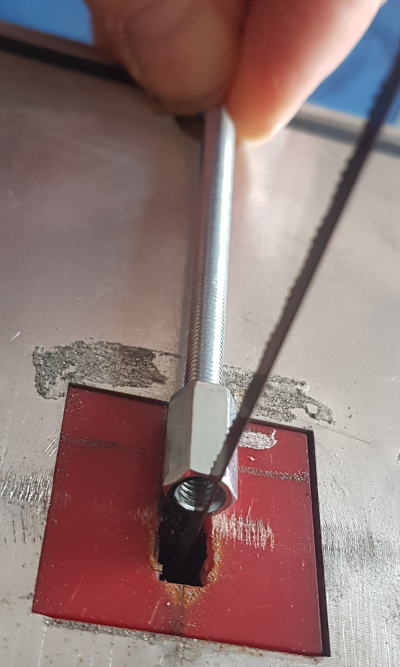
The resulting shape is the flower part of the “tulip” where the cords are going to be connected.
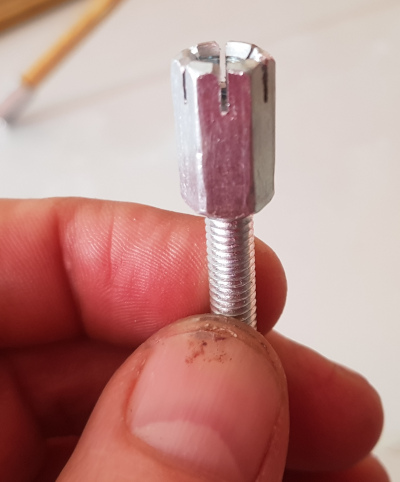
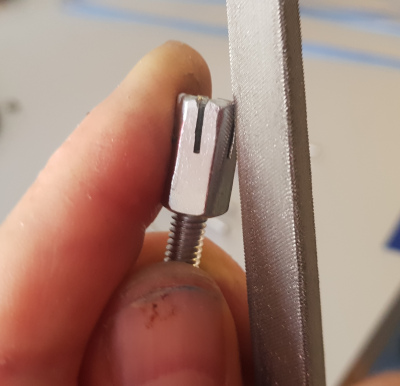
I found that it was much easier to slip cords into the slits if the top of the slit had more of a “V” shape, so I filed all the slits with a metal file with a triangle cross section.
Now, taking a segment of Dyneema cord and melting the end of it with a flame, I was able to mold a kind of thickened ball at the end of the cord.
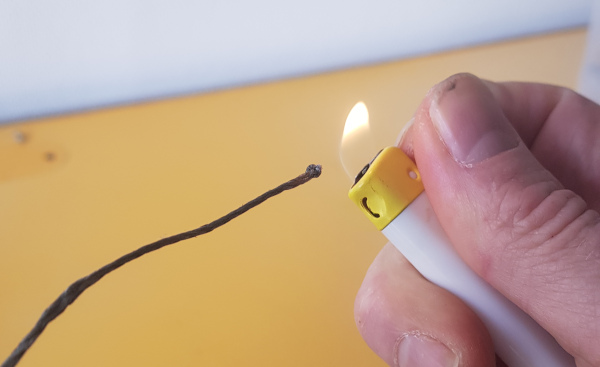
The slits are big enough for the cord, but too thin to let the ball part slip through. Also, I found that I was able to get five cords to connect to a single slitted connector nut. I would have preferred to knot the ends, but that makes the ball too large to fit five of them inside the hole.
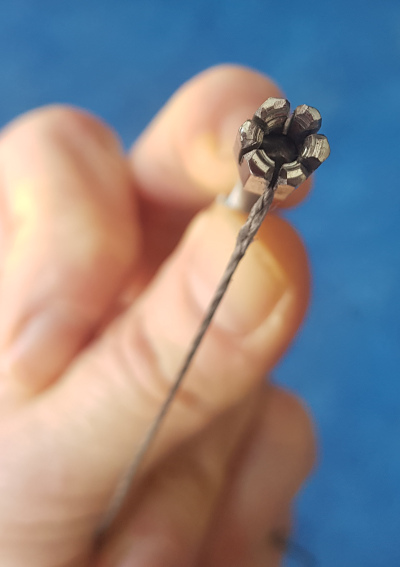
Then of course begins the phase of mass production of steel tulips.
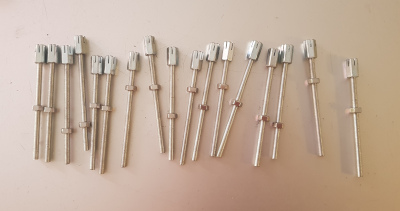

Fortunately while slitting and filing endless numbers of tulips, I was able to listen to some podcasts, some music, and even watch a documentary or two.
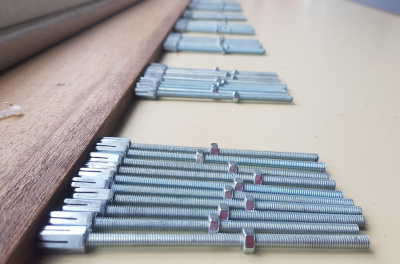
Brass Tubes
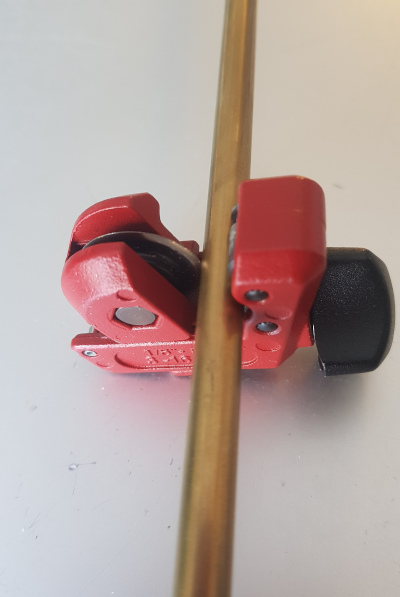
Then it was time to cut the brass tube segments, so I got a tiny little pipe cutter from the hardware store and started measuring and cutting.
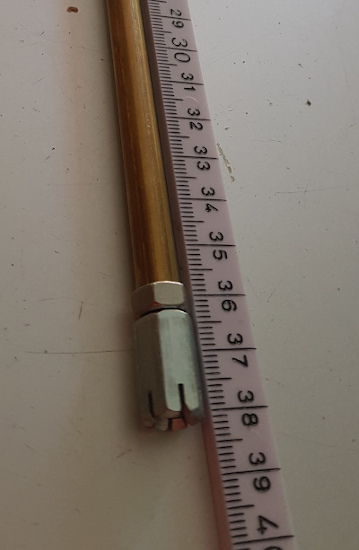
A complete extensible bar consists of a brass tube and two tulips.

The normal screw can be turned to add significant effective length to the bar!
Assembly Twist by Twist
With all the compression parts manufactured, it was time to assemble the twists. For this, I reused a little trick from the previous project: the perpendicular clamp.
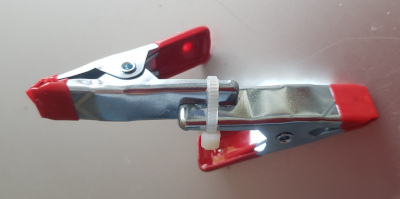
First clamping three bars into the twist orientation, I was able to connect the top and the bottom unfinished faces with radial tension, gathered at the middle with an aluminum fitting like last time. For this I made a loop of tension, which was easy to connect to the tulips.
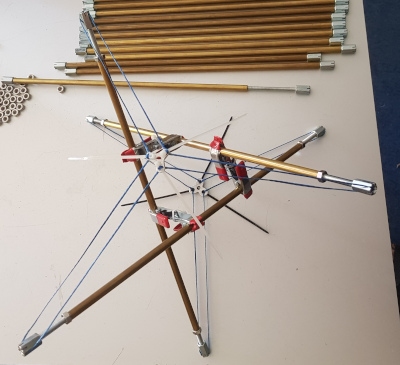
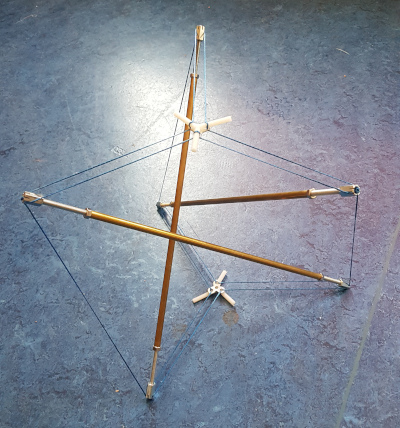
Then with tension cords between one top tulip and the next bottom tulip, the twist can finally stand on its own. The little white segments on the aluminum triangles are pieces of nylon threaded rod, which was convenient because I could easily twist them to remove them.
This is the first experience of tightening the twist using the screws of the tulips, which was very nice. I could make the twist remarkably tight!
Creating a twist is one thing, but connecting it to the next twist is a whole different challenge. First a hexagon ring of cord segments is made between the top tulips of the original twist and the bottom tulips of the new (currently still scaffolded) twist.
This one can also be tightened up nicely such that the hexagon is really tight - and actually quite flat. That will change as we proceed.
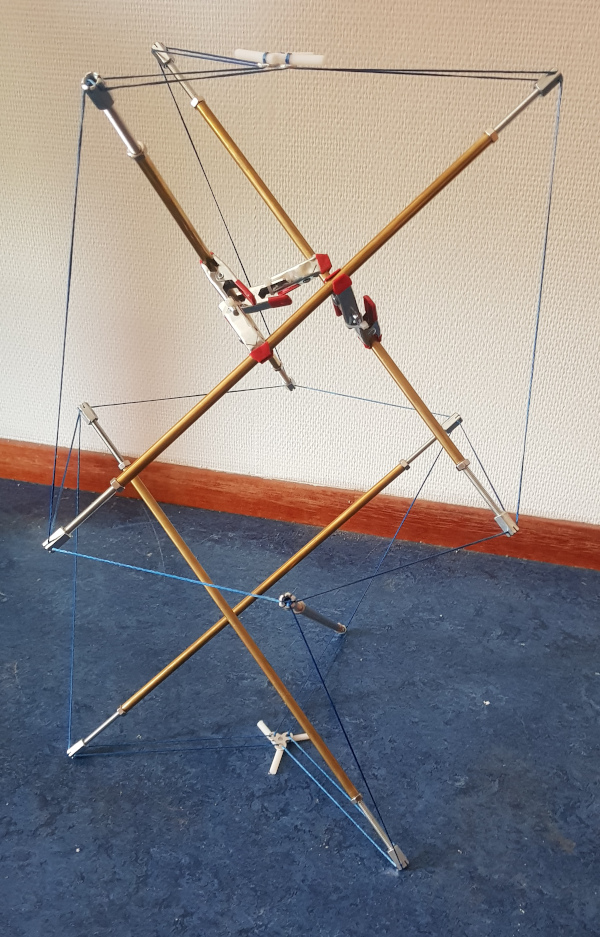
The same steps repeated again resulted in three twists connected, but these are still just holding together by the tight flat hexagons of tension. The tower is not yet very resistant to bending, because the hexagons can easily bend. What is still needed is cords which extend from the hexagons to the opposite ends of the twist bars.
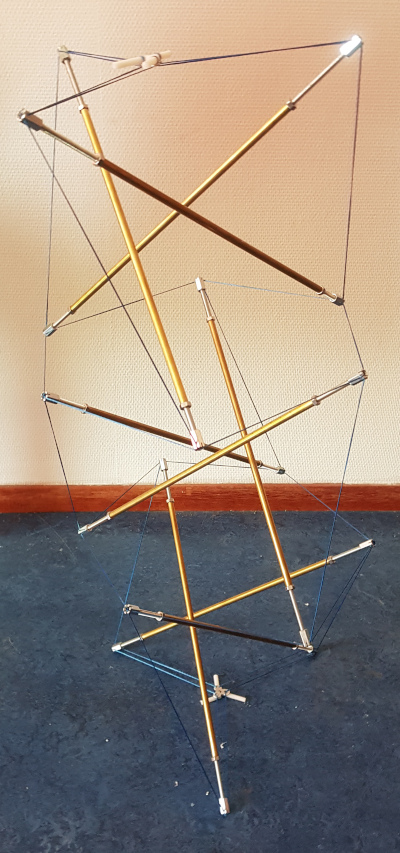
With the “inter-twist” cords inserted, the hexagon rings are turned into zig-zags of tension, because tulips are alternatively pulled upwards and downwards. Now the tower nicely resists bending!
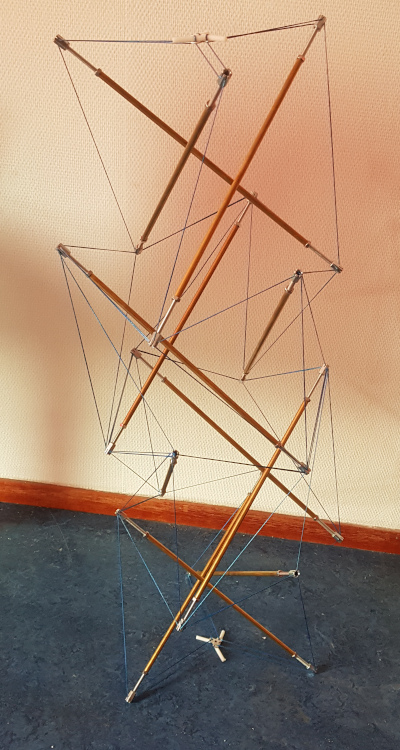
Every time I would start with a new hexagon ring, and with the end tulips of the final twist connected radially to the middle. The hexagon would then have three of its tulips pulled downward with new cords to lower bar ends, becoming a partial zig-zag (like the top one above).
Only when a new end-twist is added can the other three tulips of the hexagon be pulled upwards, making it a full zig-zag. Here we have six twists:
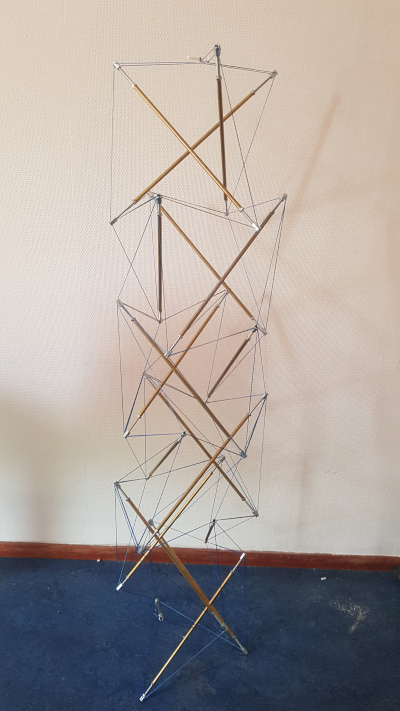
It was friday evening, it was standing eight twists tall, and it felt nice and tight, but I still didn’t dare put it to the test to see what it could carry. I was tired and went home.
Testing (as in Breaking)
On saturday morning in bed I kept getting more and more curious how much the tower could actually carry, so I had to get back to it.
The first test is the Bucky Fuller test: Can it hold both volumes of Synergetics?
Yes it could!
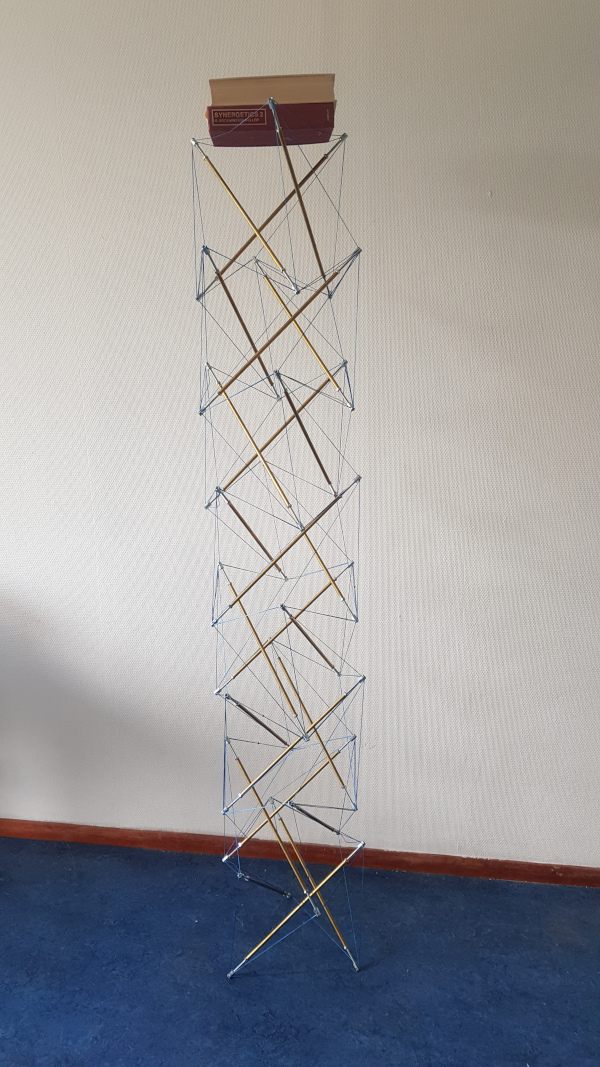
Unfortunately I couldn’t stop there. I added another fascinating heavy book and the tower broke and fell over.

It was very specific cord segments that broke: only ring cords let go. And they broke due to the cord’s melted ball-end got violently yanked through the slit, so this was the primary weakness.
I decided to make some strong loops to fortify the zig-zag hexagon rings.
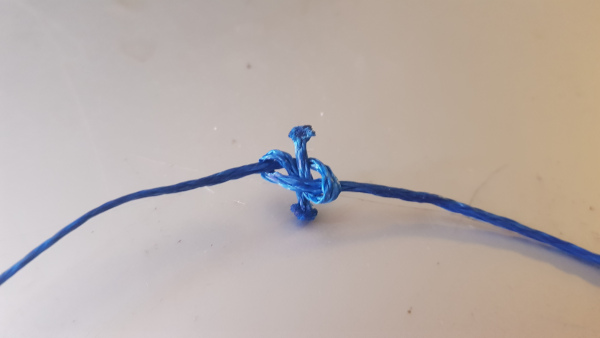
A good square knot (with melted ends) makes a superbly strong loop ring of Dyneema.

I was able to string the loops around the existing hexagons, effectively doubling-up the tension of the rings.
Conclusion
With Dyneema cord loops strengthening the hexagon rings, the tower can carry a surprising amount of weight! With a stack of books on top, the tower’s cords can be plucked almost like guitar strings.
The tower is taller than I am!

This has turned out to be a very important structure for further structural experimentation! More on that soon.
Projects:
2024-07-23: "Bouncy Wooden Sphere": what you can do with a discarded bed2024-04-23: "Twisted Torque": tied into a permanent twist
2023-03-27: "Easy 30-Push Sphere": one simple element
2022-10-05: "Glass and LED": going big and colorful
2022-09-29: "Fascia": dancing with tensegrity
2022-08-30: "Mitosis": the four-three-two tensegrity
2022-08-04: "Push Bolts for the People": finalizing design and getting it out there
2022-06-22: "Head to Head Push Bolt": M5 and M6 bolts symbiosis
2022-05-30: "Hiding Knots": bump up the aesthetics
2022-05-25: "Innovation with 3D Printer": the push bolt
2021-12-02: "Headless Hug": breaking a rule for the sake of symmetry
2021-10-28: "Rebuilding the Halo": finally got it right
2021-10-20: "Convergence": growing and reconnecting
2021-07-27: "120-Strut Brass Bubble": taking the next step up in complexity
2021-05-26: "30-Strut Brass Bubble": bouncing spherical tensegrity
2021-04-08: "Bow Tie Tensegrity": better bend resistance
2021-03-29: "Six Twist Essential": what if more hands could see?!
2021-01-25: "Minimal Tensegrity": no more tension lines than absolutely necessary
2021-01-18: "Degrees of Freedom": first adjustable hybrid tensegrity
2021-01-11: "Fractal Experiment": a tensegrity of tensegrities
2020-12-09: "Axial Tension": pretensing what is already pretenst
2020-11-02: "Halo by Crane - Part 2": the strengthening
2020-10-26: "Halo by Crane - Part 1": assembly complete but strength lacking
2020-10-12: "Brass and Tulips": a tight and strong tensegrity tower
2020-08-10: "Prefab Tension Tower": the tower of eight twists
2020-07-27: "Elastic Bubble": building with elastic ease
2020-07-13: "The Twist Sisters": left-handed and right-handed
2020-07-06: "Radial Tension": Pulling towards the middle
2020-06-22: "Diamond of Tension": Four pulls for every push
2020-06-15: "Prefab Tension": Separating compression from tension