PretensT
Tensegrity is a special kind of structure made of push and pull.
Project maintained by elastic-interval Hosted on GitHub Pages — Theme by mattgraham
Challenge Accepted
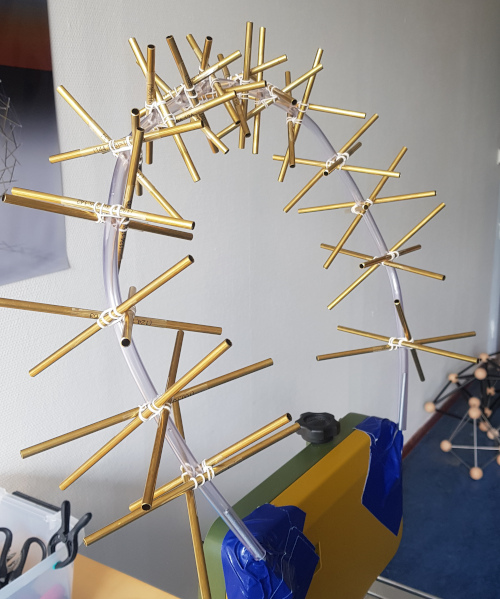
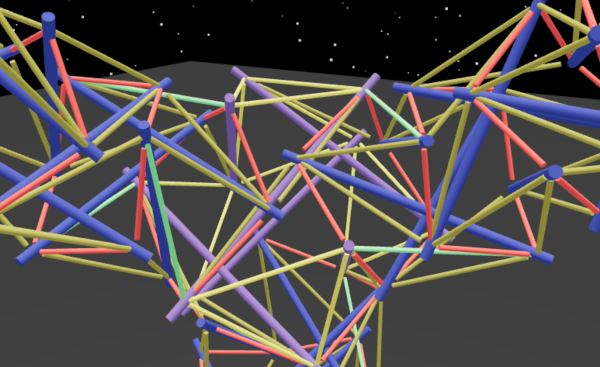
Once I had built a strong metal tensegrity tower out of brass and tulips, I got confidence in the technique and started wondering what could possibly be built this way. Returning to the pretenst app I looked over the structures that I had been able to generate using tenscript, settling on one of the first truly interesting ones, which I had named “Halo by Crane” the moment I saw it.
I guess I was thinking that a halo is something that you might typically hanging from a skyhook, coming from above. This one is held up from the ground by tension, and it’s a tensegrity structure that nobody has ever tried to build.

The great Kenneth Snelson could never have written the code for this, since it was not really part of his generation’s youth. I started coding as a teenager, so I thought maybe this could be my way of taking Ken’s work to a new level.
First Tulips
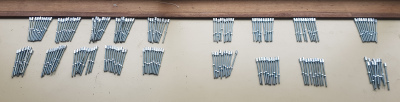
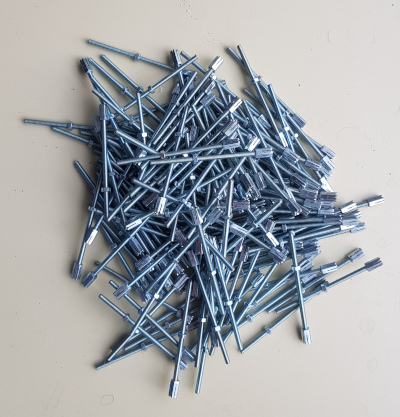
The structure consists of 90 bars, all connected up exactly the right way to share the correct joints. How could I manage all that complexity? I had to come up with ways to keep track of it all, so I ordered a label printer and got busy with the tulips, one hundred eighty of them! This meant also cutting the 180 connector nuts a total of 540 times (3x each).
This was a time-consuming and repetitive activity, so once again I spaced it over a few days and interspersed and mixed the work with watching some documentaries and listening to some podcasts. I learned about the history of the Japanese Yen while filing the tulips by hand.
Then Brass
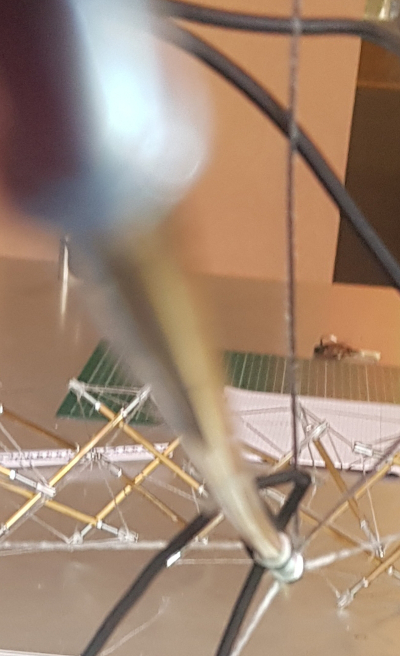
Then came the brass bars, each one of them with its own unique length. This is where the label printer came in.
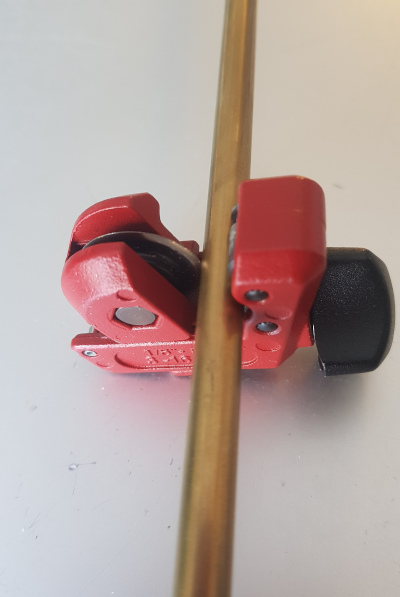
I cut them with the little pipe cutter and labeled each and every one of them so that I would know how to connect them up later. Using the label printer to keep everything straight was not really optional. There’s too much to remember.
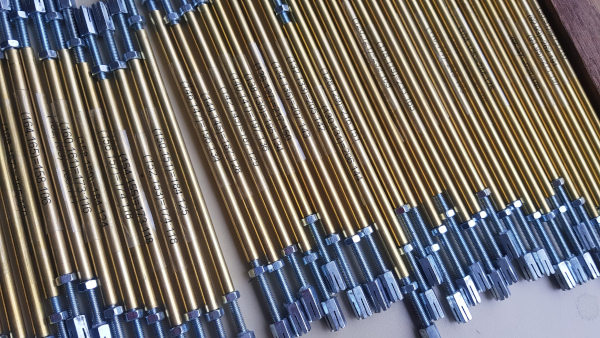
Finally, 90 bars and 180 tulips! (this took a few days). Each bar was labeled with its two joint numbers followed by its lengths in millimeters.
(J1,J2)=L1:L2
The two lengths were the total effective length of the bar-and-tulip combination, followed by the length of the brass tube. For example:
(2,3)=631:505
(68,69)=324:242
(176,177)=147:97
Cords
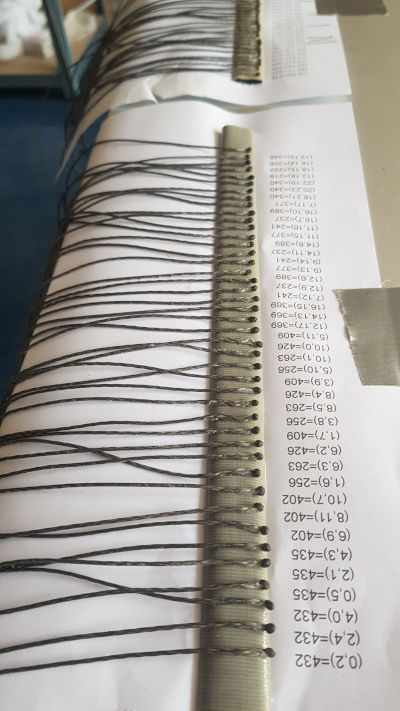
Then I began to manufacture cord segments, each segment with its two ends melted with a flame (started with a lighter but eventually bought candles) and formed into a solid blob. I decided that it was better to make the segments first and then measure them so that the error would be minimized, since it’s not extremely accurate to cut and then melt the blobs.
I first used graph paper and looked up the lengths in my list in order to stick them to the right place in the list. Initially almost every length had a home, but it got harder to find holes in the list, so I learned how to make the cutting-and-melting into a quite accurate process, to within a millimeter or two.
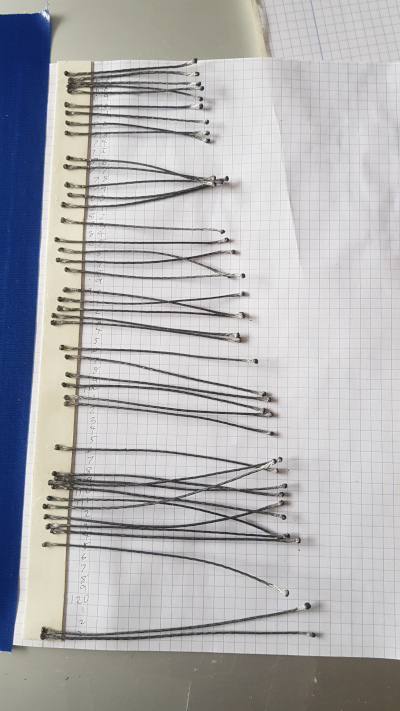
But yes, then the numbers rose up and attacked me because I gradually came to the realization that I would have to cut and form 450 of these and form 900 blobs!!
I bit the bullet and printed the specifications of all the cords on about 9 sheets of paper and then slowly but surely manufactured all of the initial lengths that would be needed. Patience, patience, and besides, I would never be able to convince someone else to do this because it was far too tedious.
I did decide to stop at some point for a while, because I was getting a little concerned that maybe even after all this preparation work it wouldn’t be possible for some reason to actually put together this complex tensegrity.
I had to prove to myself that it wasn’t all for nothing, and there was no real convincing guarantee that it would all work. This was a new tensegrity shape, more complicated than anything I had ever seen.
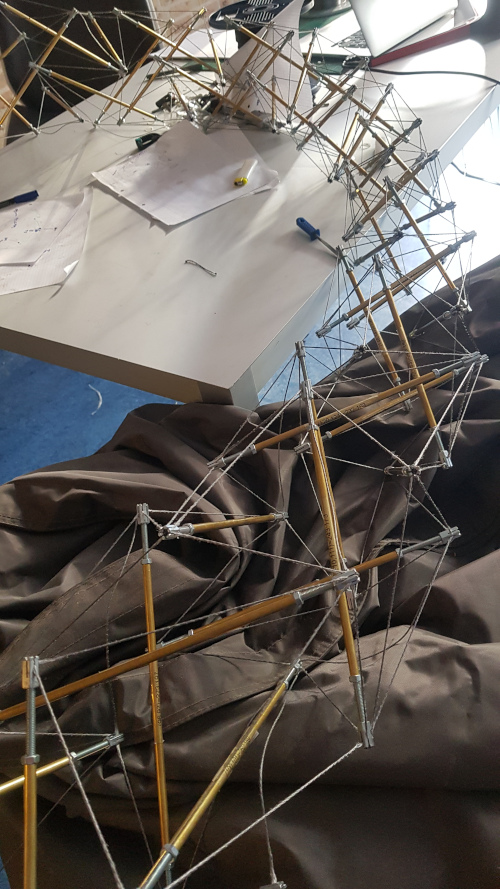
Assembling the Lobe
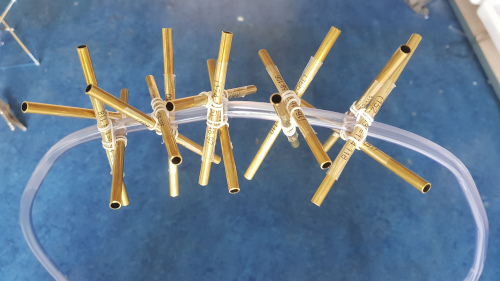
The part of the Halo by Crane tensegrity that I was most worried about was the smallest part, since I had some experience with tensegrity like the big part or the foot of the structure.
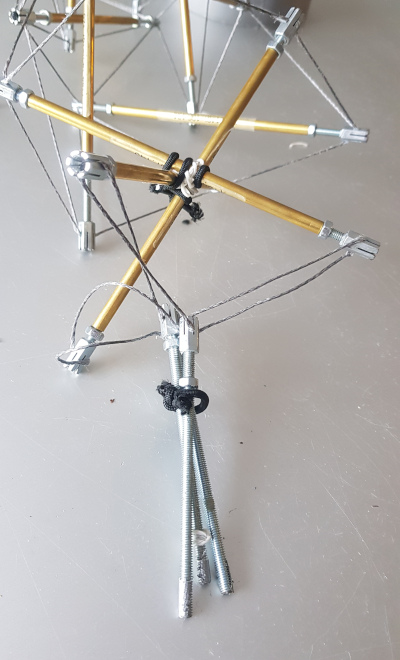
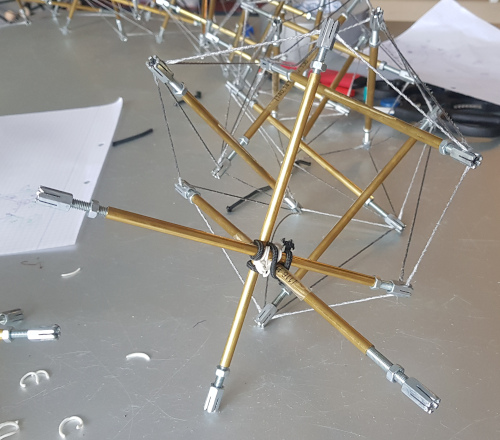
I collected the groups of three bars together which were to form the twists and bound them together with elastics so that they were in the right constellation.
This is not trivial because all of the joint numbers had to match up correctly with the design, and the twists had to be properly left or right handed, depending on which one, because they alternate left-right-left-right…
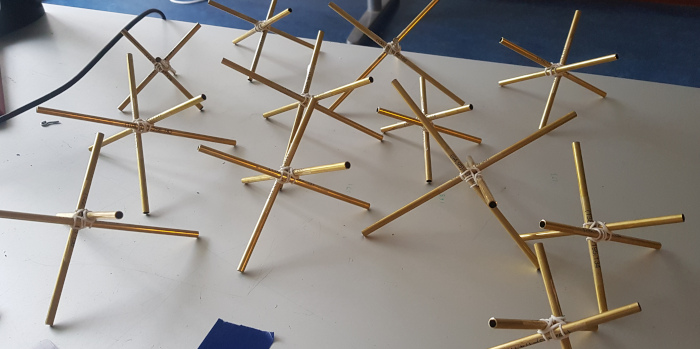
This small part of the structure around its loop of course had a curve in it, so I would have to assemble the twists so that they would end up curved. For this, I warmed up a PVC pipe by pouring boiled water on it and then bent it into a curve so that I could mount the twists before attaching any tension cords.
I had to get all of the twists to line up such that the (currently still imaginary) cords would connect the right joint numbers to each other. This involved a lot of adjusting and puzzling to get it right, but at least I had the whole curve prepared properly.
I wanted to get at least half way around the loop before starting on the cords, which were already pre-fabricated in previous phases. It really was just a matter of connecting, but there were so many it was daunting.
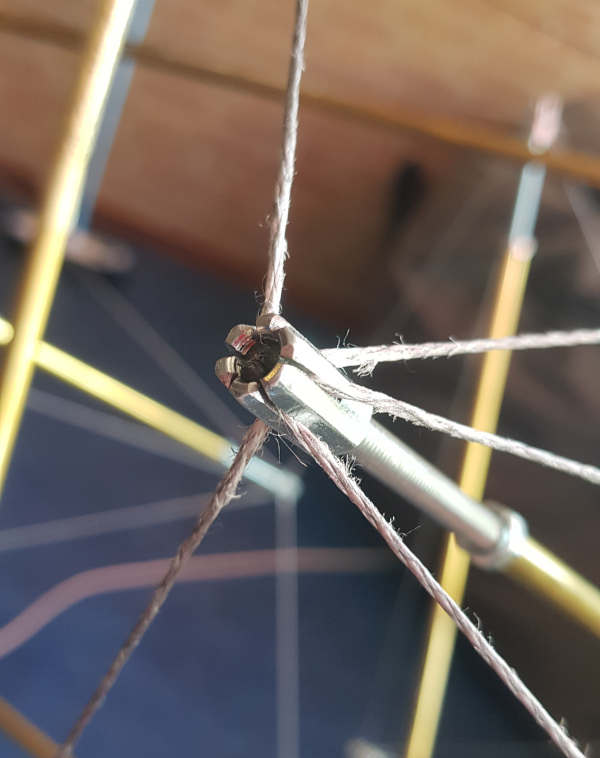
Eventually I figured out that by looping a strong elastic cord in exactly the right way around the brass tubes, I was able to construct them solidly so that they held on tight, and they stayed oriented quite well for the cords. The specific zig-zag elastic cord path takes an interesting trip around the twist center, pulling almost vertically between the bar ends which end up in a similar vertical relationship.
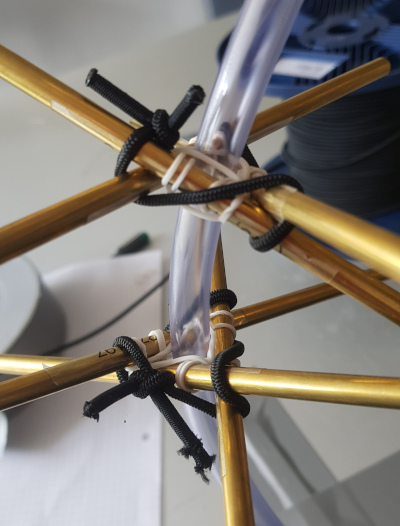
With everything oriented correctly it was time to start trying to connect it all up with cords. This was not easy, since the tied up versions of the twists are actually too tight, relative to the end state with cords.
Suddenly I had an unexpected problem, since the tulips kept falling out of the brass tubes in the absence of cables. I discovered that by adding a little bit of sticky duct tape to the end of the tulip stems, the duct tape acted like a brake.
As it turned out, I was unable to connect them while they were still bound at their midpoints, so eventually I started releasing the centers of twist which were fully connected so that it became possible to attach cords to the next one.
After a lot of painstaking connecting of cords by slipping them into the grooves cut into the tulip flowers, I could remove the PVC hoop and I had an actual segment of the loop which was more or less intact. Note that the ends are still tied at their centers.
The process started to get a little bit routine, step-by-step, so that I had to think less and less about it and it felt more natural.
I would first attach three new tulips to the extreme ends of the existing tensegrity column.
Then I would fetch the next twist and slip its tubes over the tulips so that the right joint numbers were connected at the right places.
Then I could make all of the other connections needed to hold onto this new twist, while releasing the elastics holding together the previous one.
Wash, rinse, repeat, but always mind the joint numbers so that the whole thing doesn’t get screwed up because you missed a stitch.
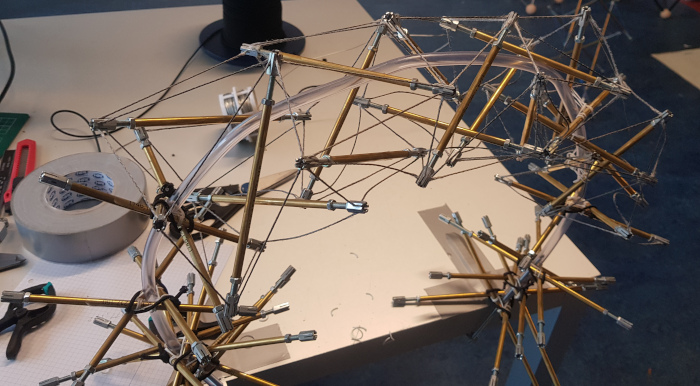
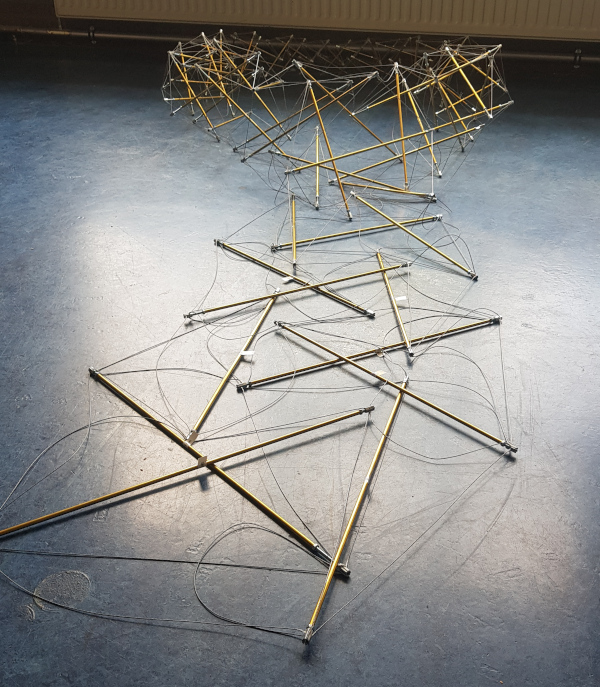
After a lot of patient connecting and manipulating and adjusting and connecting again, I had most of the loop complete.
But now the challenge was to get it to come together, which was a whole new ball game. This was the first time I had ever had to bring two tensegrity ends together at a joining tensegrity and then extend in the third direction.

I have to say that this part got me very confused and somewhat overwhelmed. It didn’t seem to fit quite right, and it was indeed very different to bring the two together. I managed to calm myself down and leave the unfinished connection laying there overnight until I could take a fresh look at it the next day.
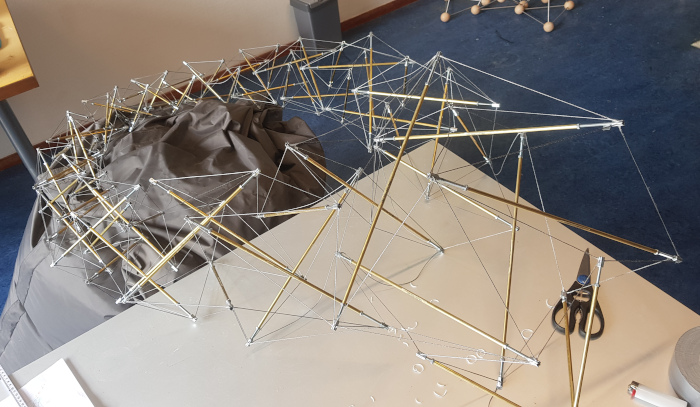
Early the next day I was able to make the joining happen and from there on it was a breeze to build the ever larger twists which make up the foot of the structure.
Of course things were not perfectly tightened up and it hadn’t proven itself, but it was complete!.
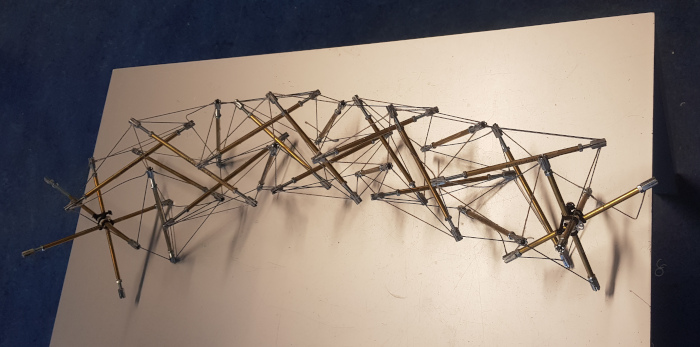
But Can it Stand?
Then came a series of new challenges, because when I tried to lift it up into its ultimate standing position, I discovered the weaknesses.
The brass tubes that I had used to build this tensegrity were simply not strong enough. Certain critical tubes, such as the three that were touching the floor, would simply bend and buckle.
Meanwhile the cord segments were more than strong enough for the job, not really straining much at all. The weakness here was the bars.
Thicker: Replacement Magic
I resolved to order thicker bars for everything but the loop part of the structure.
Now here’s where the real magic of this special construction technique begins to show!
Since the tulips are all adjustable, I could easly reduce the effective length of all of the bars without disconnecting anything. It feels like you are deflating the tensegrity!
The fact that I could do this temporarily means that I could prepare and label the new thicker bars and then effortlessly replace them one-by-one in the structure with its main part simply slack.
With the bars replaced, I could just use the tulip screw action to “re-inflate” the structure and now make it tighter than ever due to the new thicker bars.
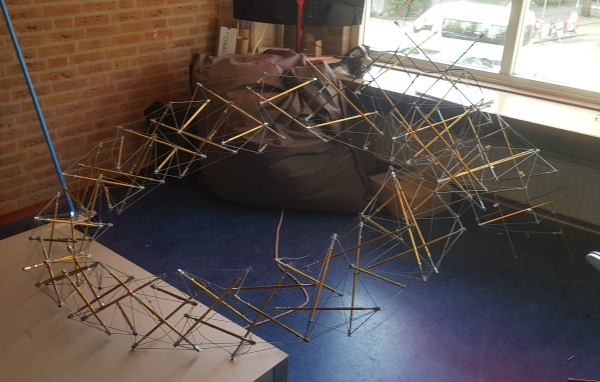
The work on this structure was interrupted briefly buy the “atelier weekend” which had been organized, resulting in many people coming to visit my atelier and chat about what I’m trying to do.
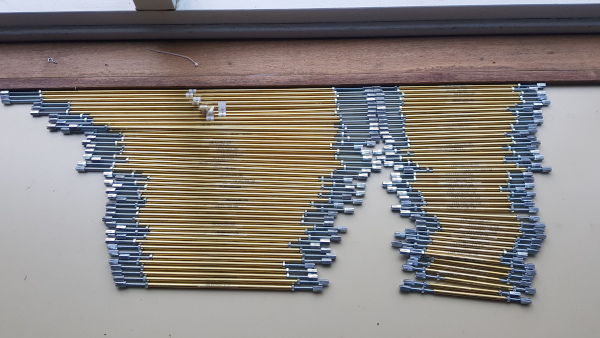
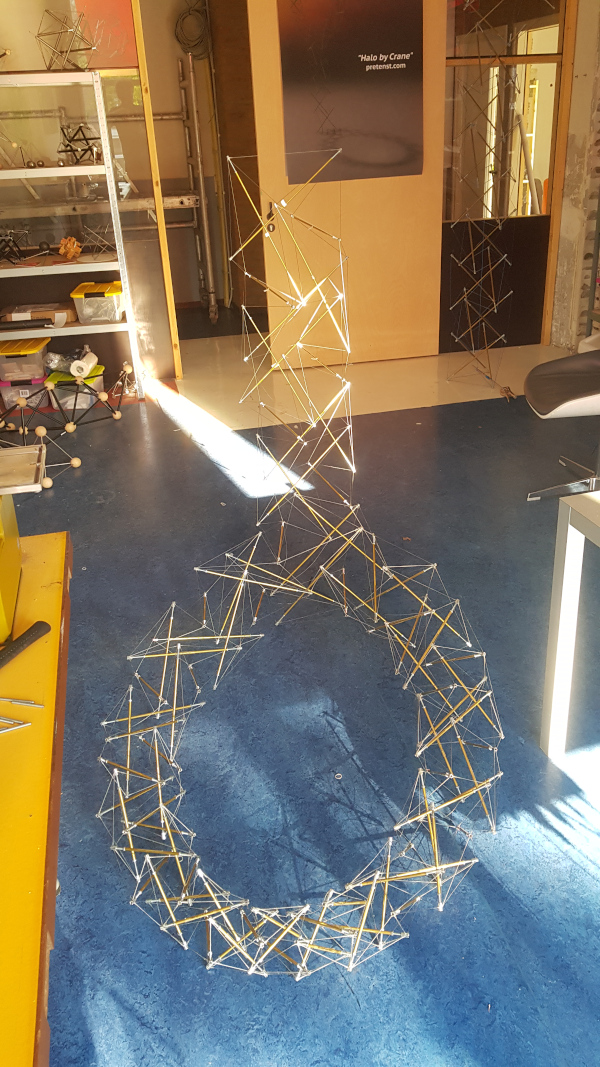
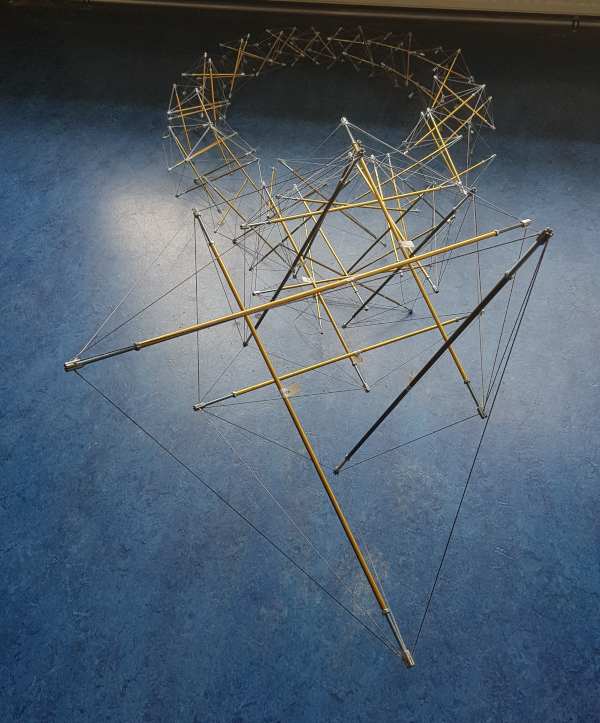
As you may be able to see here in the background below, I had to tie up the Halo by Crane to a cord from the ceiling because although it was structurally complete, even with the new bars it could not quite hold its own weight yet.
It was very close, however. I discovered that by carefully pressing downwards on particular joints, I could nearly make it support its own weight, with some bars bending with frightening curves.
Conclusion.
This thing is not strong enough.
I did have an actual complete Halo by Crane structure to look at, although it still had to hang from the ceiling.

I could compare it with my virtual version.
And yes, everything basically worked nicely, it was tight and looked promising.
But unfortunately it was still unsatisfying because it could not stand on its own. It was certainly not finished.
Anyway you look at it, the structure is front-heavy with the loop extending forwards, so something would have to compensate for that imbalance, or it wouldn’t stand up. Either it needed a counterweight or some kind of support cable.
In Part 2 I figure out how to raise the stiffness and get it standing proudly and permanently.
Projects:
2024-07-23: "Bouncy Wooden Sphere": what you can do with a discarded bed2024-04-23: "Twisted Torque": tied into a permanent twist
2023-03-27: "Easy 30-Push Sphere": one simple element
2022-10-05: "Glass and LED": going big and colorful
2022-09-29: "Fascia": dancing with tensegrity
2022-08-30: "Mitosis": the four-three-two tensegrity
2022-08-04: "Push Bolts for the People": finalizing design and getting it out there
2022-06-22: "Head to Head Push Bolt": M5 and M6 bolts symbiosis
2022-05-30: "Hiding Knots": bump up the aesthetics
2022-05-25: "Innovation with 3D Printer": the push bolt
2021-12-02: "Headless Hug": breaking a rule for the sake of symmetry
2021-10-28: "Rebuilding the Halo": finally got it right
2021-10-20: "Convergence": growing and reconnecting
2021-07-27: "120-Strut Brass Bubble": taking the next step up in complexity
2021-05-26: "30-Strut Brass Bubble": bouncing spherical tensegrity
2021-04-08: "Bow Tie Tensegrity": better bend resistance
2021-03-29: "Six Twist Essential": what if more hands could see?!
2021-01-25: "Minimal Tensegrity": no more tension lines than absolutely necessary
2021-01-18: "Degrees of Freedom": first adjustable hybrid tensegrity
2021-01-11: "Fractal Experiment": a tensegrity of tensegrities
2020-12-09: "Axial Tension": pretensing what is already pretenst
2020-11-02: "Halo by Crane - Part 2": the strengthening
2020-10-26: "Halo by Crane - Part 1": assembly complete but strength lacking
2020-10-12: "Brass and Tulips": a tight and strong tensegrity tower
2020-08-10: "Prefab Tension Tower": the tower of eight twists
2020-07-27: "Elastic Bubble": building with elastic ease
2020-07-13: "The Twist Sisters": left-handed and right-handed
2020-07-06: "Radial Tension": Pulling towards the middle
2020-06-22: "Diamond of Tension": Four pulls for every push
2020-06-15: "Prefab Tension": Separating compression from tension