PretensT
Tensegrity is a special kind of structure made of push and pull.
Project maintained by elastic-interval Hosted on GitHub Pages — Theme by mattgraham
The “Cell” of Tensegrity
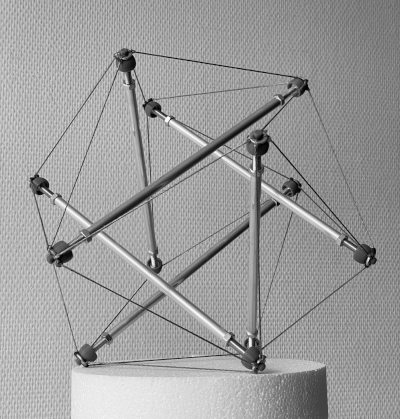
Many people, including myself, consider the most iconic tensegrity to be the symmetrical six-strut.
It’s actually what I started with when I began this adventure more than two years ago.
This archetypal structure, if any, should of course be available from any respectable tensegrity store.
The Omni-twist
In my work up to now I have been thinking of this six-strut structure as the branching configuration because it has eight triangles of tension, each of which can be the base of another column of twists (you remember the Twist Sisters).
The Omni-twist was applied to split and rejoin the structure of “Convergence”, for example.
Half of the Omni-twist’s tension triangles are right-handed, and the other half are left-handed, and no adjacent triangles have the same handedness.
Mirror-symmetry
When I wanted to build something with bilateral symmetry, like the “Headless Hug”, the mirror image symmetry made it so that the ends of struts touched each other, so I came up with a way to give them a simple minimal hinge mechanism to avoid them colliding.
There are other ways to mirror a tensegrity, but I had never properly thought through what options were available.
Then I was speaking with Tom Myers who mentioned the “Pelvis” by Tom Flemons.
This structure also has mirror symmetry, and also has intriguing degrees of freedom when you twist it.

But Flemons made his pieces with wooden dowels, elastic cord, and rubber caps. That gives everything a lot of freedom to move, and in a few years time it gradually loses its tension.
These materials are very different from the ones that I needed to build my more complex structures, so I had to see what Flemons’ structure would be like, built in the pretenst way with tough tension.
I want one in my hands
My first step was to make a virtual model in the pretenst code, so I could read out the exact lengths that I would need. (It was just a hack; I still have to figure this out, but I needed the numbers).
I chose bar lengths to more or less imitate Flemons’ model, but also based on what I had in brass laying around from previous projects.
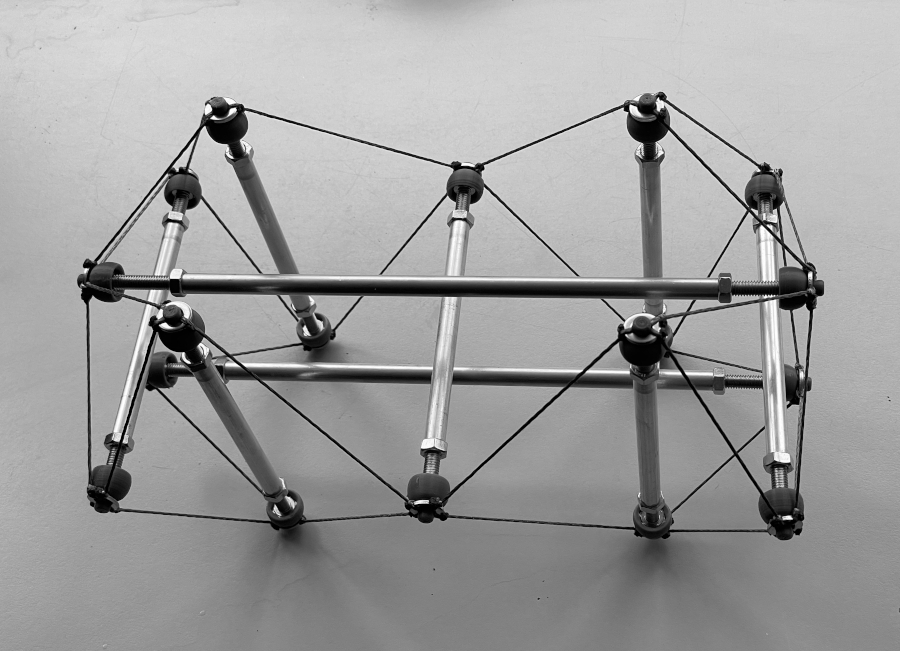
The end result was very fascinating indeed, because with a pretenst object you can make it loose or tighten it by just turning nuts.
When you tighten it becomes quite rigid, even though you can still sense that there is some movement possible when you twist.

But when you loosen the structure by shortening some struts, it becomes as loose as the hips of a belly dancer.
With tough tension this structure has wholly different degrees of freedom! It really largely acts like a pelvis and hips.
Immediately it was apparent that I needed to bring this to the fascia conference in Montreal next month, so I could discuss it with those familiar with how our bodies are held together.
Generalization
I cannot help but think with my math head when I see something like this, and try to imagine what it would be like in the general case.
I want to think of these structures as being individual examples of families of shapes all sharing the same connections but differing in size.
The pelvis structure involves some unusual lengths, with the two long horizontal struts and the “femurs” being about twice or more the length of the back-to-front support struts.
I wanted to focus on the simplest version of this so I adjusted the design to use more the same lengths everywhere and thereby acquire up-down symmetry as well as its original left-right symmetry.
Since this looks like the original tensegrity “cell” but somewhat split into two of them, it vaguely triggers the idea of cell mitosis.
Building Mitosis
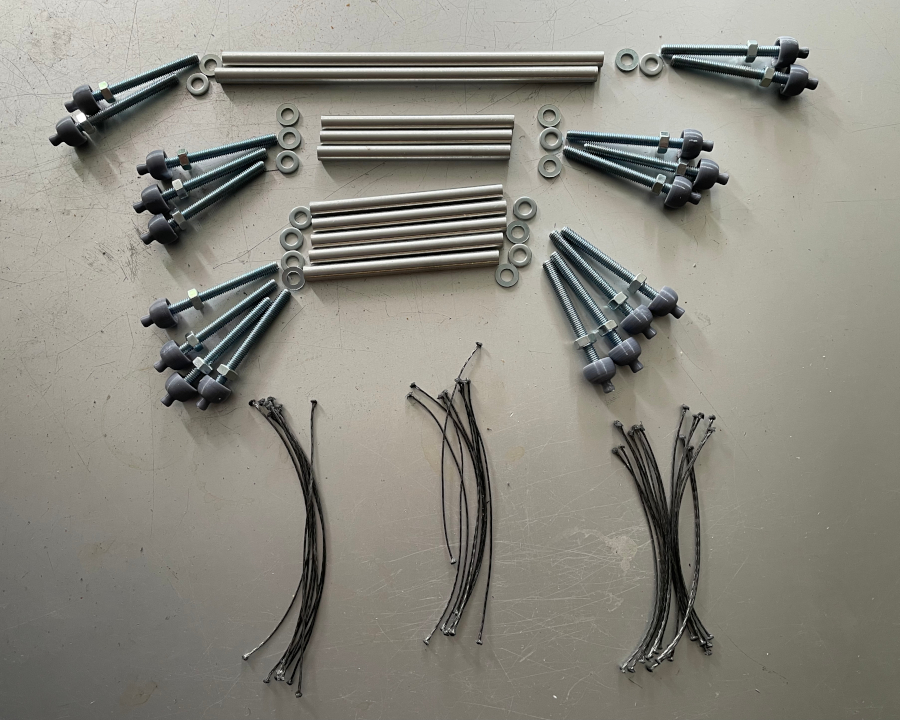
I decided to just split the length of tube that I normally use in two, so each half became 100mm long, and record the effective lengths when it includes the push bolts.
That’s what goes into the mathematical model, and from the model I could acquire the length numbers for the tension cords.
- 8 longer (116mm)
- 8 middle length (100mm)
- 16 short (87mm)
Time to start assembling.
First we take the 8 longest cords and tie them all around two rings, also adding rings at the ends. These will be the top and bottom rings for the middle strut.
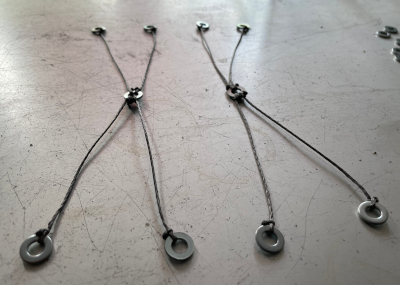
Next, the 8 middle length cords are tied to 4 rings to make the V shape.
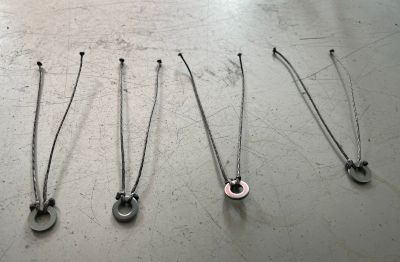
Then the V shapes connect to pairs of rings to make the diamond shape on both sides.
The remaining 16 short cords are all tied around rings in groups of 4, and these will tie everything together.
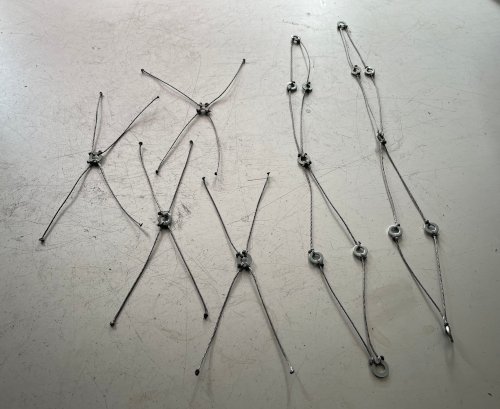
There will be a pair of short “spiders” for each side, connecting to the outer corners of the diamond shapes.
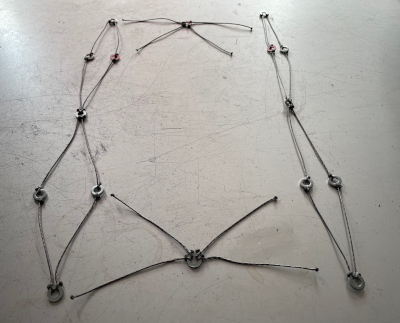
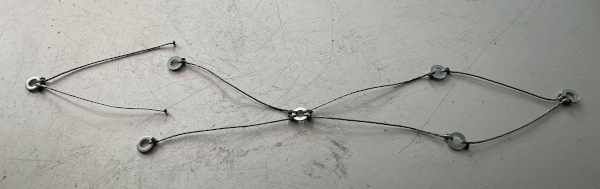
Now comes the trickier part because we have to go from flat 2D to 3D curling around.
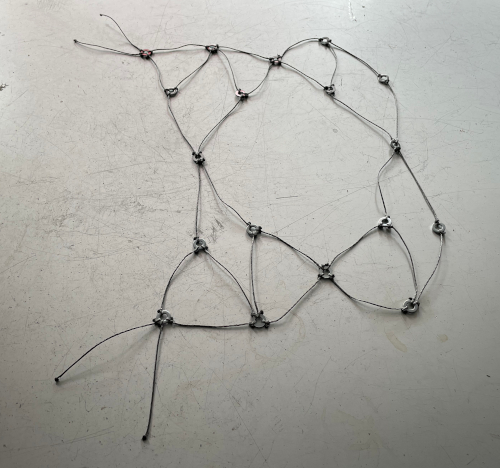
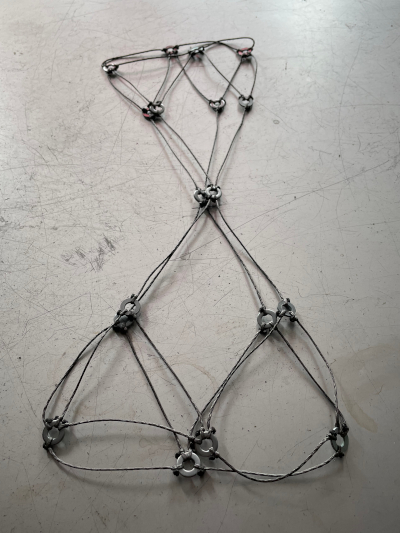
Okay then, tension complete!
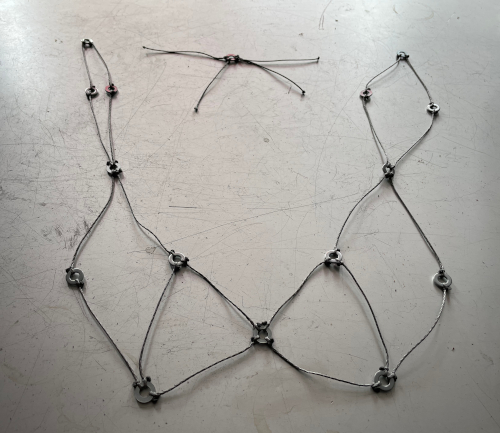
Now the struts can be inserted, starting with three small ones.
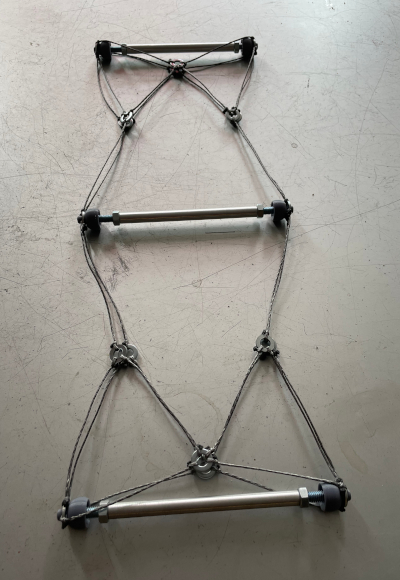
After that, we need the long ones to span between both “cells”.

And finally the four remaining short struts push things apart to give us full 3D.

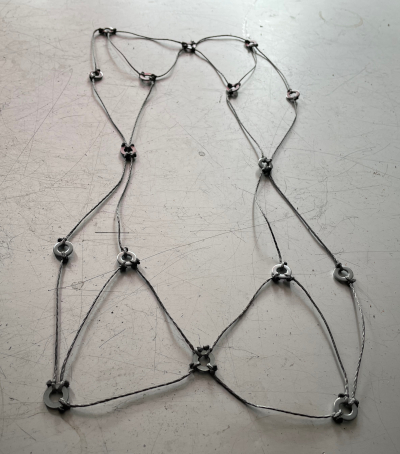
This structure is still loose until we start turning the nuts to lengthen the struts.
Conclusion
This generalized two-cell structure is very nice to hold in your hands, and you can twist things to make it kind of move like a pelvis and hips.
It’s portable and durable, so it could be very attractive as a communication tool for getting across “biotensegrity” ideas.
It’s all about the hands-on!
For me it’s provided my next coding challenge, because I want to be able to generate this kind of mirror-imaging automatically in my app.
Thanks to the people in charge of the legacy of Tom Flemons for their blessing for me to do this.
Projects:
2024-07-23: "Bouncy Wooden Sphere": what you can do with a discarded bed2024-04-23: "Twisted Torque": tied into a permanent twist
2023-03-27: "Easy 30-Push Sphere": one simple element
2022-10-05: "Glass and LED": going big and colorful
2022-09-29: "Fascia": dancing with tensegrity
2022-08-30: "Mitosis": the four-three-two tensegrity
2022-08-04: "Push Bolts for the People": finalizing design and getting it out there
2022-06-22: "Head to Head Push Bolt": M5 and M6 bolts symbiosis
2022-05-30: "Hiding Knots": bump up the aesthetics
2022-05-25: "Innovation with 3D Printer": the push bolt
2021-12-02: "Headless Hug": breaking a rule for the sake of symmetry
2021-10-28: "Rebuilding the Halo": finally got it right
2021-10-20: "Convergence": growing and reconnecting
2021-07-27: "120-Strut Brass Bubble": taking the next step up in complexity
2021-05-26: "30-Strut Brass Bubble": bouncing spherical tensegrity
2021-04-08: "Bow Tie Tensegrity": better bend resistance
2021-03-29: "Six Twist Essential": what if more hands could see?!
2021-01-25: "Minimal Tensegrity": no more tension lines than absolutely necessary
2021-01-18: "Degrees of Freedom": first adjustable hybrid tensegrity
2021-01-11: "Fractal Experiment": a tensegrity of tensegrities
2020-12-09: "Axial Tension": pretensing what is already pretenst
2020-11-02: "Halo by Crane - Part 2": the strengthening
2020-10-26: "Halo by Crane - Part 1": assembly complete but strength lacking
2020-10-12: "Brass and Tulips": a tight and strong tensegrity tower
2020-08-10: "Prefab Tension Tower": the tower of eight twists
2020-07-27: "Elastic Bubble": building with elastic ease
2020-07-13: "The Twist Sisters": left-handed and right-handed
2020-07-06: "Radial Tension": Pulling towards the middle
2020-06-22: "Diamond of Tension": Four pulls for every push
2020-06-15: "Prefab Tension": Separating compression from tension