PretensT
Tensegrity is a special kind of structure made of push and pull.
Project maintained by elastic-interval Hosted on GitHub Pages — Theme by mattgraham
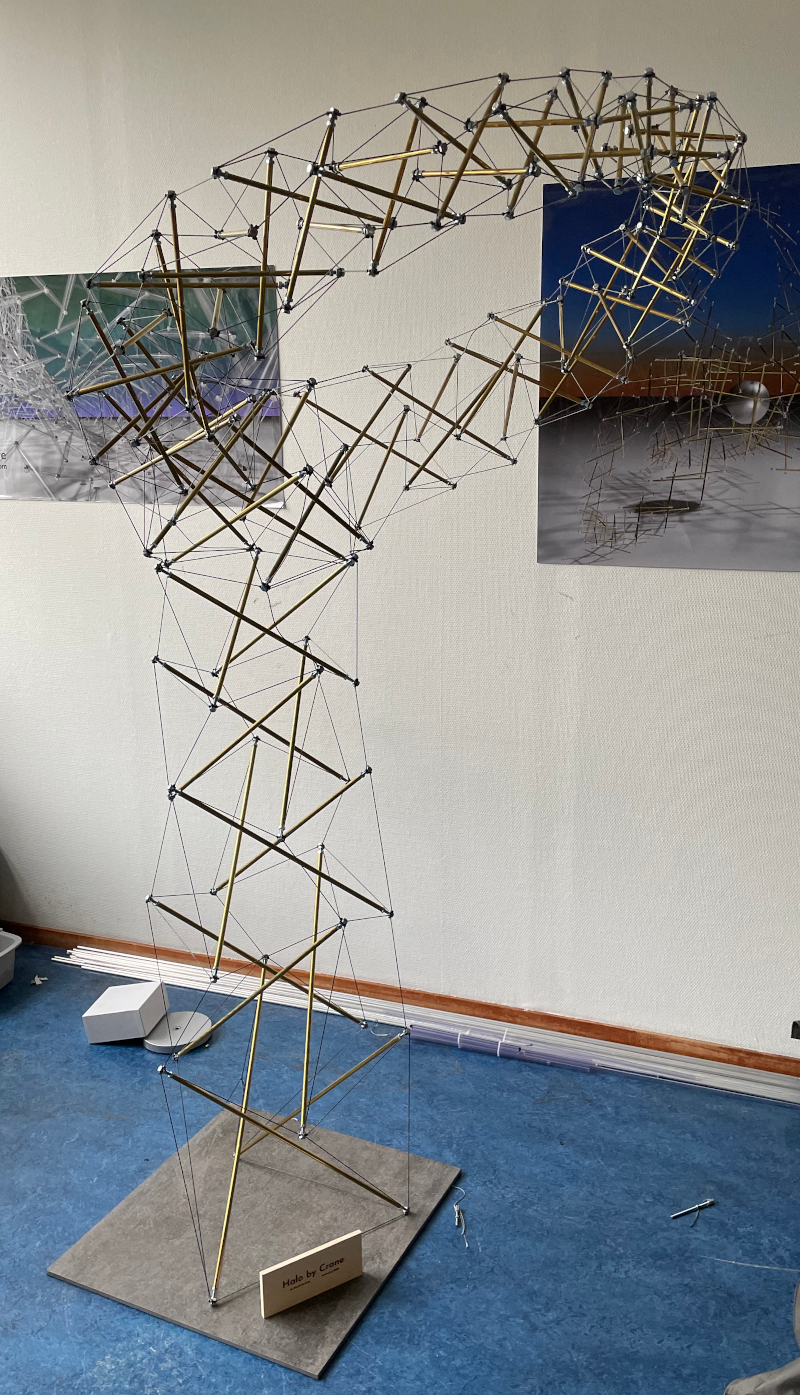
Halo by Crane
It was the first really complicated tensegrity structure that I had attempted!
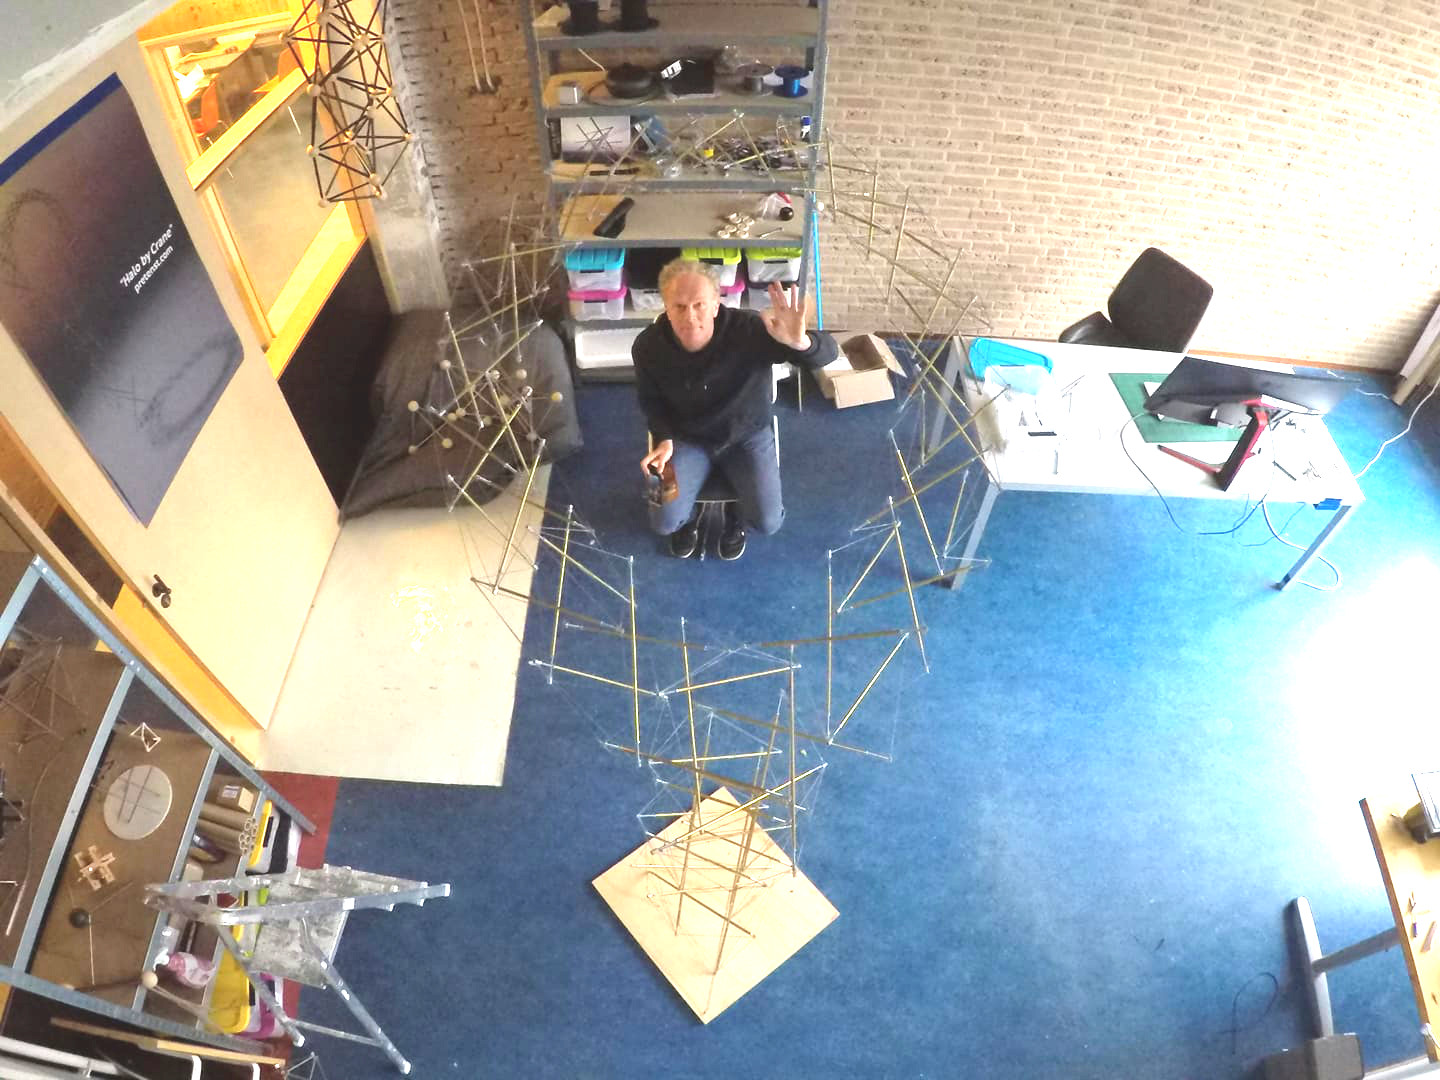
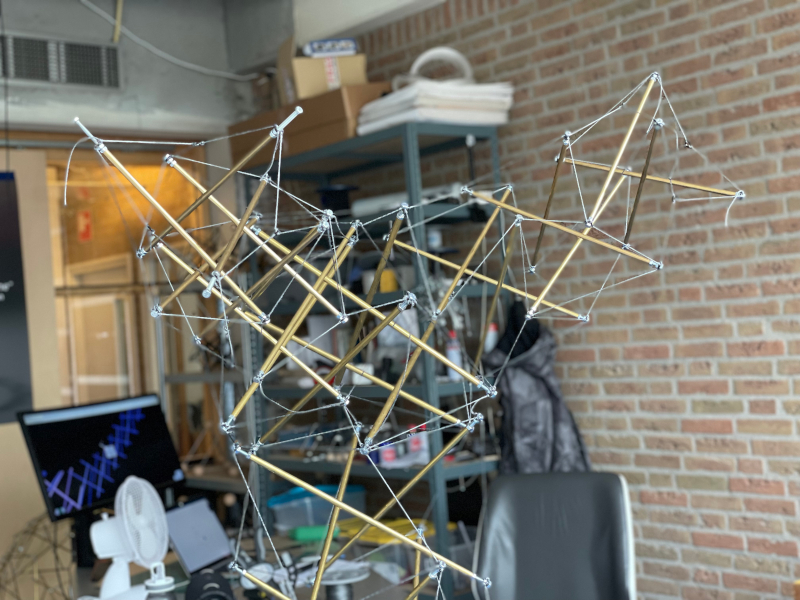
About a year ago today, I jumped in the deep end and tried to build a physical structure that was complicated enough that it could have only realistically been generated on a computer.
My first building effort was a hard learning experience, but through heroic strengthening I was able to create a stable “Halo by Crane” structure.
There was still something bothersome about it. Alright, the halo stood for months but I couldn’t help but feel sorry for how much stress it looked like it was under.
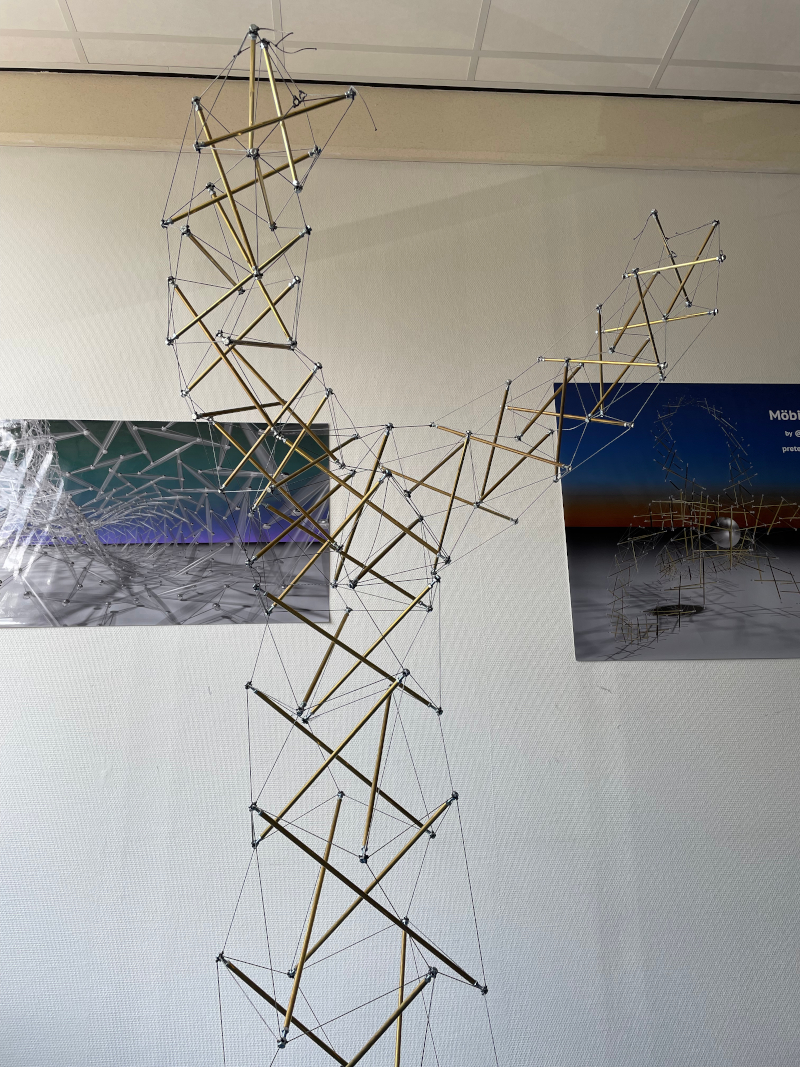
One day I decided to tighten it up a little and discovered that it was indeed not really stable enough, for example, to be easily transported.
It weakened further and at one point actually fell over due to a bar having bent crooked. That hurt. Cords sprung loose. Disaster.
But I could not give up on the Halo, no matter what.
I decided to rebuild it from scratch with mostly the same materials, but make it right this time!
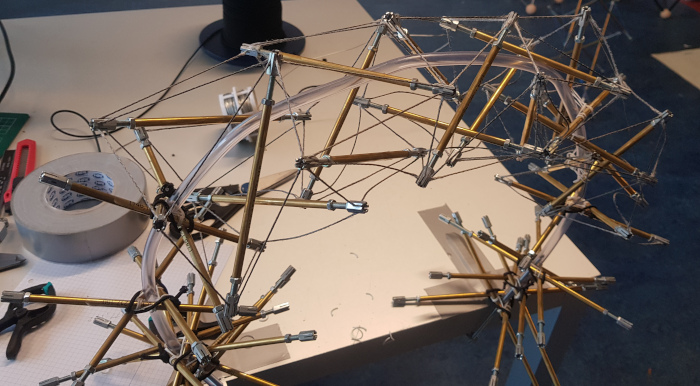
Bow tie style
I had just fully explored the bow tie pattern by building the very challenging Convergence structure, so I knew that this was right for the new Halo.
This way of constructing a tensegrity column resulted in a much greater resistance to bending than the technique typically used by Ken Snelson on his Needle.
The weight that the Halo stem has to carry would have made it collapse had I not come up with the guy wire trick, but maybe with bow tie style it could be strong enough.
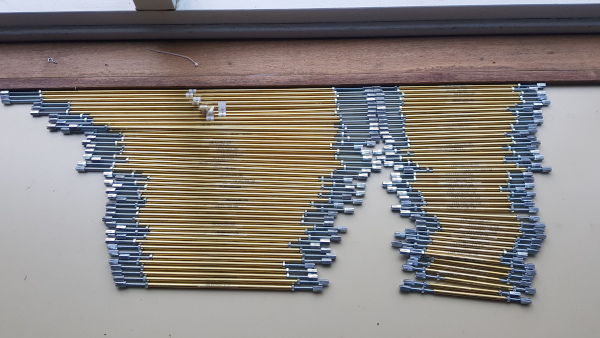
Gradual Thinning
When I did the strengthening, I had already resolved to use three different thicknesses depending on where a bar was located in the structure.
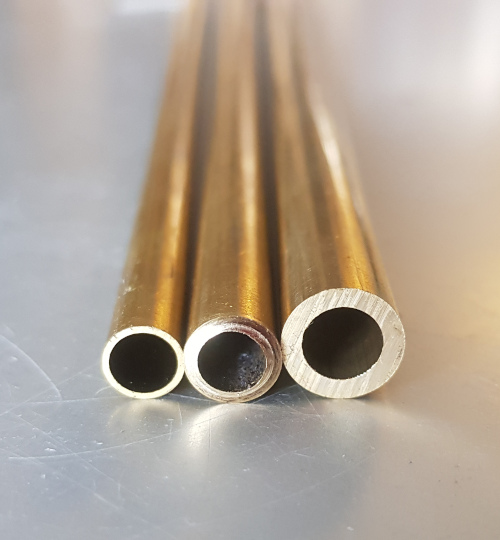
So I just took this strategy more seriously and bought the right numbers of very thick bars this time.
The thickest would be used for the entire stem, going from the bottom all the way up to the omni-twist where it split into the two arms.
The middle thickness would go for the three largest twists out into each arm, and the thinnest would be used to complete the loop between the two arms.
There were also two different thicknesses of Dyneema cord available, so I used thicker cords for the stem and first twist, and then thinner cord for completing the loop.
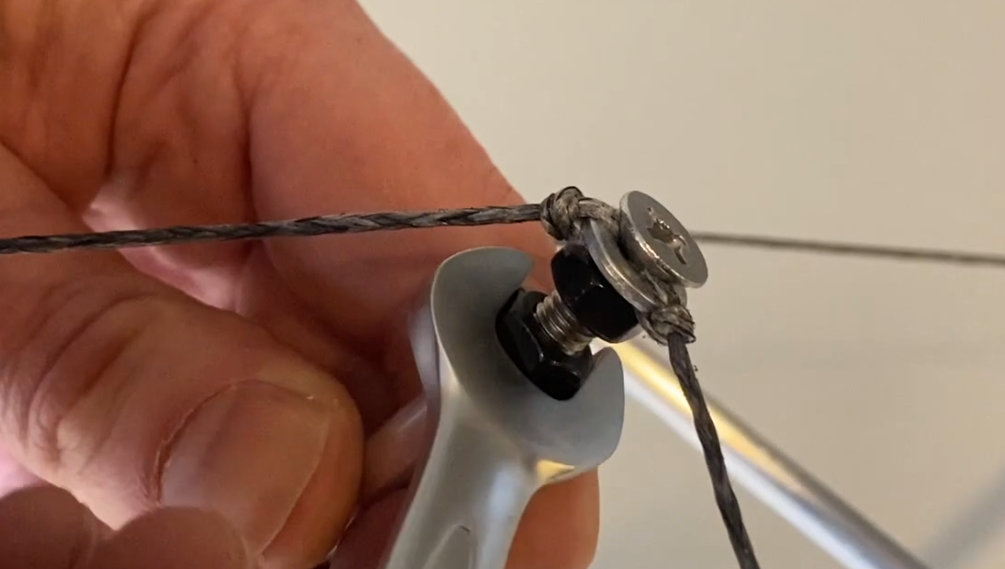
Rings and Bolts
Back last year I was still discovering ways to connect, and I had come up with the tulip technique.
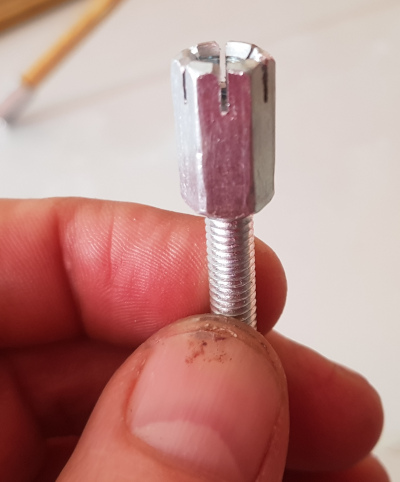
This was labor intensive and in the end it was not as strong as it needed to be, since the cords just slipped into the slots with no knot.
Since the first Halo was built, I had also developed new and better techniques for making the connections with the cords using knots and rings.
Just-in-Time building
The first time I built Halo, I was so naïve.
For some reason I started by preparing all of the bars and then numbering them, and I numbered all the cords.
It was a remarkably difficult puzzle to put it all together in the end, and it turns out that this is entirely not necessary!
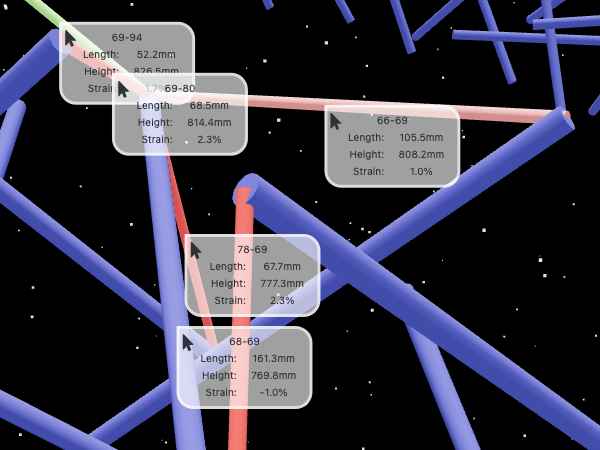
This time I continued with the much easier strategy that I had used to build Convergence, which involved cutting and preparing the cords just in time for when they needed to be added to the structure.
This way you never need to identify all the elements, and everything is done visually using the app at every step of the way.
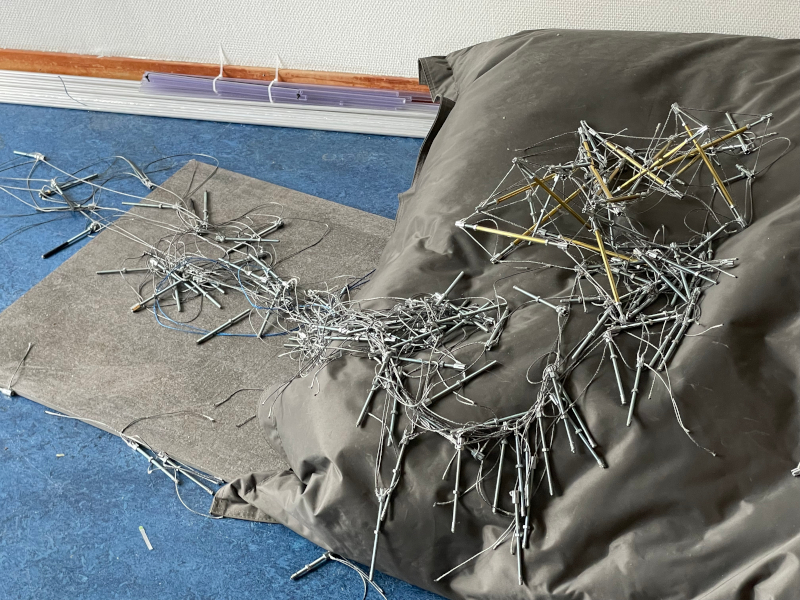
Cannibalizing
I generated a new model and collected the new thick bars for the stem and got to work.
Every time the next bar was required, I would take out bars of the existing Halo which were just long enough (or a little too long) and cut them to size.
I used the medium thickness for the first three twists of the arms.
Beyond the first three twists, I re-used all of the thinnest bars.
It was exciting to be competing the loop again, and this time with arms that were so much more rigid than last time a year ago, due to the bow tie pattern.

Gradually every bar was re-used, and all of the tulip-shaped ends and cords were disconnected.
I was able to re-use the cord as well by just cutting and preparing lengths that were shorter than the existing lengths in the previous Halo.
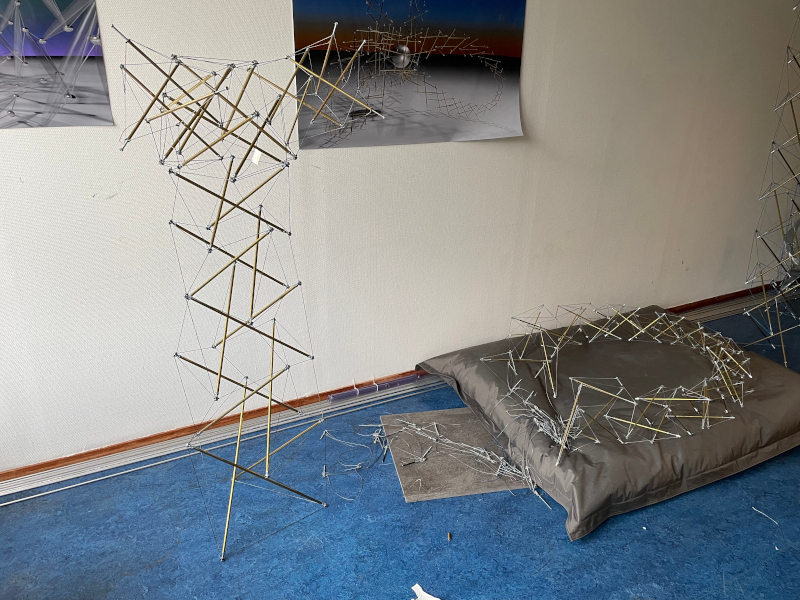
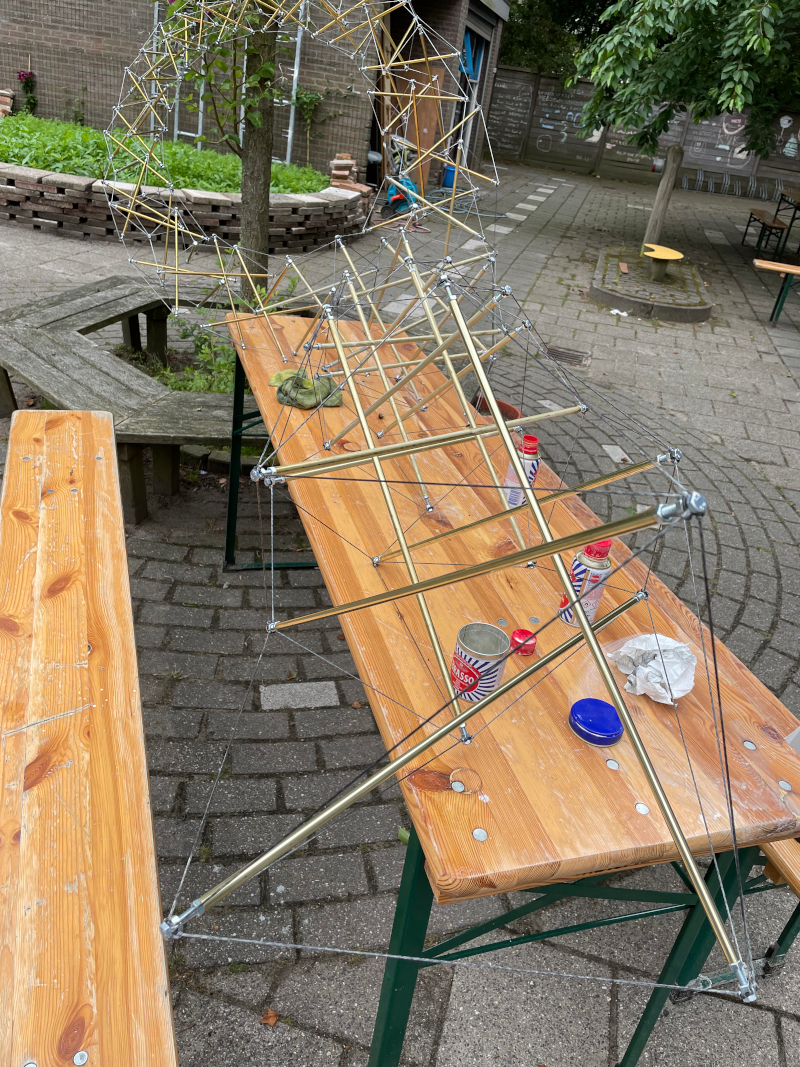
Rebirth!
Finally the new Halo stood tall, and it was very strong indeed.
The only thing that it really needed was some polishing, because the brass bars had gotten very dim looking from handling them so much.
Conclusion
The new Halo by Crane is easy to pick up and transport, and very strong. The Halo based on the bow tie pattern is much better!
Mission accomplished!.
More importantly, it no longer requires a guy wire since the stem is strong enough now!
There is only one cord holding it upright and it is attached to the top of the lowermost bar.
Projects:
2024-07-23: "Bouncy Wooden Sphere": what you can do with a discarded bed2024-04-23: "Twisted Torque": tied into a permanent twist
2023-03-27: "Easy 30-Push Sphere": one simple element
2022-10-05: "Glass and LED": going big and colorful
2022-09-29: "Fascia": dancing with tensegrity
2022-08-30: "Mitosis": the four-three-two tensegrity
2022-08-04: "Push Bolts for the People": finalizing design and getting it out there
2022-06-22: "Head to Head Push Bolt": M5 and M6 bolts symbiosis
2022-05-30: "Hiding Knots": bump up the aesthetics
2022-05-25: "Innovation with 3D Printer": the push bolt
2021-12-02: "Headless Hug": breaking a rule for the sake of symmetry
2021-10-28: "Rebuilding the Halo": finally got it right
2021-10-20: "Convergence": growing and reconnecting
2021-07-27: "120-Strut Brass Bubble": taking the next step up in complexity
2021-05-26: "30-Strut Brass Bubble": bouncing spherical tensegrity
2021-04-08: "Bow Tie Tensegrity": better bend resistance
2021-03-29: "Six Twist Essential": what if more hands could see?!
2021-01-25: "Minimal Tensegrity": no more tension lines than absolutely necessary
2021-01-18: "Degrees of Freedom": first adjustable hybrid tensegrity
2021-01-11: "Fractal Experiment": a tensegrity of tensegrities
2020-12-09: "Axial Tension": pretensing what is already pretenst
2020-11-02: "Halo by Crane - Part 2": the strengthening
2020-10-26: "Halo by Crane - Part 1": assembly complete but strength lacking
2020-10-12: "Brass and Tulips": a tight and strong tensegrity tower
2020-08-10: "Prefab Tension Tower": the tower of eight twists
2020-07-27: "Elastic Bubble": building with elastic ease
2020-07-13: "The Twist Sisters": left-handed and right-handed
2020-07-06: "Radial Tension": Pulling towards the middle
2020-06-22: "Diamond of Tension": Four pulls for every push
2020-06-15: "Prefab Tension": Separating compression from tension