PretensT
Tensegrity is a special kind of structure made of push and pull.
Project maintained by elastic-interval Hosted on GitHub Pages — Theme by mattgraham
Bubble’s Big Brother
Down the hallway from my studio is where my tensegrity friend Joël Keijnemans runs his one-man civil engineering company. I’m very lucky to have a tensegrity friend, because together we brainstorm a lot and think a lot about what the best next challenge should be.
Ultimately I built two of the 30 strut bubble from last time, and sold one to Joël. One was left-twisted and one right-twisted.
This time it was pretty obvious what to build next. We had to build the big brothers of the bubbles that we had and we were now able to squish and roll around. One left-twisted and the other right-twisted.
Well we did it, and these are Joël’s:

It ended up being a real collaborative effort, at one point going until the early morning hours when we almost had construction complete and couldn’t stop.
We had a lot of fun and certainly learned a lot about how to go about such a complex construction with prefab tension.
Big numbers prompt innovation
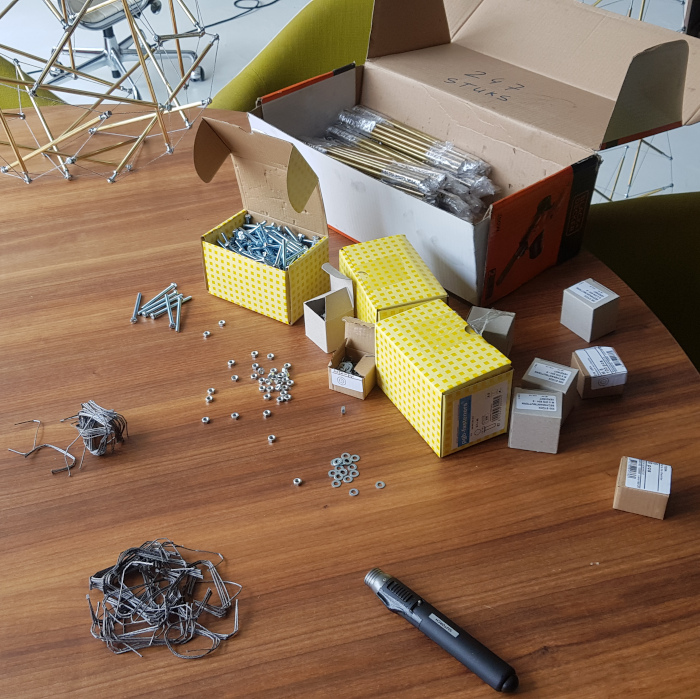
When you begin to realize how many identical parts you have to manufacture to build two brass bubbles this big, believe me, you think hard about how you can save time with every step.
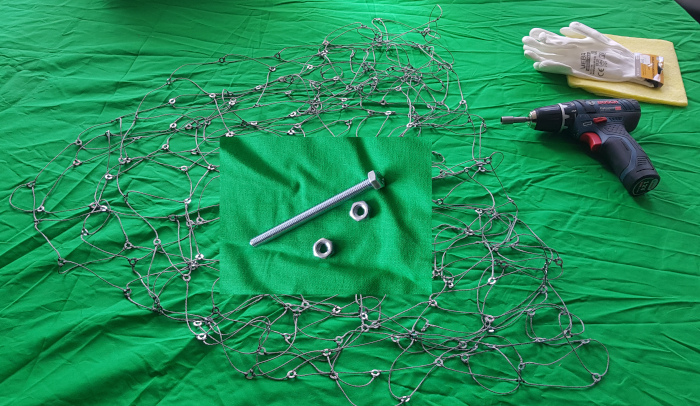
- 240 brass tubes
- 480 M5 bolts
- 480 M5 rings
- 960 M5 nuts
- 720 cord segments, three different lengths
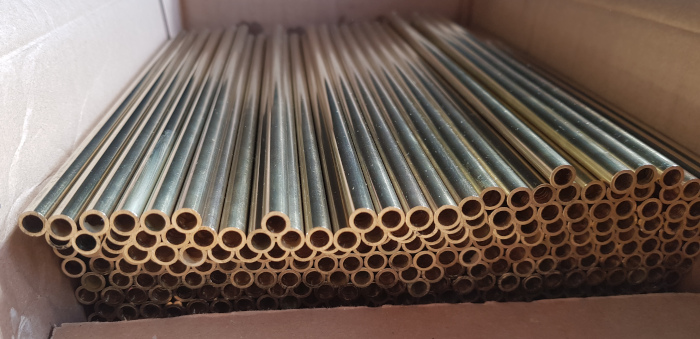
To save time, we went for luxury and had the 240 tubes cut for us by the metal store, since they have the equipment to do it more quickly.
However, we couldn’t really ask them to polish the tubes so that was something that we had to do beforehand, and it took some hours. The end result was very nice.
Many many
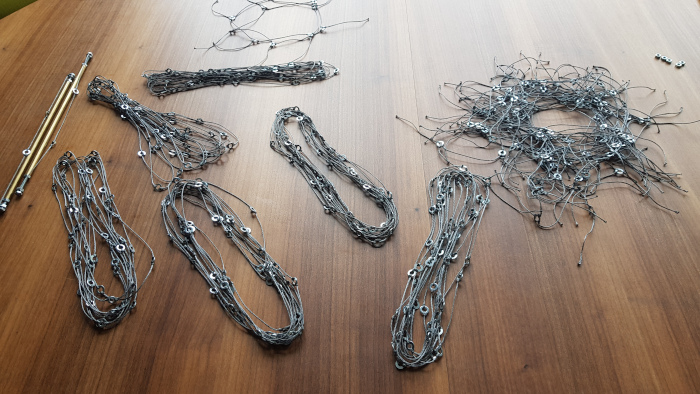
But another big challenge was all those cord segments!
Since we knew we had to cut many segments, we decided to create a kind of cutting mold, actually three of them, for the different lengths.
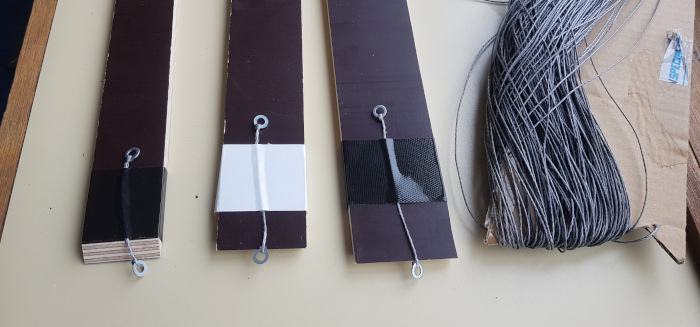
The distance around these strips of wood corresponded to the lengths we needed.
To get the lengths right, we measured the ring center to ring center distance, which means that this is the effective length after the knots are tied.
We could basically mass produce the cords by wrapping the Dyneema cord around the strips of wood and then cutting in one swoop with the hot knife.
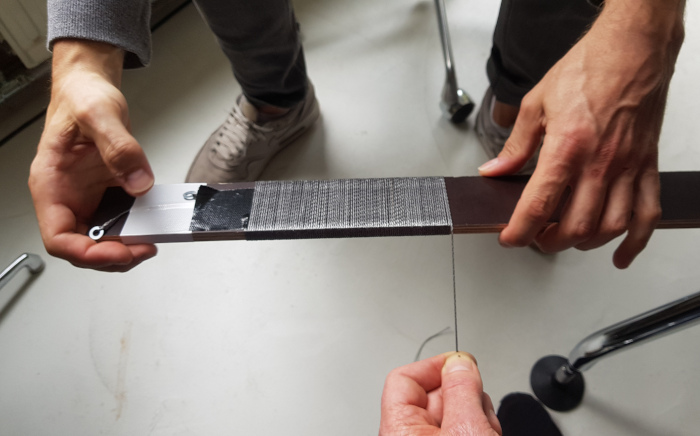
I made a big heat shield with many slits so I could also quite quickly produce the cord terminations as well.
Now, putting the heads on the cord segments is done with a quick flash melting of the end of the Dyneema cord using a blowtorch.
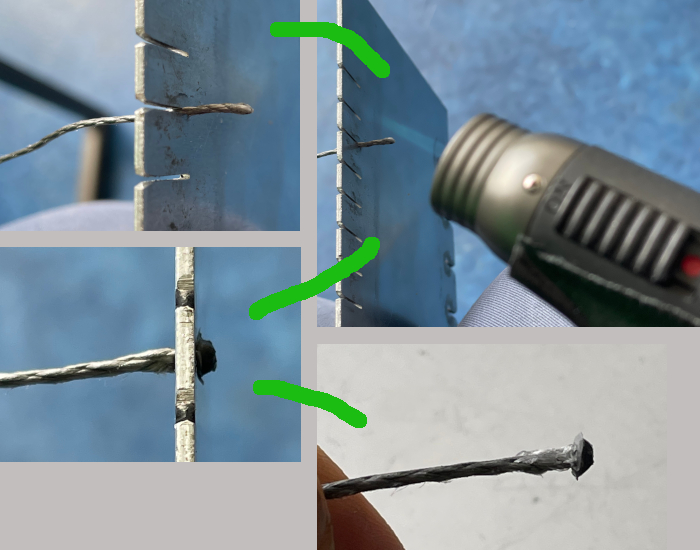
Even a simple knot doesn’t slip loose when the end of the cord has a little solid head on it. That’s the trick, for prefab tension.
Connecting the network
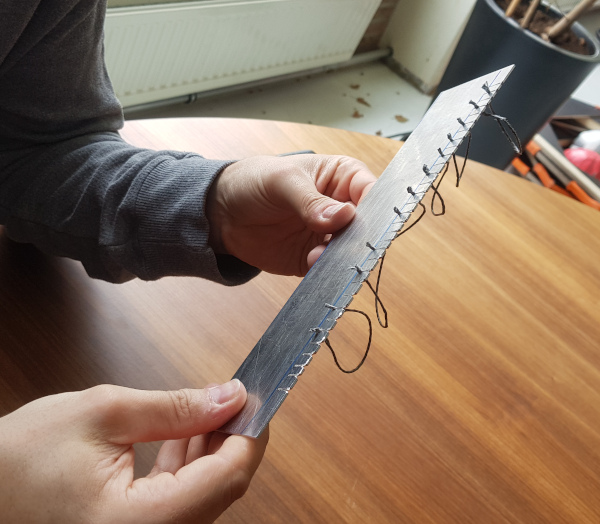
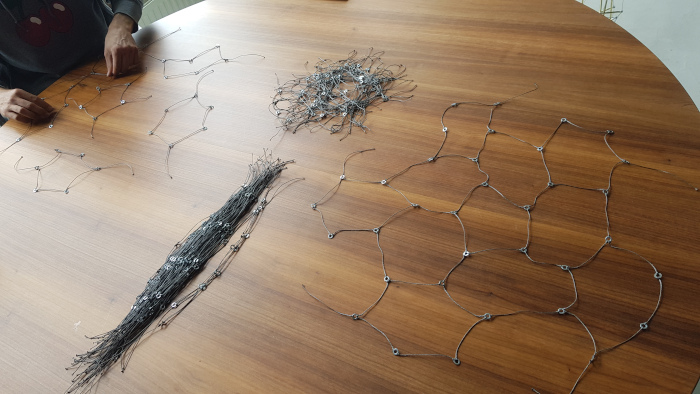
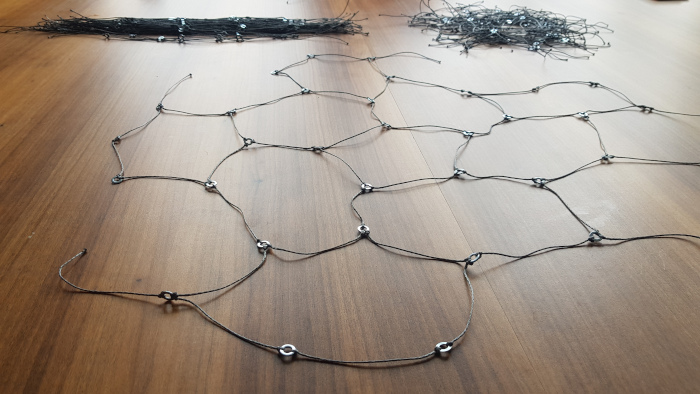
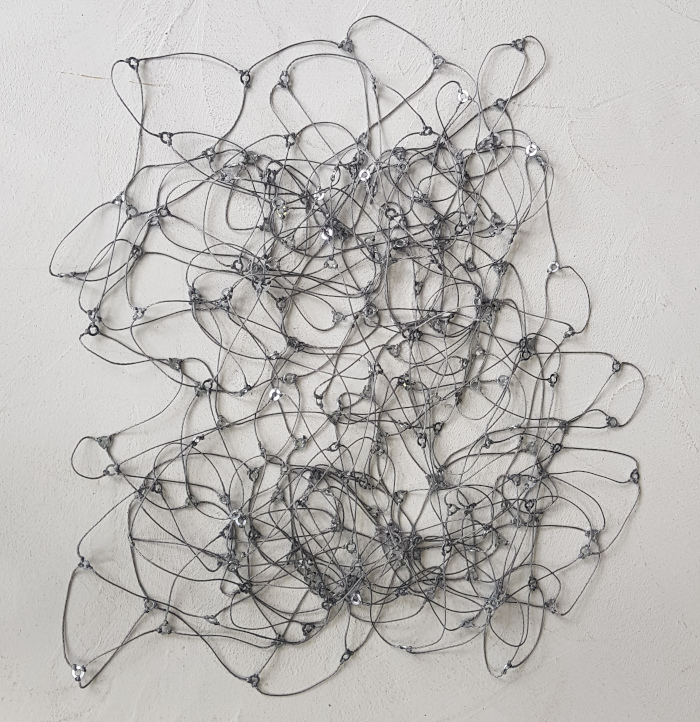
With all the cord segments cut and terminated properly, we started connecting the network together by knotting the cords onto rings.
This gave us the chance to prepare all of the repetitive structures individually beforehand.
- hexagons
- pentagons with a “star” of cords
When these structures are complete, you have used up all the rings and all the cord segments, so there are no more little parts lying around.
And you also now have bigger parts that just need to be connected together.
This is where the topology gets interesting, because with prefab tension you expect to assemble the tensegrity’s tension network while it is completely slack.
This is initially quite straightforward once you’ve internalized how things fit together, but when you reach a certain size you start to recognize that it has to go from a two dimensional network assembled on the table to a three dimensional object.
We wanted to delay the wrapping around into 3D as long as possible so we moved to the floor where there was more space.
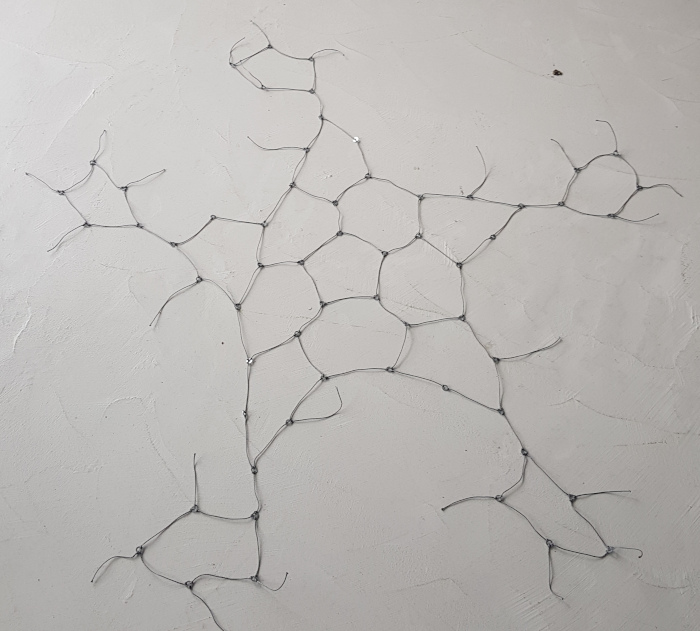
The further you go, the more trouble you run into keeping track because the curvature is there in the topology of the connections but the floor is still flat.
It became literally tricky enough that we made mistakes and had to disconnect and reconnect elsewhere to debug.
The main rule was very clear: only three cords per ring. However, when you make this many knots, you eventually tend to let your mind wander.
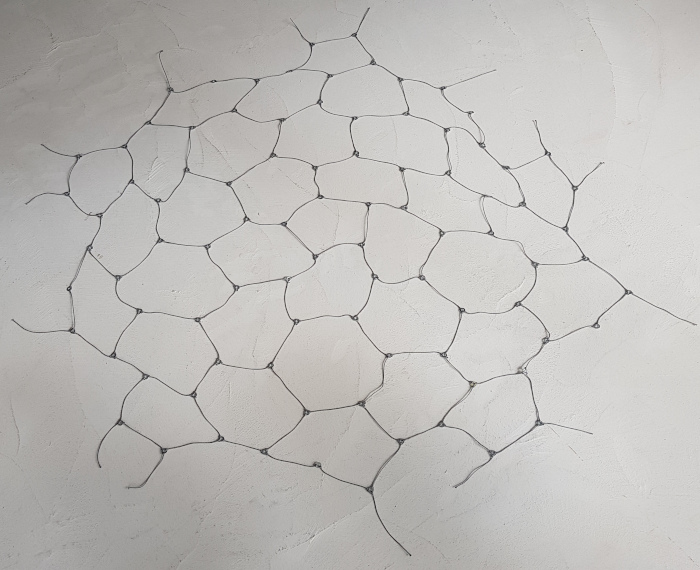
After painstakingly kind of “sewing” up the parts that were to become the two hemispheres we actually completed all connections!
Isn’t it beautiful?! :)
Alright, you have to be a real prefabricated-tension tensegrity fanatic to truly appreciate the beauty of the above bag of tension.
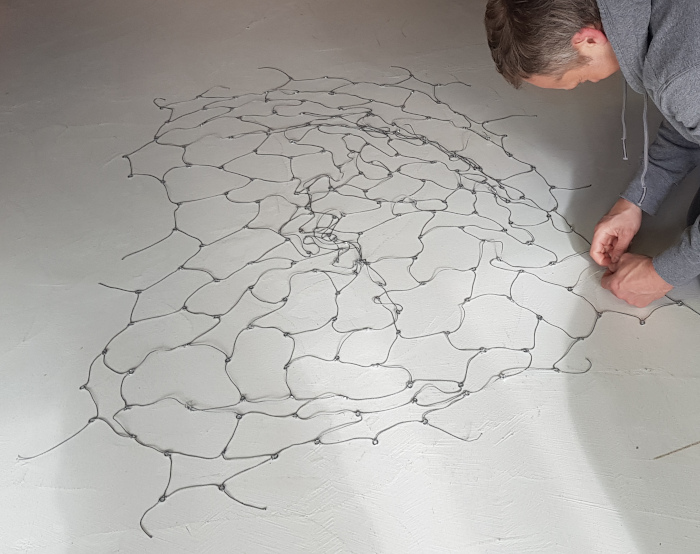
Assembly
All that remains is the compression, so we began the assembly process. That involves lots and lots of turning of bolts, and that’s not what you want to do by hand.
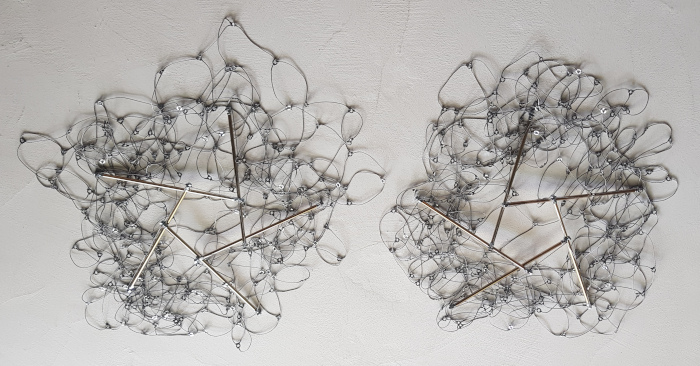
One interesting thing to note is that we built the exact same bag of tension, and our goal was to make two bubbles of opposing spin (chirality).
In other words, the tension doesn’t dictate which spin the bubble eventually gets, it’s agnostic.
That comes with the first step here to build the first spiral pentagon.

To make sure we didn’t get off on the wrong foot, we made sure that our initial spiral pentagons were in the proper opposite directions.
Soon we found it useful to hang the growing structure up by its initial pentagon so that the rest could just hang down.
This made it a bit easier to get each new tube inserted between the right two rings.
Even so, this in itself was remarkably tricky and here as well we ended up making errors that we had to correct by disconnecting and reconnecting.
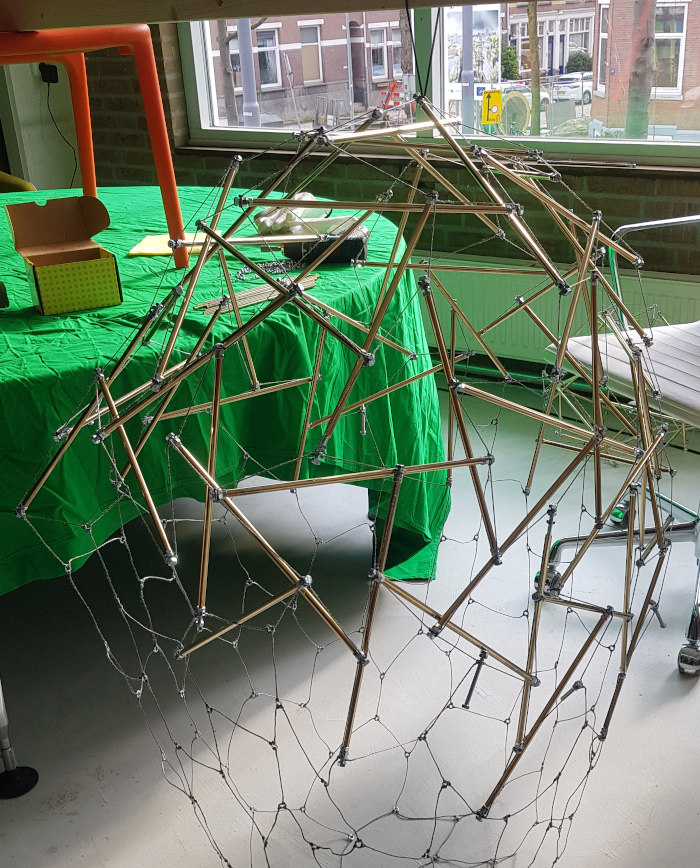
This was about midnight after many hours of assembly, but we could not stop until we had everying connected properly.
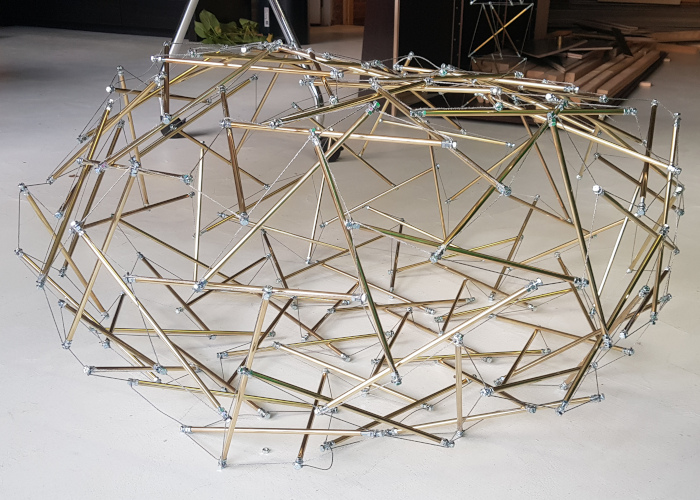
Without the bars extended, the bubble sags down, shaped a little bit like a red blood cell. You can sort of roll it, but it’s like a half-empty water balloon.
For us, though, this was mission accomplished and we went home satisfied.
Conclusion
I came in the next morning and spent a few hours turning the many many nuts so that the bars extended long enough.
Eventually it got very tight indeed!
It could actually stand on five points, and the total weight was 7.5 kilos so that was impressive.
That was actually the question that I had before we embarked on this project: “Can it stand on five points?”. In other words, could we get it tight enough for that?
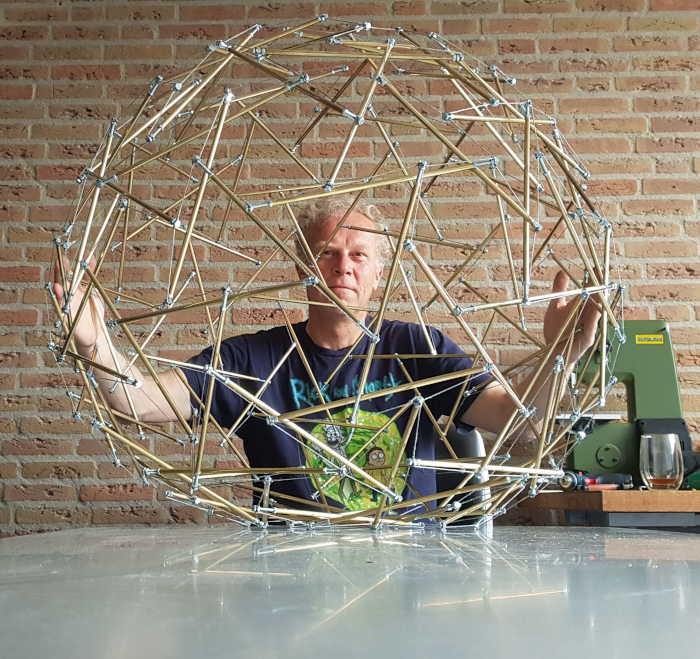
When it’s that tight, it actually really starts to behave like a bubble. But it’s a bubble that mysteriously doesn’t contain anything.
I bounced it on the table to show what it was like.
Projects:
2024-07-23: "Bouncy Wooden Sphere": what you can do with a discarded bed2024-04-23: "Twisted Torque": tied into a permanent twist
2023-03-27: "Easy 30-Push Sphere": one simple element
2022-10-05: "Glass and LED": going big and colorful
2022-09-29: "Fascia": dancing with tensegrity
2022-08-30: "Mitosis": the four-three-two tensegrity
2022-08-04: "Push Bolts for the People": finalizing design and getting it out there
2022-06-22: "Head to Head Push Bolt": M5 and M6 bolts symbiosis
2022-05-30: "Hiding Knots": bump up the aesthetics
2022-05-25: "Innovation with 3D Printer": the push bolt
2021-12-02: "Headless Hug": breaking a rule for the sake of symmetry
2021-10-28: "Rebuilding the Halo": finally got it right
2021-10-20: "Convergence": growing and reconnecting
2021-07-27: "120-Strut Brass Bubble": taking the next step up in complexity
2021-05-26: "30-Strut Brass Bubble": bouncing spherical tensegrity
2021-04-08: "Bow Tie Tensegrity": better bend resistance
2021-03-29: "Six Twist Essential": what if more hands could see?!
2021-01-25: "Minimal Tensegrity": no more tension lines than absolutely necessary
2021-01-18: "Degrees of Freedom": first adjustable hybrid tensegrity
2021-01-11: "Fractal Experiment": a tensegrity of tensegrities
2020-12-09: "Axial Tension": pretensing what is already pretenst
2020-11-02: "Halo by Crane - Part 2": the strengthening
2020-10-26: "Halo by Crane - Part 1": assembly complete but strength lacking
2020-10-12: "Brass and Tulips": a tight and strong tensegrity tower
2020-08-10: "Prefab Tension Tower": the tower of eight twists
2020-07-27: "Elastic Bubble": building with elastic ease
2020-07-13: "The Twist Sisters": left-handed and right-handed
2020-07-06: "Radial Tension": Pulling towards the middle
2020-06-22: "Diamond of Tension": Four pulls for every push
2020-06-15: "Prefab Tension": Separating compression from tension