PretensT
Tensegrity is a special kind of structure made of push and pull.
Project maintained by elastic-interval Hosted on GitHub Pages — Theme by mattgraham
Starting with “Mitosis”
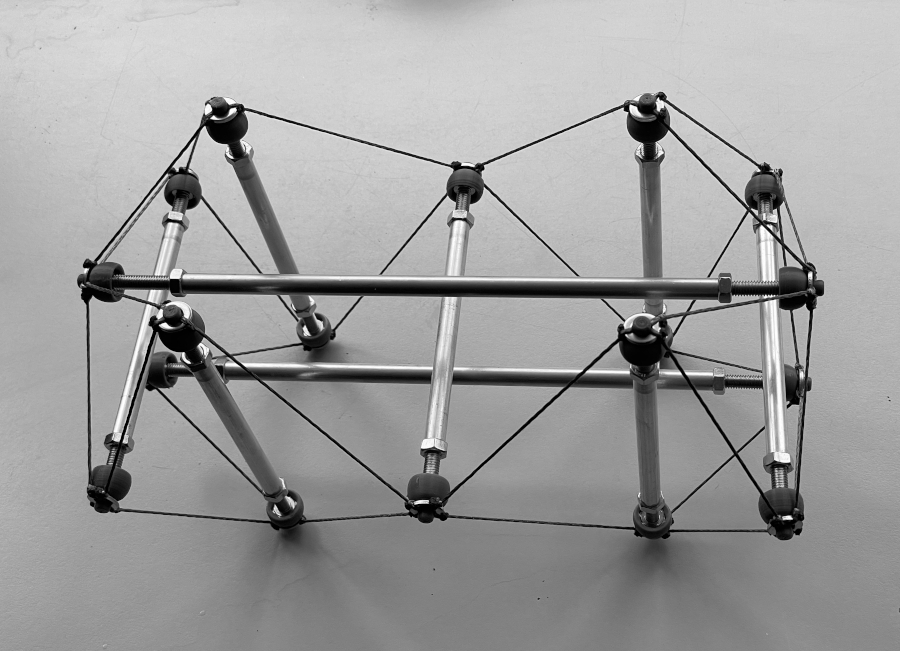
Some time ago I built a structure I called “mitosis”, which has a very interesting degree of freedom, because it naturally torques.
That is to say, if you grab the left side with one hand and the right side with the other, you can twist the ends in opposite directions and it will initially not provide much resistance.
The resistance increases according to how far you have twisted. Imagine picking this structure up and twisting it both ways:
(Better yet, order one so you can try this with your own hands!)
Embrace the torque
It turns out that you can also remove the center bar without much change in twisting behavior.
After a while I started to call this structure “torque” instead of “mitosis” because of this twisting freedom, which I haven’t had in other structures built so far.
I figured out how to model the structure in the tensegrity lab software that I’m building, and then I added some cross-wise pushing and pulling virtual “muscles” to enable torquing the structure on command.
Alright, I may have gotten carried away a little, but once I could build and animate this structure, I had to make a fun video of it.
Adding four cables to freeze the twist
But if this structure can twist, and if the resistance increases, it should be possible to simply tie it in its twisted shape so it freezes that way!
I did this as an experiment and the result was quite nice.
The blue cables here were added to freeze the torque in twisted state.
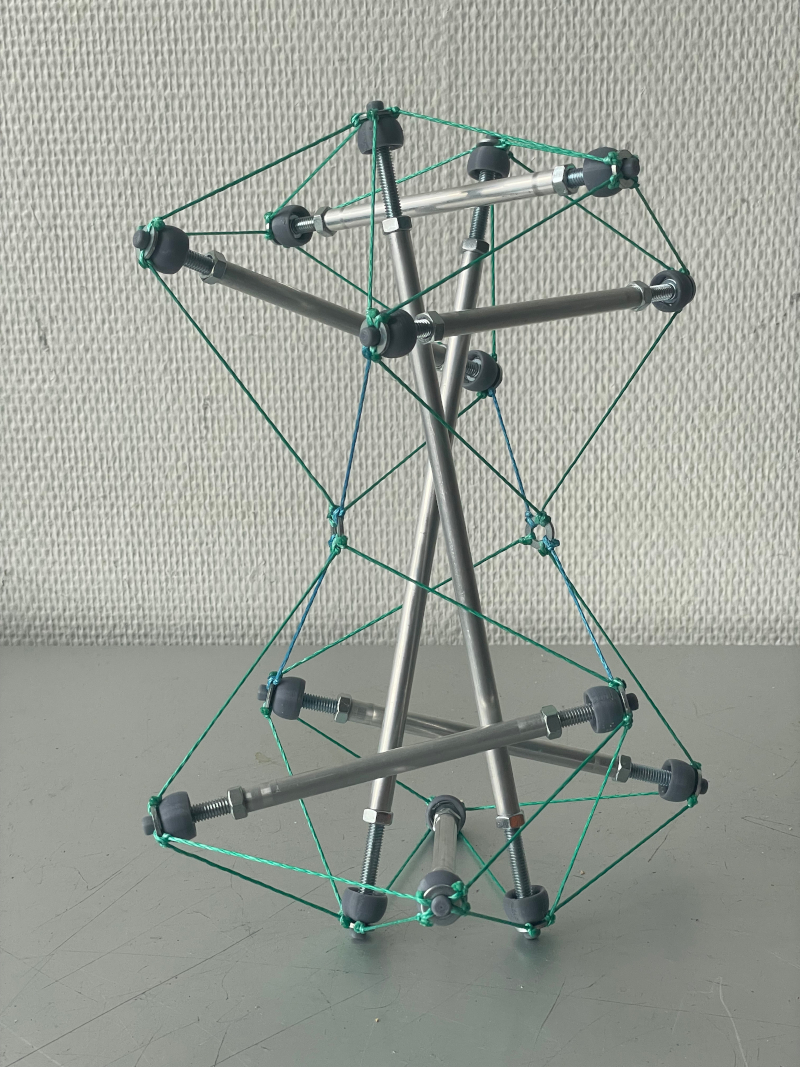
Once I saw this structure I began to really like it, because suddenly I have a shape with very interesting angles which depend on the degree of twist.
Every compression strut is rotated with respect to what was originally its parallel “brother” strut.
Nowadays in the software I’m building tensegrity structures based on individual “bricks” which connect triangle-to-triangle, so this is now a whole new kind of brick!
The Twist goes both ways
Needless to say, it is once again important to distinguish two different ways to twist this structure, a left-handed and a right-handed way, just like the twist sisters.
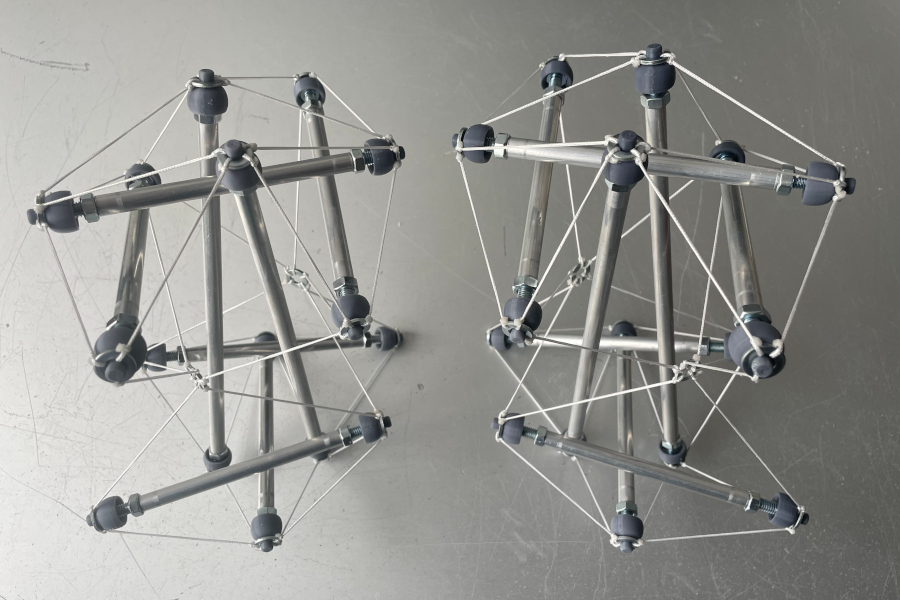
So we start with two “torque” structures with no extra twist-preserving cables:
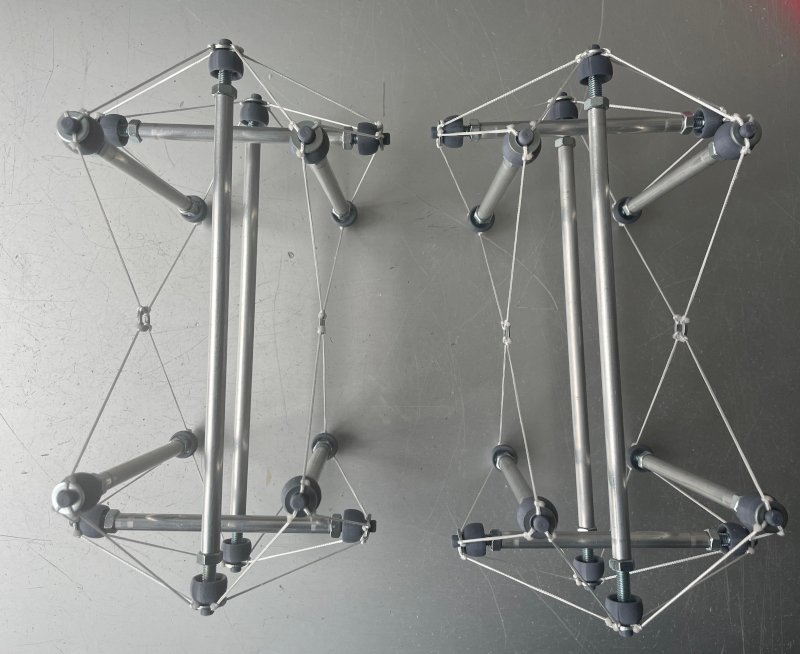
Adding the four new cords in opposite ways creates the two differently-twisted torque structures.
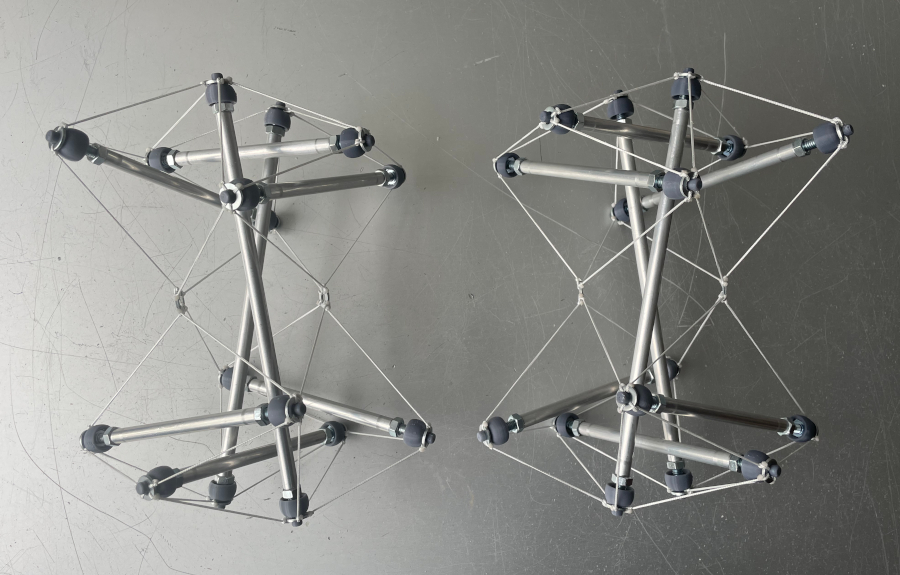
They stand up nicely on one of their triangular “faces” and it’s very good to see them side-by-side so the various twists you see in one of them is comfortably mirror-imaged in the other.
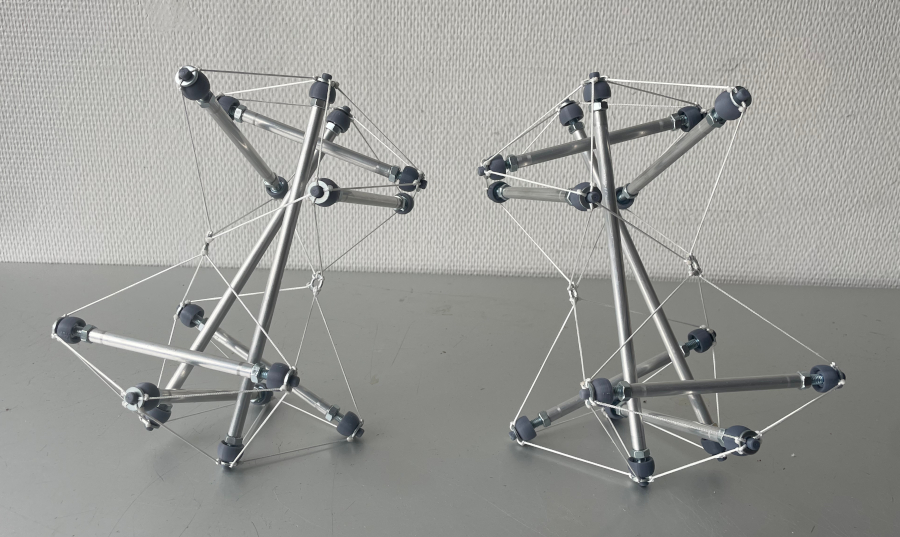
It’s interesting to stare at this pair of structures until you can really internalize the fact that they are opposites, as if you had just one and the other was in the mirror.
Curves of spring steel
One thing you realize when you have these torque structures in your hands is that you can tighten up the entire structure by lengthening more or less anywhere.
It’s kind of like the different directions work independently, so the four shorter struts can be lengthened or the two longer struts can be lengthened, to tighten the structure.
I decided to try and make a kind of hybrid structure, with the same kind of struts material for the two push struts, but spring-steel for the remaining four shorter struts.
So I made the structure’s big sister:

There’s something about seeing all those curves sweeping in their different twisted directions that makes this structure very elegant.
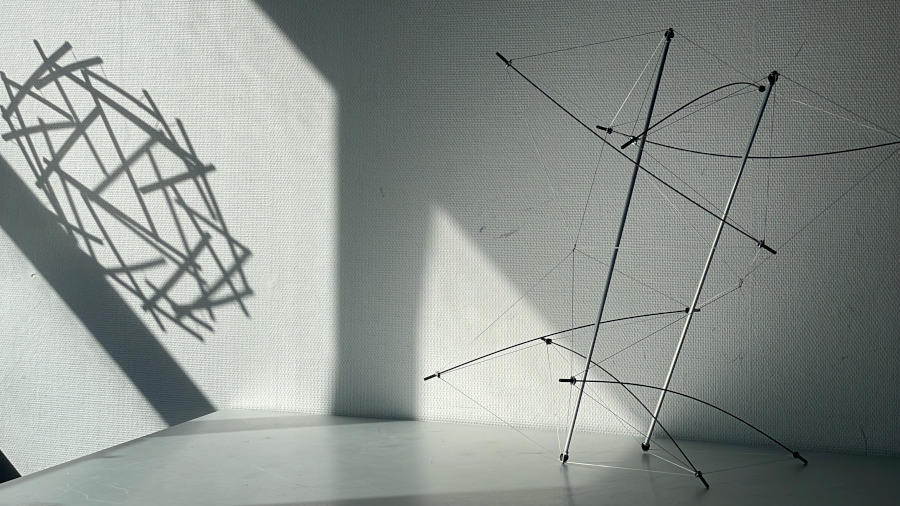
The curved struts are simply always pushing with all their force, while the two vertical struts are casually holding their ends apart.
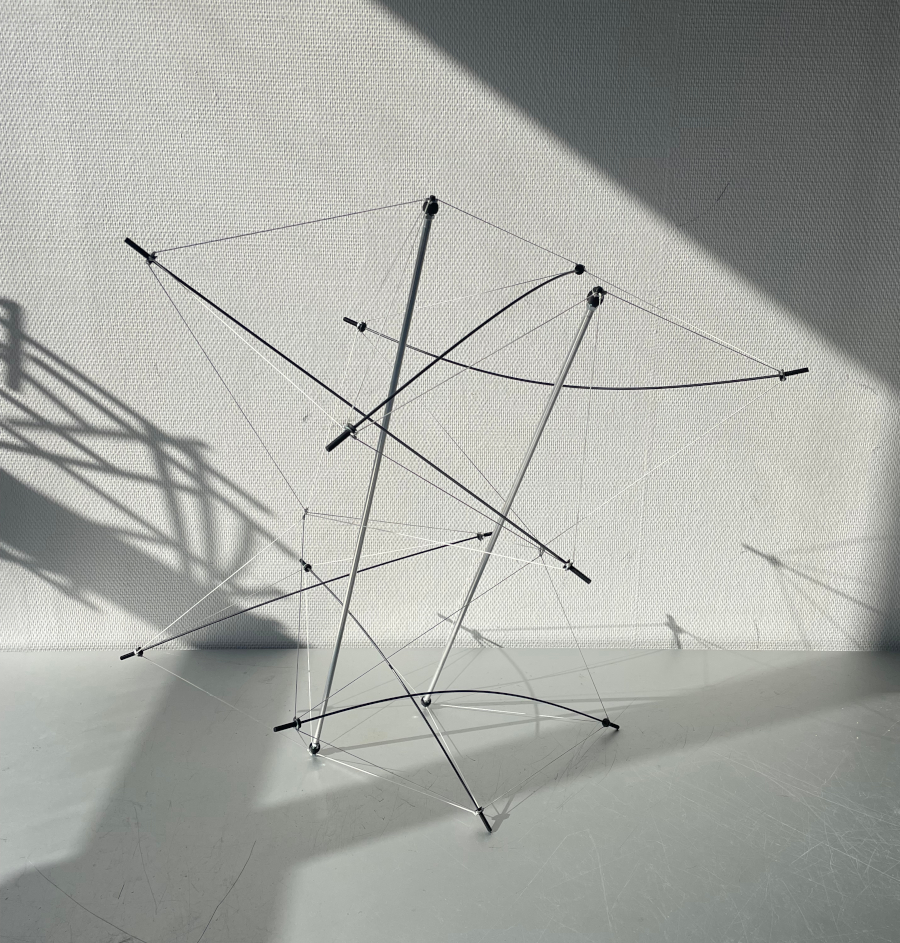
This is really an object that I can fall in love with.
Conclusion
This is an exciting new development!
I love the new angles that are suddenly available now that I can turn these twisted shapes into “bricks” in the software and start to build with them.
But then comes the next challenge!
To build these structures using the script language, I need to figure out how to name things, and with this twistiness it’s not easy at all!
After getting it wrong a couple of times (it’s remarkably tricky!) I decided to make a numbered free-twisting torque to allow me to get the names correct for the two permanently twisted ones.
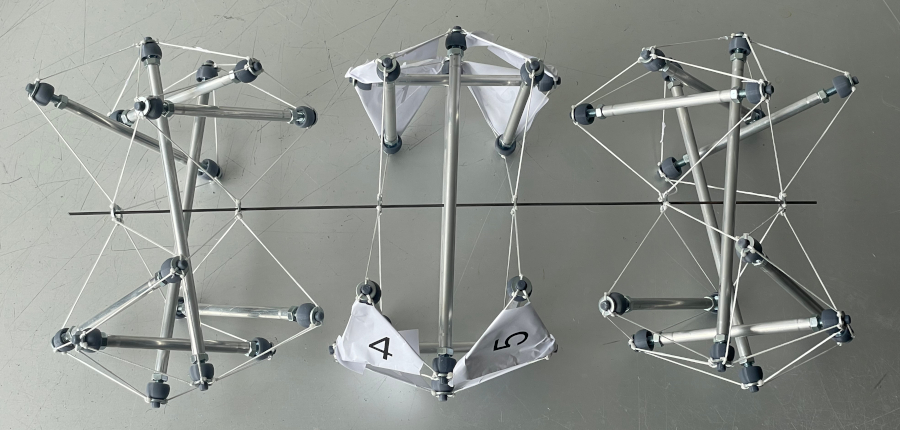
I’m guessing that few of you really understand how strangely tricky it is to get these names right, because I had no idea of it when I started.
Eventually I got my system worked out and now I can start to build virtual models using this twisted brick.
Stay tuned for that.
Projects:
2024-07-23: "Bouncy Wooden Sphere": what you can do with a discarded bed2024-04-23: "Twisted Torque": tied into a permanent twist
2023-03-27: "Easy 30-Push Sphere": one simple element
2022-10-05: "Glass and LED": going big and colorful
2022-09-29: "Fascia": dancing with tensegrity
2022-08-30: "Mitosis": the four-three-two tensegrity
2022-08-04: "Push Bolts for the People": finalizing design and getting it out there
2022-06-22: "Head to Head Push Bolt": M5 and M6 bolts symbiosis
2022-05-30: "Hiding Knots": bump up the aesthetics
2022-05-25: "Innovation with 3D Printer": the push bolt
2021-12-02: "Headless Hug": breaking a rule for the sake of symmetry
2021-10-28: "Rebuilding the Halo": finally got it right
2021-10-20: "Convergence": growing and reconnecting
2021-07-27: "120-Strut Brass Bubble": taking the next step up in complexity
2021-05-26: "30-Strut Brass Bubble": bouncing spherical tensegrity
2021-04-08: "Bow Tie Tensegrity": better bend resistance
2021-03-29: "Six Twist Essential": what if more hands could see?!
2021-01-25: "Minimal Tensegrity": no more tension lines than absolutely necessary
2021-01-18: "Degrees of Freedom": first adjustable hybrid tensegrity
2021-01-11: "Fractal Experiment": a tensegrity of tensegrities
2020-12-09: "Axial Tension": pretensing what is already pretenst
2020-11-02: "Halo by Crane - Part 2": the strengthening
2020-10-26: "Halo by Crane - Part 1": assembly complete but strength lacking
2020-10-12: "Brass and Tulips": a tight and strong tensegrity tower
2020-08-10: "Prefab Tension Tower": the tower of eight twists
2020-07-27: "Elastic Bubble": building with elastic ease
2020-07-13: "The Twist Sisters": left-handed and right-handed
2020-07-06: "Radial Tension": Pulling towards the middle
2020-06-22: "Diamond of Tension": Four pulls for every push
2020-06-15: "Prefab Tension": Separating compression from tension