PretensT
Tensegrity is a special kind of structure made of push and pull.
Project maintained by elastic-interval Hosted on GitHub Pages — Theme by mattgraham
Minimalism
I’ve always felt very excited and motivated by the idea of doing more with less, which is called “Ephemeralization”, and I’m always looking to optimize and minimize in both code and materials, and especially techniques because they are weightless!
So something about the previous project Degrees of Freedom triggered me.
It was missing some tension lines! Each joint had just 3 instead of 5, yet it stood perfectly! I clearly needed to revise what I thought defines a tensegrity.
I had tricked myself into thinking that the Snelson Needle structure was the defining set of tension and compression.
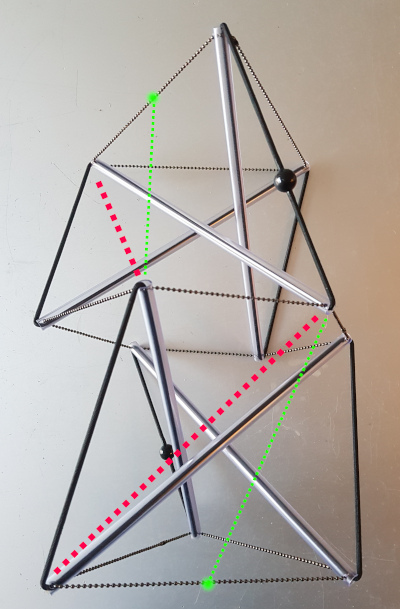
The red tension lines could actually be added to the Degrees of Freedom structure, and their role would be to pull these two twists together (but what you would be doing is limiting its degrees of freedom, so that kind of defeats the purpose, or at least the name).
The green tension lines would normally have been employed to pull towards the next twist above and the next one below, which in this case don’t exist (green spots).
Remember last time we saw the tension hexagon.
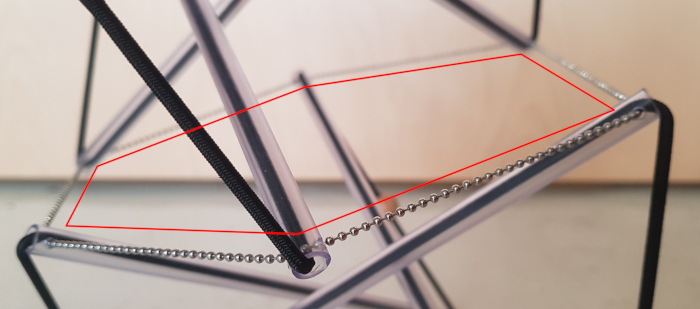
Normally in the structures we have built so far these hexagons are not flat, but are pulled into a zig zag shape by the tension lines which are missing in Degrees of Freedom.
Gradually I realized that this was a whole new direction opening up for construction!
Three Tension Lines
I was only able to stare at Degrees of Freedom for so long before I started wondering what this would be like with serious materials.
I had to get this structure in my head and find out how it feels in brass and dyneema!
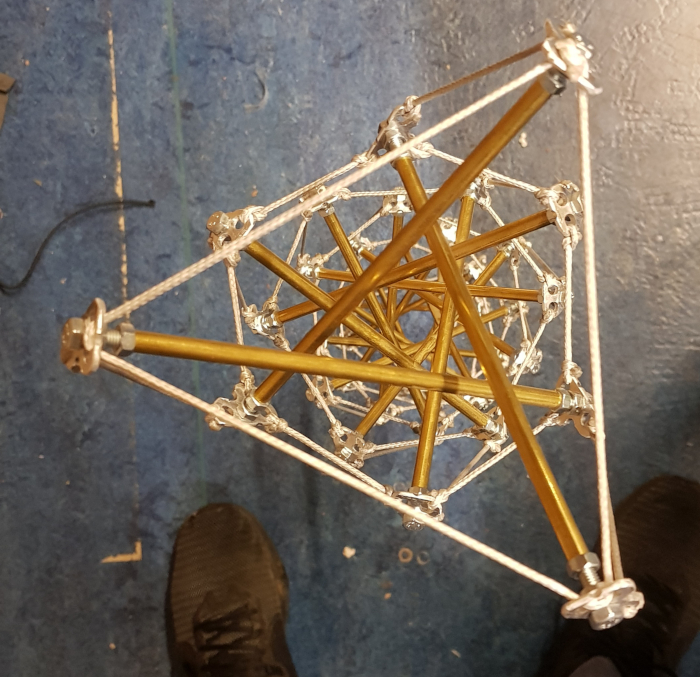
I made a little animation to meditate on, so I could get a feeling for what only the cords of a tower would look like with this minimal tension scheme.
So the challenge was to create a situation of very high tension, more than the bottom twists in Halo by Crane when they are carrying the whole weight (these can be plucked like a guitar and play fairly high note).
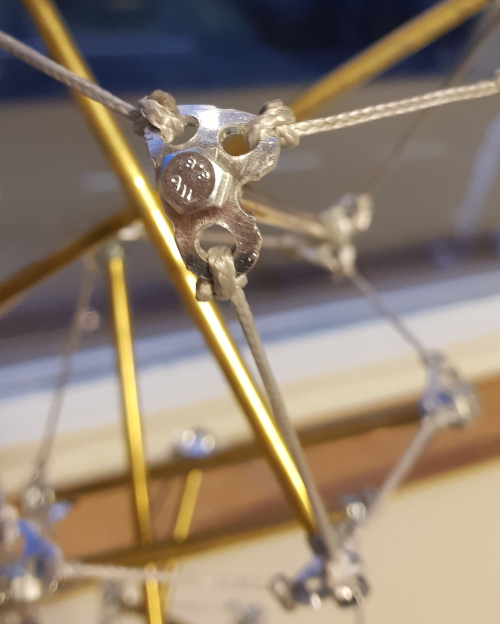
Aluminum Joints
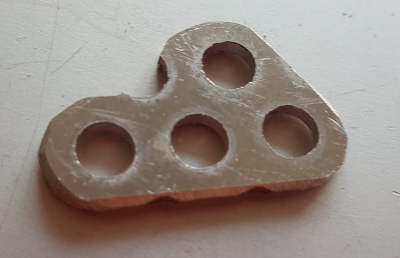
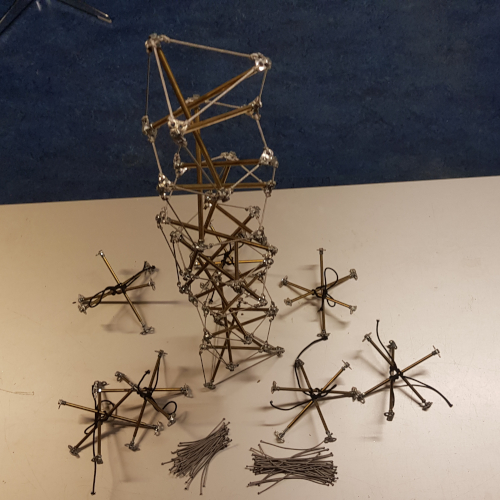
I returned to a piece of leftover perforated aluminum that I used a long time ago when building the Twist Sisters, because that would make a strong joint.
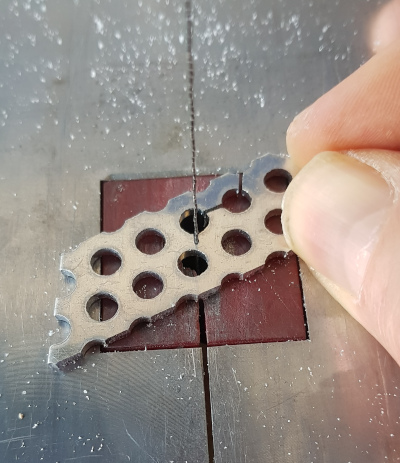
I needed joints to bring together just 3 tension cords, so I gave each one of them its own hole, leaving one hole in the middle for the bar.
The three holes in a row makes some sense because the tension hexagon between adjacent twists will be flat now, so it would be cable-bar-cable. The third hole will be to connect the twist from bottom to top.
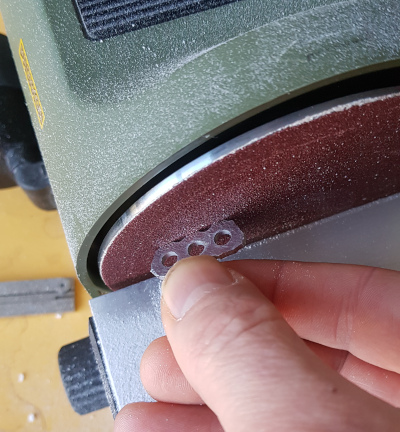
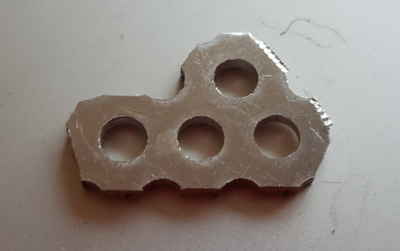
To make it a little more attractive I sanded off the edges a bit.
Not perfect, but at least there were no sharp edges anymore.
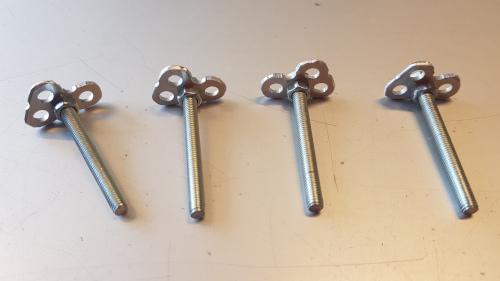
To complete the joint, it had to be tightly attached by its middle hole to the bolt that was to be inserted into the hollow brass tube.
Note that there are left-handed and right-handed joints because the third hole is for the tension line of either a right or left twist. The angle of the third hole was very nice!
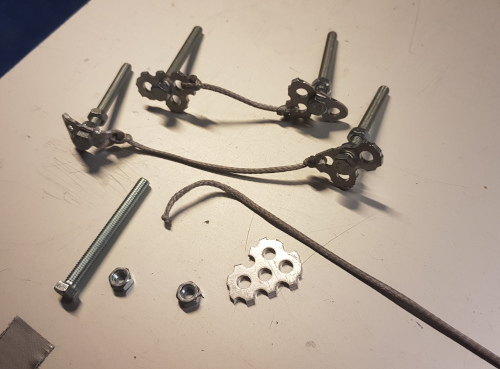
A little experimentation with cutting and knotting Dyneema cord segments to the holes, and I was ready to start building!
This is using a thicker kind of Dyneema than previously used, which was vastly stronger than it needed to be. The tension would not be the weak point, that’s for sure.
The fact that we had already discovered a very efficient way to create knotted cord segments in the Fractal Experiment was remarkably helpful.
There are two nuts required for every bolt, because together they will determine the distance that the bolt extends out of the tube, for adjusting the effective length of a bar.
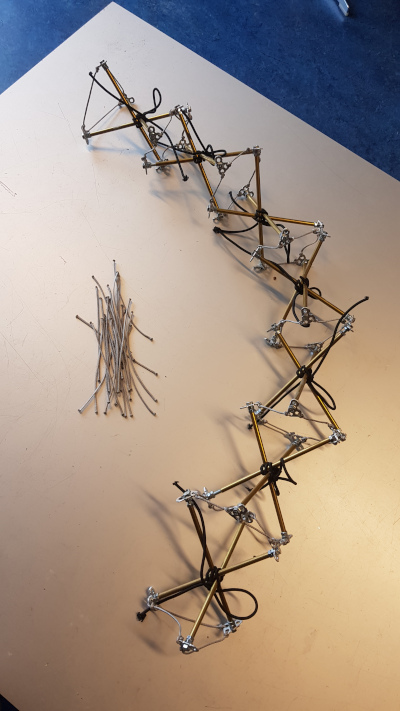
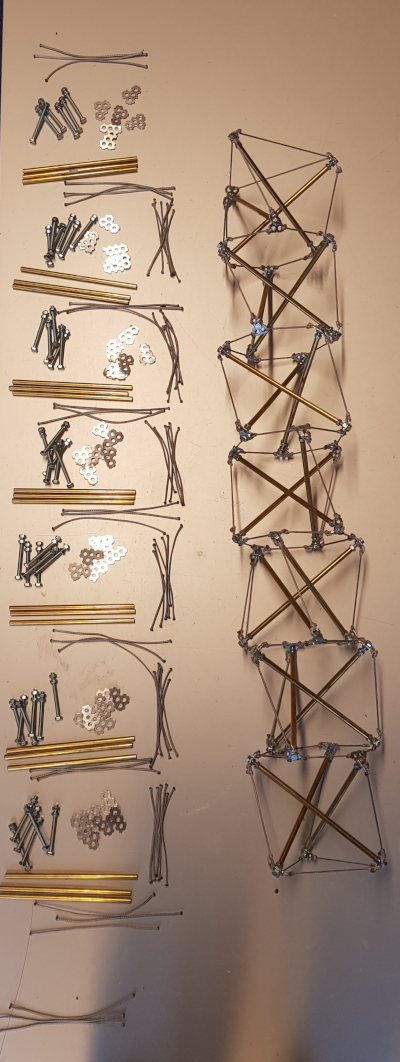
Assembly
Cutting the brass bars was much easier than for Halo by Crane since they could all be exactly the same length.
I tied up the twists beforehand with an elastic cord so that it became possible to construct the tension hexagons between twists.
I opted this time, as an extension of this experiment, to use only left-handed twists. I wanted to see how the spiral shape would make it behave.
This was going to get longer, so it was best to switch to horizontal.
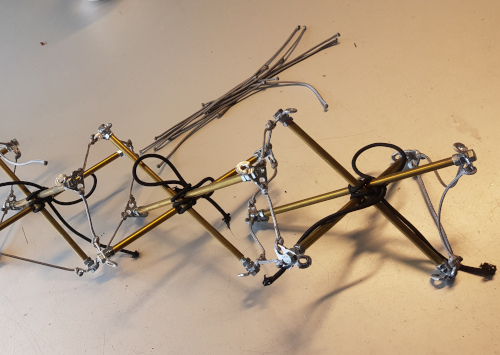
Eventually I had all inter-twist hexagons complete, and the only thing remaining was to add the final set of slightly longer cord segments.
Once I had the final set of cords in place, all that was left was to tighten up the bolts, extending the effective length of the bars, and raising the tension to a whole new level.
Having less cords actually also made it easier to get in there with a wrench and tighten for real.
It reminded me of the very first project I did Prefab Tension where I first felt high tension.
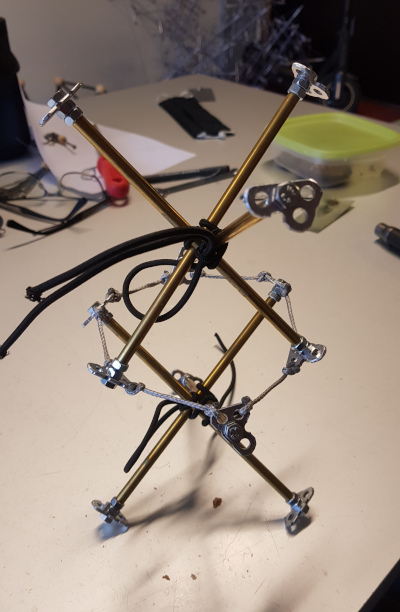
Standing Tall and Twisty
So there it was!
The cords were so tense that the hexagons of tension were basically as flat as the ones in Degrees of Freedom, but this was heavy brass.
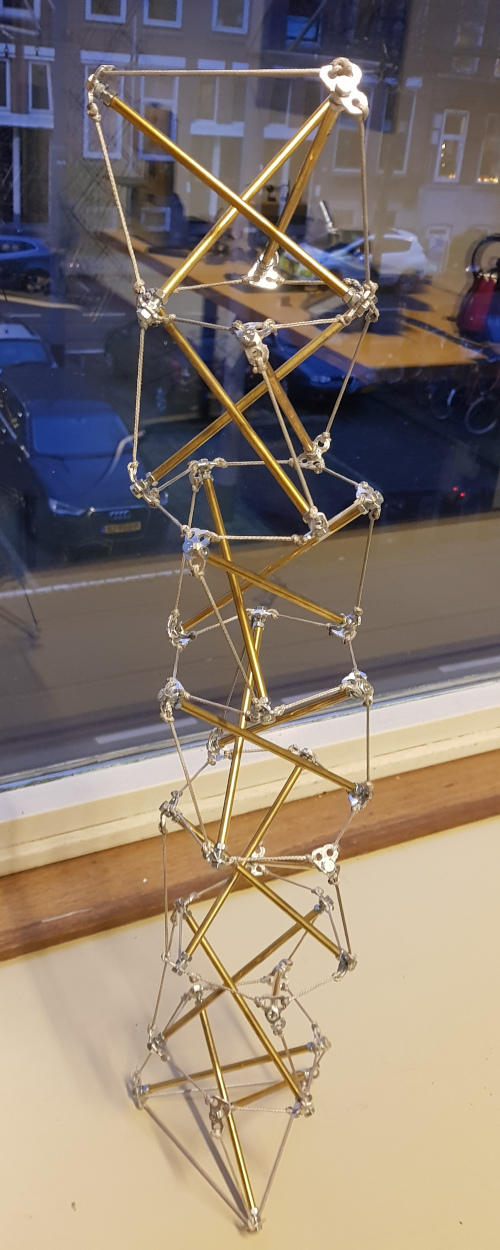
It surprised me that I was able to make it this straight! Look carefully and you can also see that every one of the twists is left-handed and there is a kind of spiral shape.
I was mesmerised!
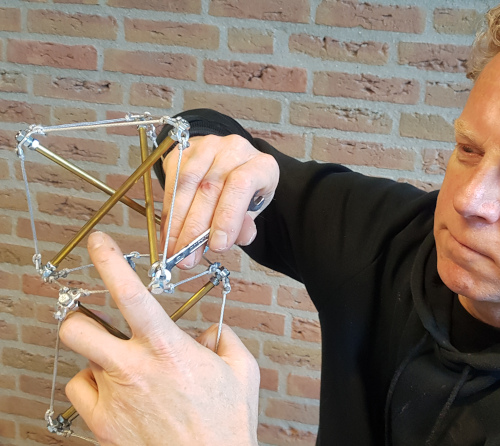
I bent the aluminum joints a bit to make them take on the appropriate angles to carry the extreme level of tension.
But, since I still had more materials, it started to seem one-sided, so actually incomplete!
Need to make its Twist Sister
I had the left-handed tower, so I couldn’t help immediately building the right-handed one.
All the parts were the same, so that was the first challenge.
Then I just had to assemble the twists that I had tied up in the right-handed way.
Assembling was even a bit easier this time because I had the other one still fresh in my mind.
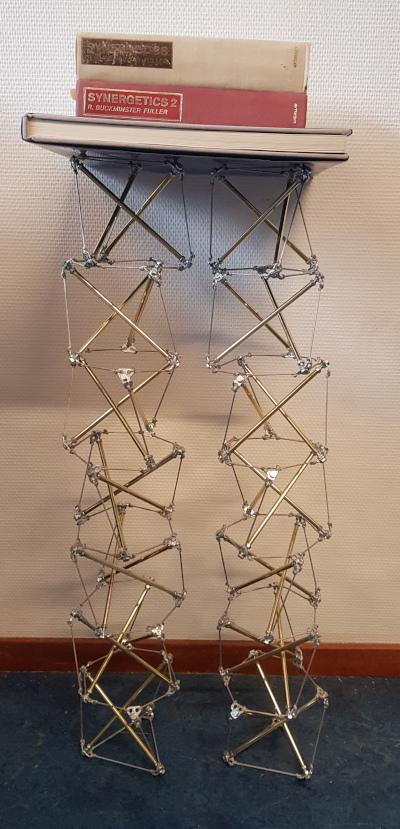
After the second one was completed, I naturally had to subject the pair to the Bucky Fuller Test with both volumes of Synergetics.
That proved too easy, so I upped the ante by adding Kenneth Snelson’s book “forces made visible”. This was to be full tensegrity challenge! The columns were so tight that they didn’t break a sweat holding this up - it was easy.
I had to balance it all against the wall because these towers are not nearly as rigidly straight as the ones up until now (an advantage in some respects, as we’ll see!).
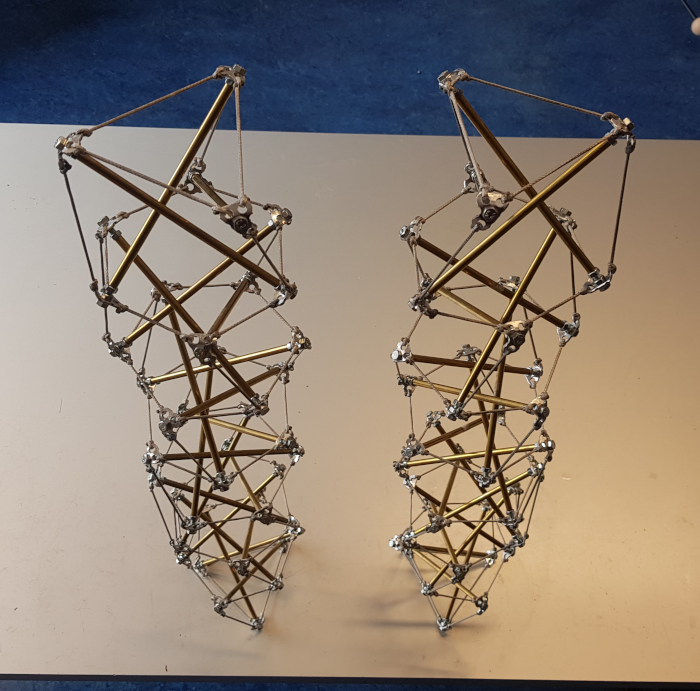
Viewing them from certain angles starts to remind you of legs, especially since they have opposing spirals.

Conclusion
This was an exciting one, because I feel like a whole new door has opened up.
I can now make tensegrity towers with a whole lot less complexity since so many of the tension lines are just missing. I could see them coming back, but then differently. Stay tuned.
The price that you have to pay for this simplicity is that you have to raise the tension with a couple of orders of magnitude.
Also exciting was that this was the first tower I had built with all twists being the same. I did that to find out what kind of spiral dynamic behavior could be observed.
Here’s the result:
Projects:
2024-07-23: "Bouncy Wooden Sphere": what you can do with a discarded bed2024-04-23: "Twisted Torque": tied into a permanent twist
2023-03-27: "Easy 30-Push Sphere": one simple element
2022-10-05: "Glass and LED": going big and colorful
2022-09-29: "Fascia": dancing with tensegrity
2022-08-30: "Mitosis": the four-three-two tensegrity
2022-08-04: "Push Bolts for the People": finalizing design and getting it out there
2022-06-22: "Head to Head Push Bolt": M5 and M6 bolts symbiosis
2022-05-30: "Hiding Knots": bump up the aesthetics
2022-05-25: "Innovation with 3D Printer": the push bolt
2021-12-02: "Headless Hug": breaking a rule for the sake of symmetry
2021-10-28: "Rebuilding the Halo": finally got it right
2021-10-20: "Convergence": growing and reconnecting
2021-07-27: "120-Strut Brass Bubble": taking the next step up in complexity
2021-05-26: "30-Strut Brass Bubble": bouncing spherical tensegrity
2021-04-08: "Bow Tie Tensegrity": better bend resistance
2021-03-29: "Six Twist Essential": what if more hands could see?!
2021-01-25: "Minimal Tensegrity": no more tension lines than absolutely necessary
2021-01-18: "Degrees of Freedom": first adjustable hybrid tensegrity
2021-01-11: "Fractal Experiment": a tensegrity of tensegrities
2020-12-09: "Axial Tension": pretensing what is already pretenst
2020-11-02: "Halo by Crane - Part 2": the strengthening
2020-10-26: "Halo by Crane - Part 1": assembly complete but strength lacking
2020-10-12: "Brass and Tulips": a tight and strong tensegrity tower
2020-08-10: "Prefab Tension Tower": the tower of eight twists
2020-07-27: "Elastic Bubble": building with elastic ease
2020-07-13: "The Twist Sisters": left-handed and right-handed
2020-07-06: "Radial Tension": Pulling towards the middle
2020-06-22: "Diamond of Tension": Four pulls for every push
2020-06-15: "Prefab Tension": Separating compression from tension