PretensT
Tensegrity is a special kind of structure made of push and pull.
Project maintained by elastic-interval Hosted on GitHub Pages — Theme by mattgraham
Our building block
Last time we saw the simple foundations of elastic interval geometry and ended with the elegant pure scenario of having push separated from pull, as two completely different kinds of intervals. This is the way we will continue, because this distinction and the constraints it adds are very revealing and beautiful.
Given the push/pull separation, we can only build with twists, and we start with the simple one with with three bars, held by a network of cables.
Whether virtual or physical, this is the form they have when they are in the middle of the model:
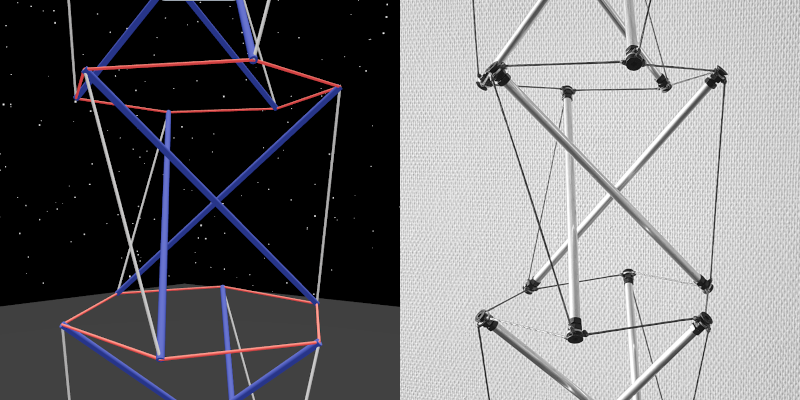
Collapse the tension hexagon
To connect two twists together, we use a ring of tension. The bars of both twists must press outwards, and this hexagon of tension between them brings them into a force relationship together.
The hexagon of tension can also be turned into radial tension lines when the neighboring twists are not available to push outwards to hold the hexagon in place.
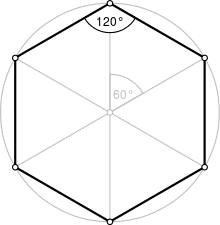

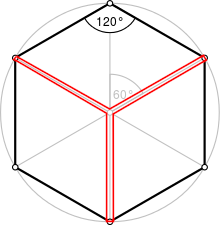
The hexagon is regular, so the triangles are the same, and all of the lengths can stay exactly the same. We can also take away the doubling of the lines so the radial tension has singular cords.
Think of this radial tension pattern as a connectable face of the twist.
A lone twist uses this radial tension instead, and it also must be used when a twist is in the end position.
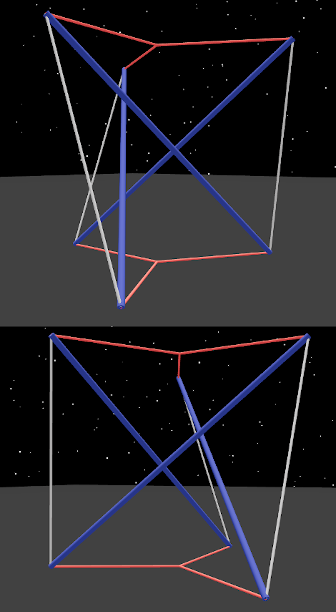
Here is a left twist:
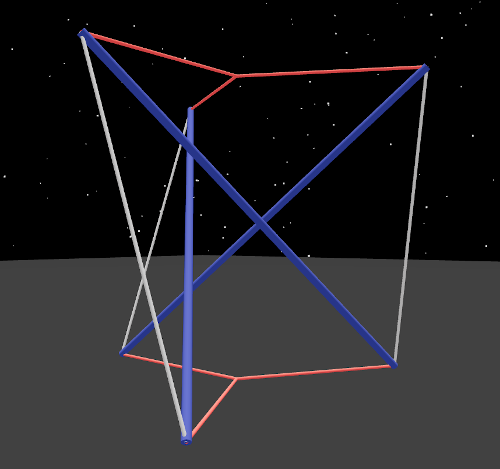
Here is a right twist:
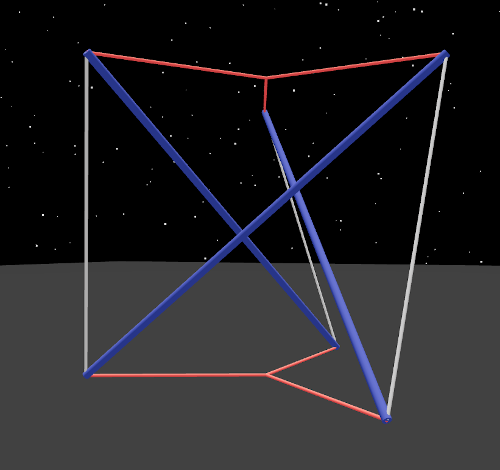
Eventually, using your hands, you can learn to easily distinguish a left twist from a right twist.
These twists have two connectable faces each.
Two radials become a hexagon
Bringing two lone twists together so that their end points form a hexagon, we can basically reconnect the two sets of three cords into one new hexagon.
Six cord segments, simplly rearranged:
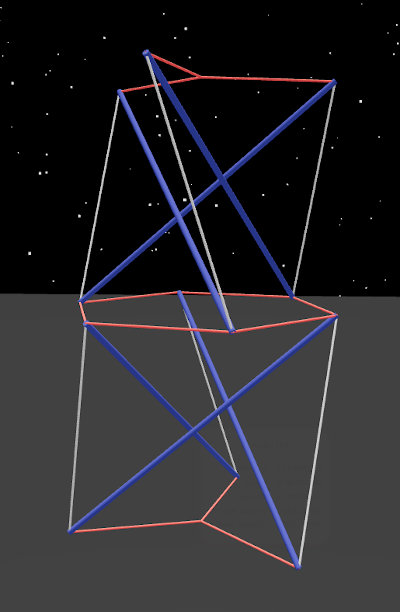
Each of the two original twists has two connectable faces, top and bottom. Here we have connected the top of the right twist to the bottom of the left twist, now in a force relationship with each other through the tension hexagon.
When they are connected, there are only two connectable faces remaining: top and bottom.
The Omni-twist
Adding the two twists together this way gives us six bars, but there’s another way to connect up six bars, and that it using radial tension everywhere.
Here you see it with and without tension:
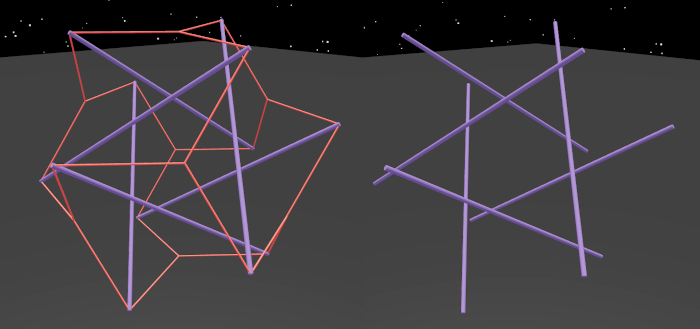
Notice that the color of the bars is different. That’s because they actually need to be a bit longer than the others from the original twists above, to keep the radial tension lines are exactly the same.
This structure is called the omni-twist because it has eight connectable faces as compared to the twist’s two!
The faces of the original twist and the omni-twist fit together perfectly! We have the blocks we need to build some interesting things.
Coming up next
This has been a quick introduction to the building blocks and the way things connect up.
Next we will take a step back and look at how the math underneath works. It’s all just arrows.
Projects:
2024-07-23: "Bouncy Wooden Sphere": what you can do with a discarded bed2024-04-23: "Twisted Torque": tied into a permanent twist
2023-03-27: "Easy 30-Push Sphere": one simple element
2022-10-05: "Glass and LED": going big and colorful
2022-09-29: "Fascia": dancing with tensegrity
2022-08-30: "Mitosis": the four-three-two tensegrity
2022-08-04: "Push Bolts for the People": finalizing design and getting it out there
2022-06-22: "Head to Head Push Bolt": M5 and M6 bolts symbiosis
2022-05-30: "Hiding Knots": bump up the aesthetics
2022-05-25: "Innovation with 3D Printer": the push bolt
2021-12-02: "Headless Hug": breaking a rule for the sake of symmetry
2021-10-28: "Rebuilding the Halo": finally got it right
2021-10-20: "Convergence": growing and reconnecting
2021-07-27: "120-Strut Brass Bubble": taking the next step up in complexity
2021-05-26: "30-Strut Brass Bubble": bouncing spherical tensegrity
2021-04-08: "Bow Tie Tensegrity": better bend resistance
2021-03-29: "Six Twist Essential": what if more hands could see?!
2021-01-25: "Minimal Tensegrity": no more tension lines than absolutely necessary
2021-01-18: "Degrees of Freedom": first adjustable hybrid tensegrity
2021-01-11: "Fractal Experiment": a tensegrity of tensegrities
2020-12-09: "Axial Tension": pretensing what is already pretenst
2020-11-02: "Halo by Crane - Part 2": the strengthening
2020-10-26: "Halo by Crane - Part 1": assembly complete but strength lacking
2020-10-12: "Brass and Tulips": a tight and strong tensegrity tower
2020-08-10: "Prefab Tension Tower": the tower of eight twists
2020-07-27: "Elastic Bubble": building with elastic ease
2020-07-13: "The Twist Sisters": left-handed and right-handed
2020-07-06: "Radial Tension": Pulling towards the middle
2020-06-22: "Diamond of Tension": Four pulls for every push
2020-06-15: "Prefab Tension": Separating compression from tension